
thanks ra. it's definitely been a worthwhile project.
I cant wait to see her shredding the heck out of them.
sam
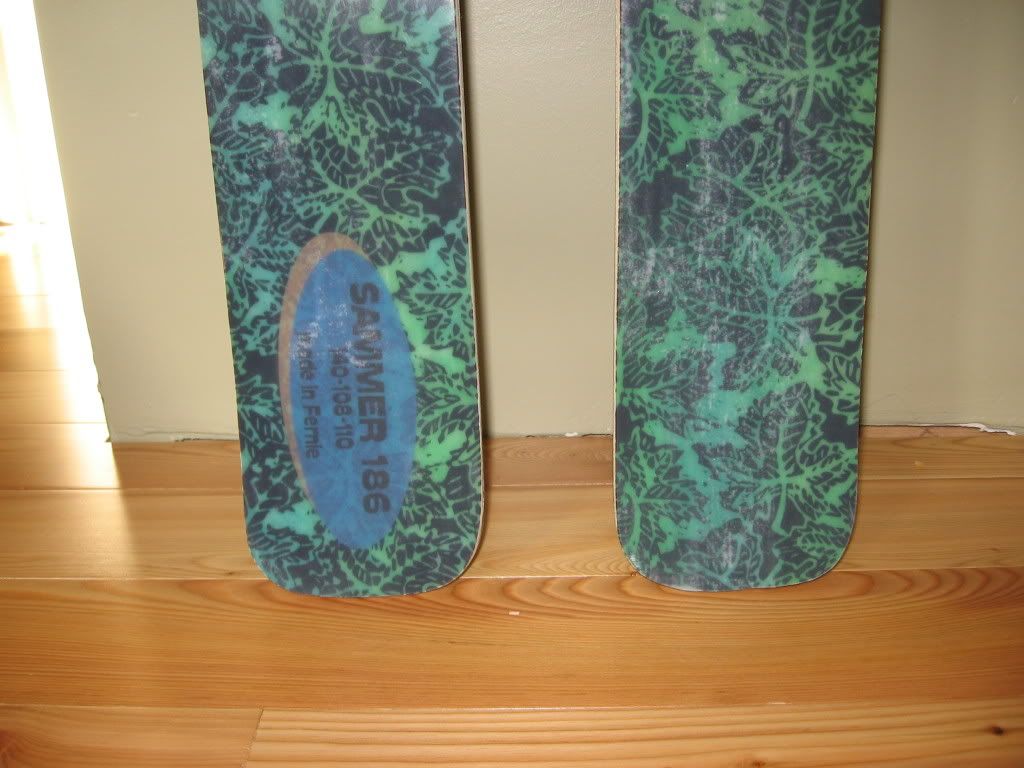
sammer's skis
Moderators: Head Monkey, kelvin, bigKam, skidesmond, chrismp
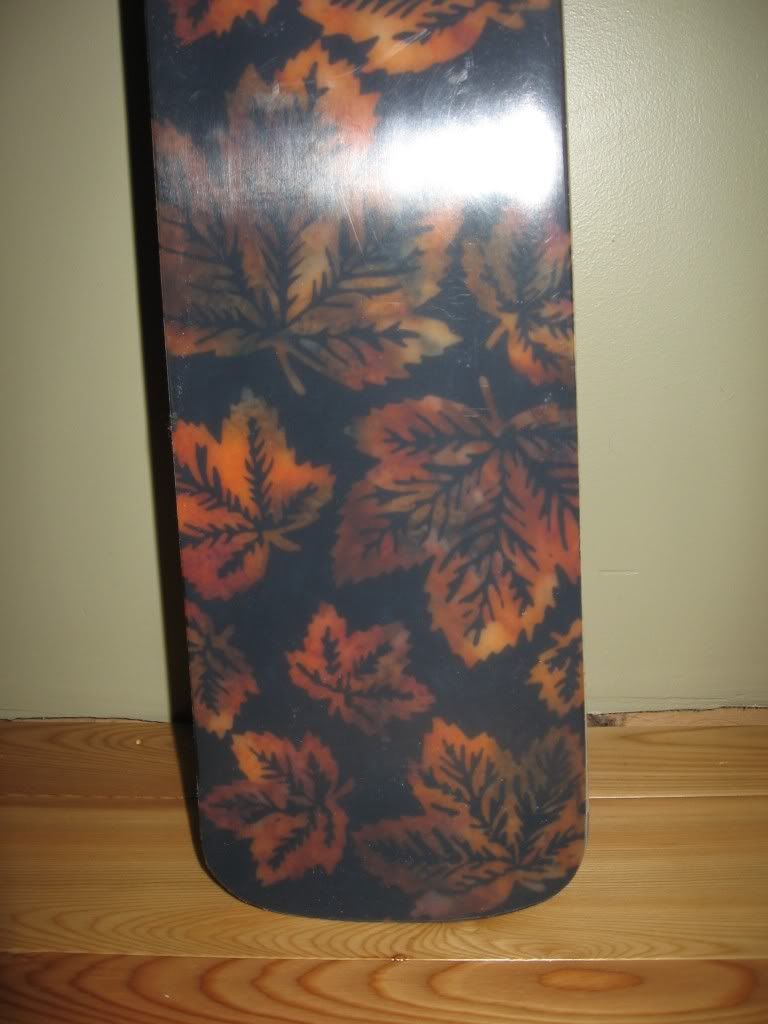
Plywood, the top sheet is natural topsheet from skibuilders with a really nice cotton fabric underneath unfortunately once it was wetted out it turned really dark. got to find something brighter or just use some light fiberglass fabric over top.
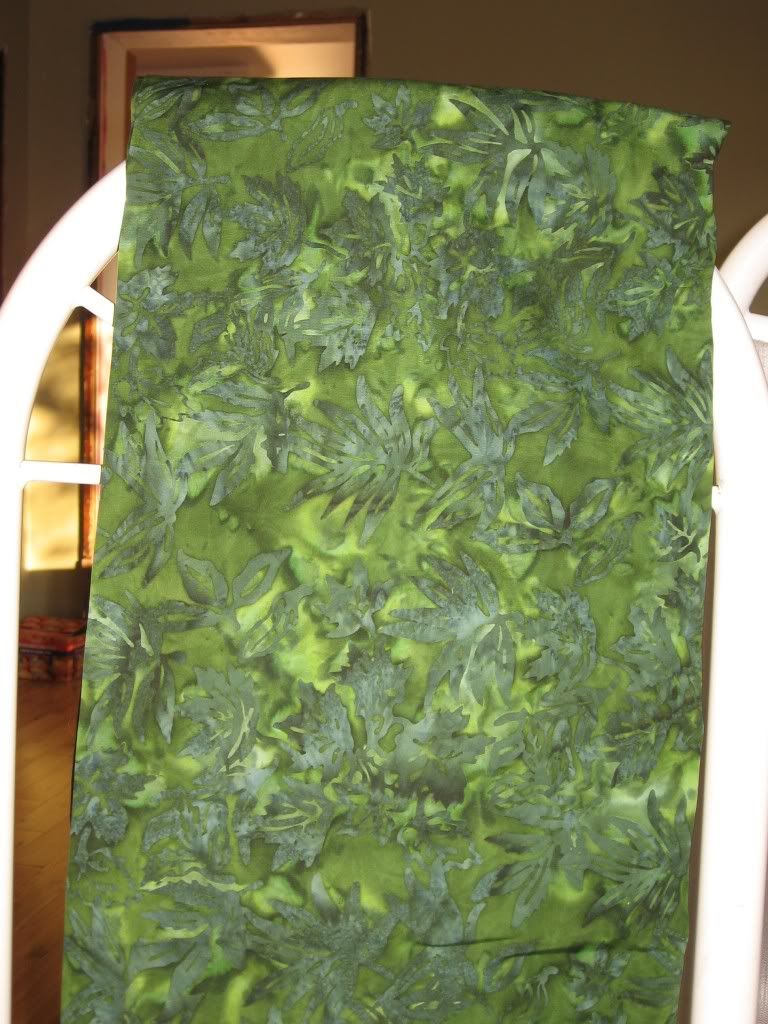
I'd like to use it on my own skis but it just gets too black when wetted out.
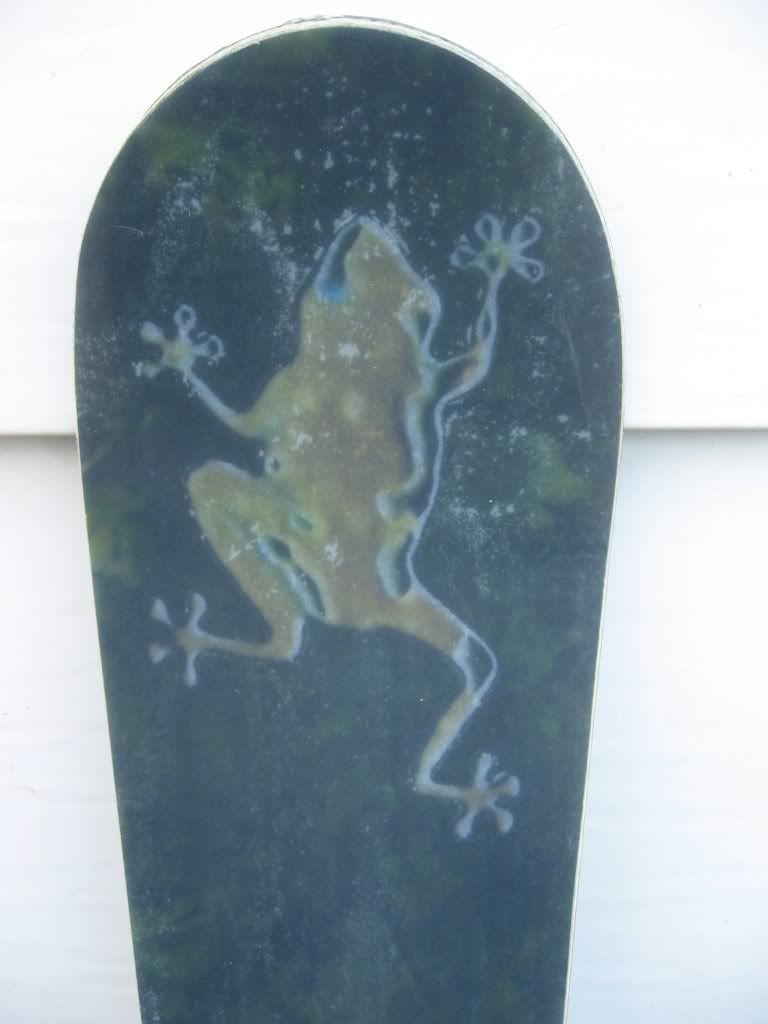
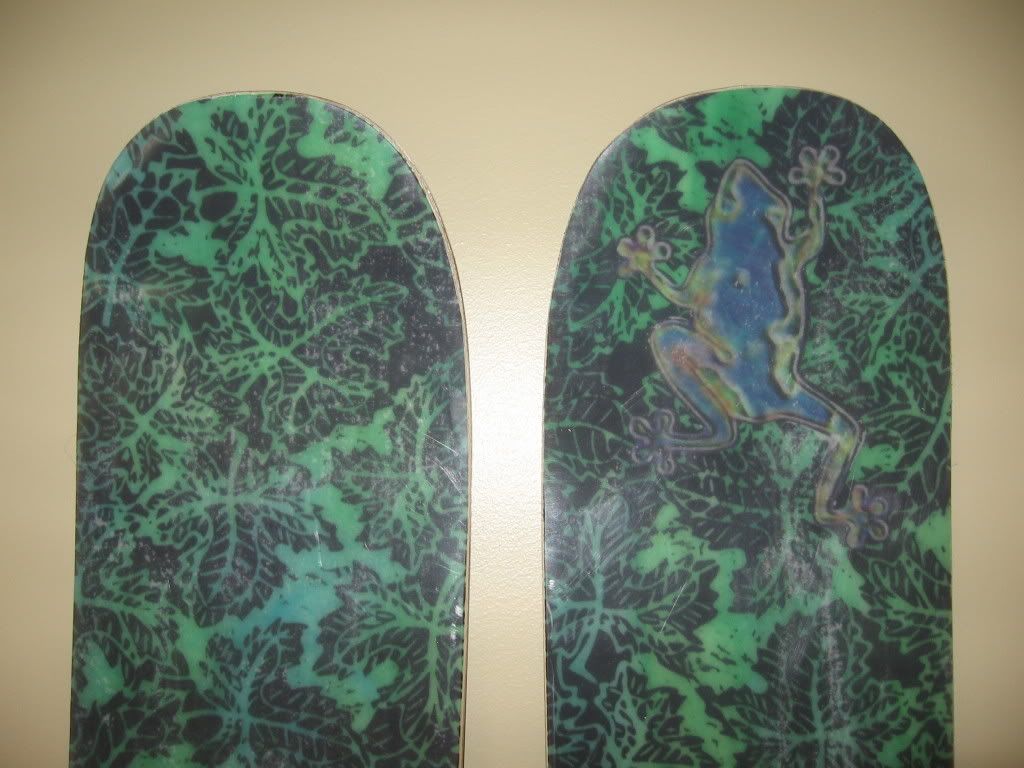
the frog is just printed out on plain paper it turned out great. we'll see how long it holds up to UV.
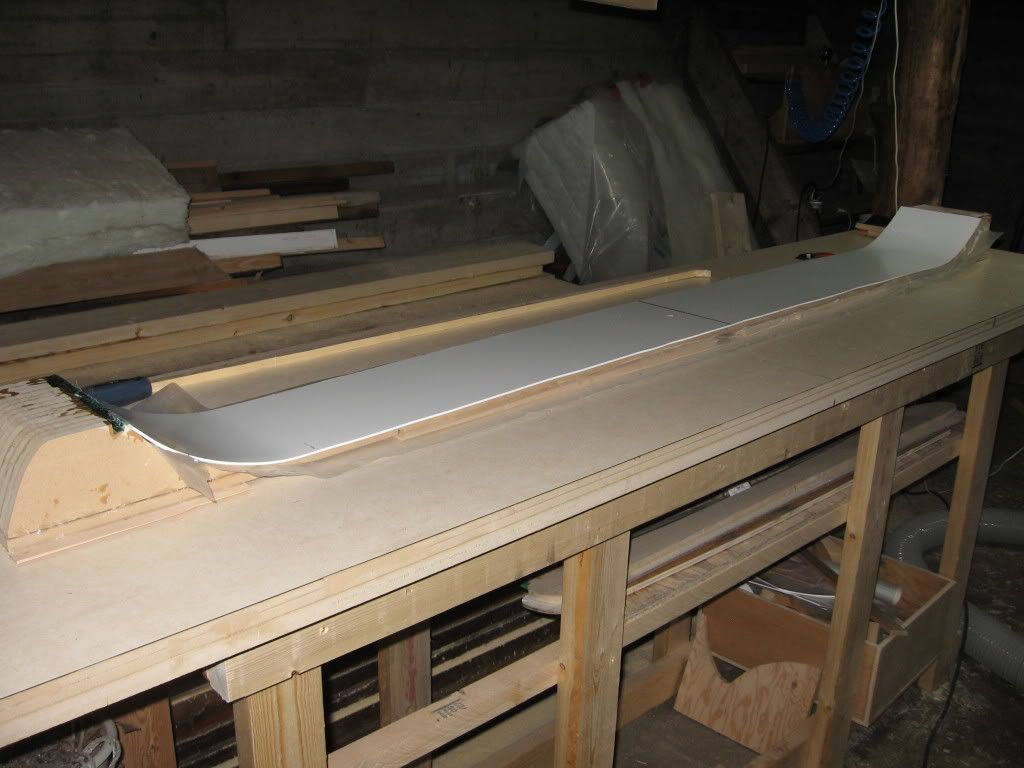
You can see all the air bubbles under the top sheet in this pic. i took a little more time rolling out the bubbles on the second ski.
I had made a logo to but it was on my computer in a box in the basement when i was laying up forgot all about it until it was too late.
sam
I'd like to use it on my own skis but it just gets too black when wetted out.
the frog is just printed out on plain paper it turned out great. we'll see how long it holds up to UV.
You can see all the air bubbles under the top sheet in this pic. i took a little more time rolling out the bubbles on the second ski.
I had made a logo to but it was on my computer in a box in the basement when i was laying up forgot all about it until it was too late.
sam
You don't even have a legit signature, nothing to reveal who you are and what you do...
Best of luck to you. (uneva)
Best of luck to you. (uneva)

Yea long weekend!!
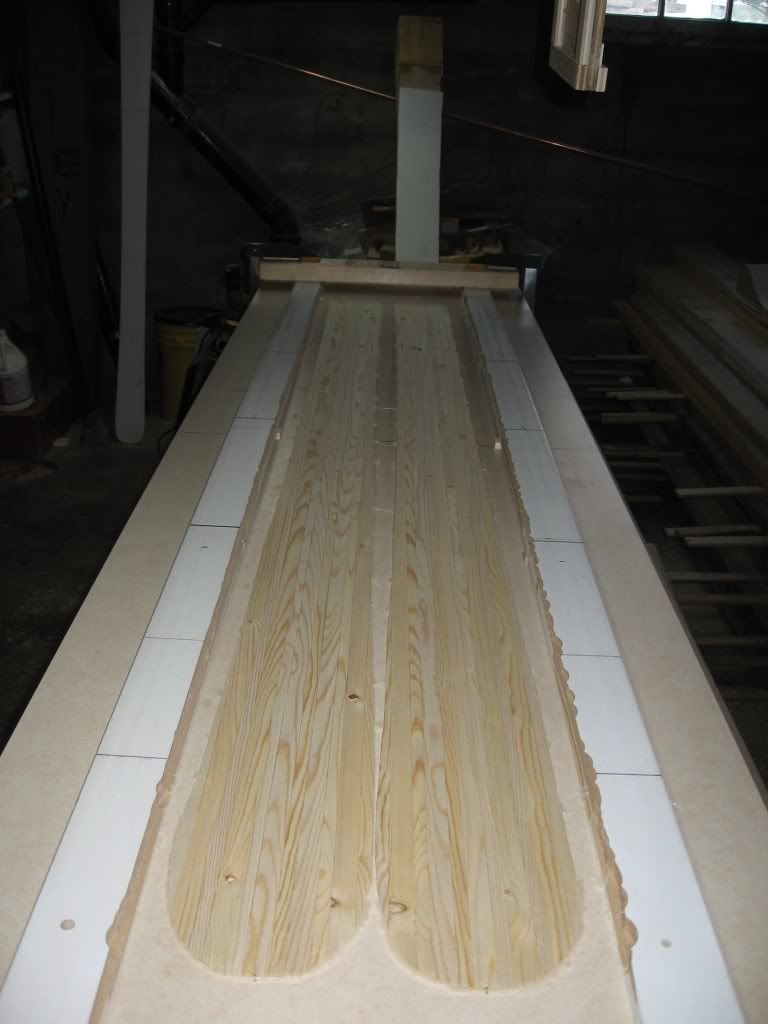
Got to work Friday night putting my mold together. Used the same technique as with the 127's, only used an old, too thin core for my camber. Made a new tip mold out of MDF. Reused the old tip mold for the tail. It wasn't quite wide enough so glued some MDF to both sides then ran it thru the router table.
Forgot to get a pic before so this one is after the fact. Should be able to reuse this one a few times.
Saturday morning got up early and headed down to finish up my cores.
Used the same simple jig, but after i clamped it at the running length I hot glued it down so i could get the clamps out of the way. (this way my tips will flow seamlessly not like last time ) Used lots of hot glue still haven't built a vacuum box.
Cores turned out great 2.3mm at the tip and tails 11.6mm in the middle.Did have a couple of knots pop out near the tip of 1.
I bent 1 core tip+ tail and glued on a piece of aluminum screen for the bindings.
While the core was setting up i cut my base and glued on edges (I bent edges earlier in the week. Getting better, I think it took me about 3 hrs to bend the 4 edges to my template.)
Then it was time for the assembly. When I bent the base into the mold 1 tip edge popped off. What a nightmare. I was minutes away from tearing it right off and starting again. Finally I got it close to where it was supposed to be and left it at that.
Lay-up went pretty smooth and it was in the bag in no time.
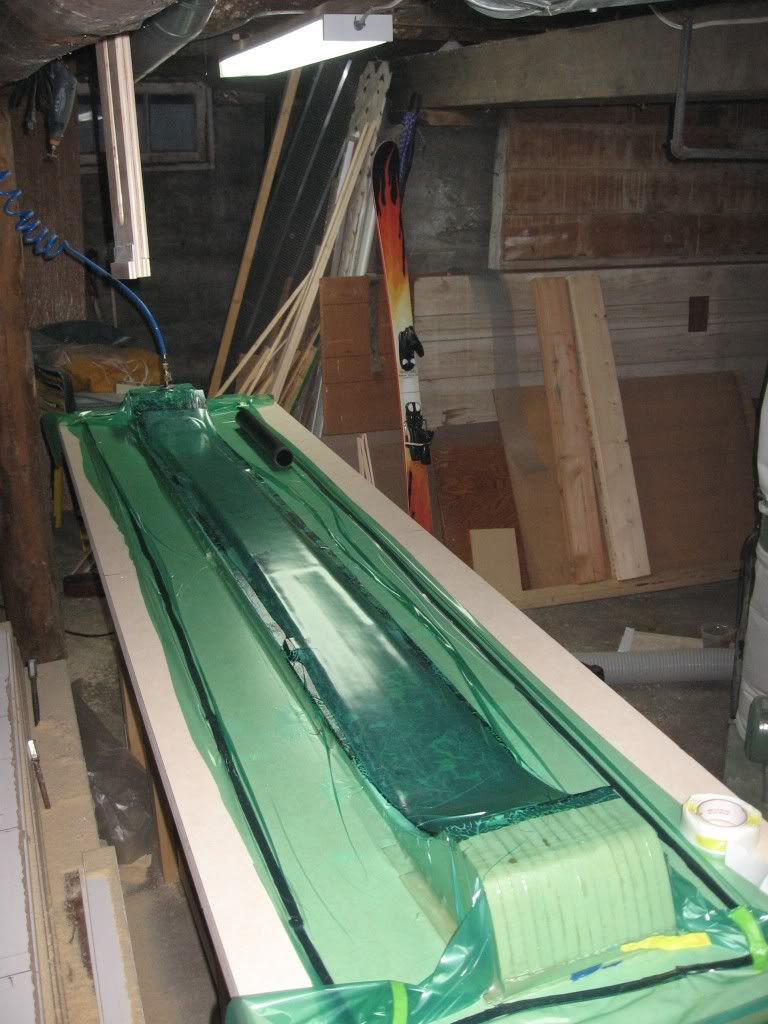
Then it was time for a much deserved beverage. It was out of my hands for the night.
Next morning I popped it out of the mold wiped the mold out and started all over again, cut base, glued edges, bent core, and lay-up.
Trimmed out the first ski then headed out to show it off around town.
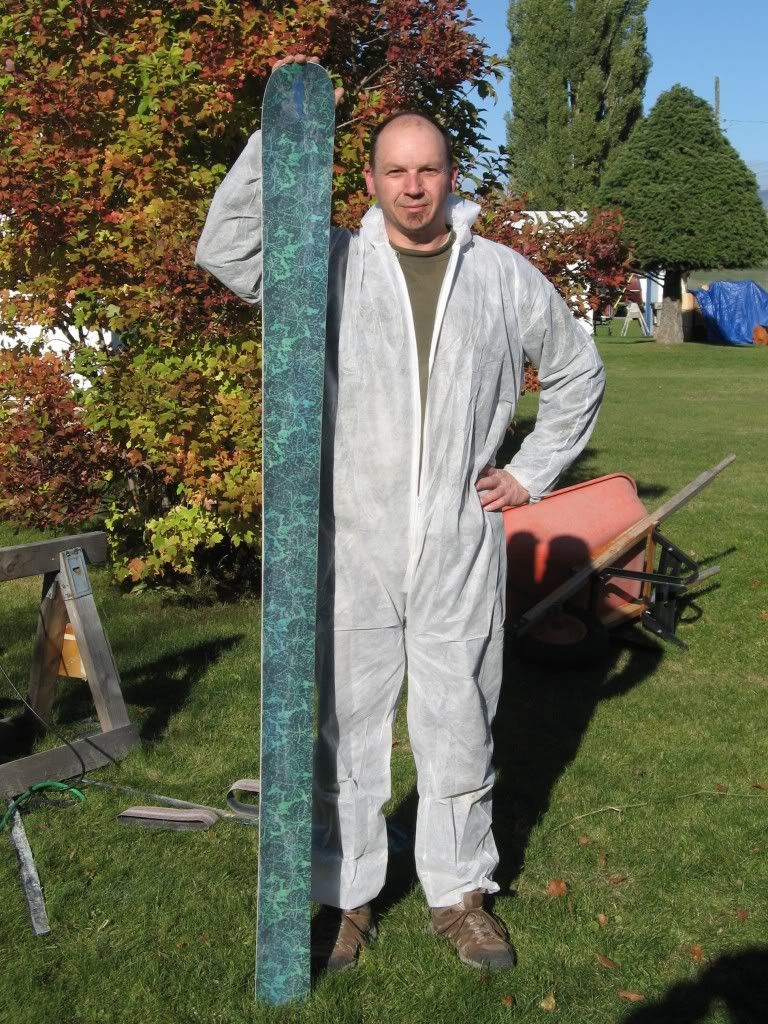
This morning not too hung over I popped the second one out trimmed the flash off it and have a pair.
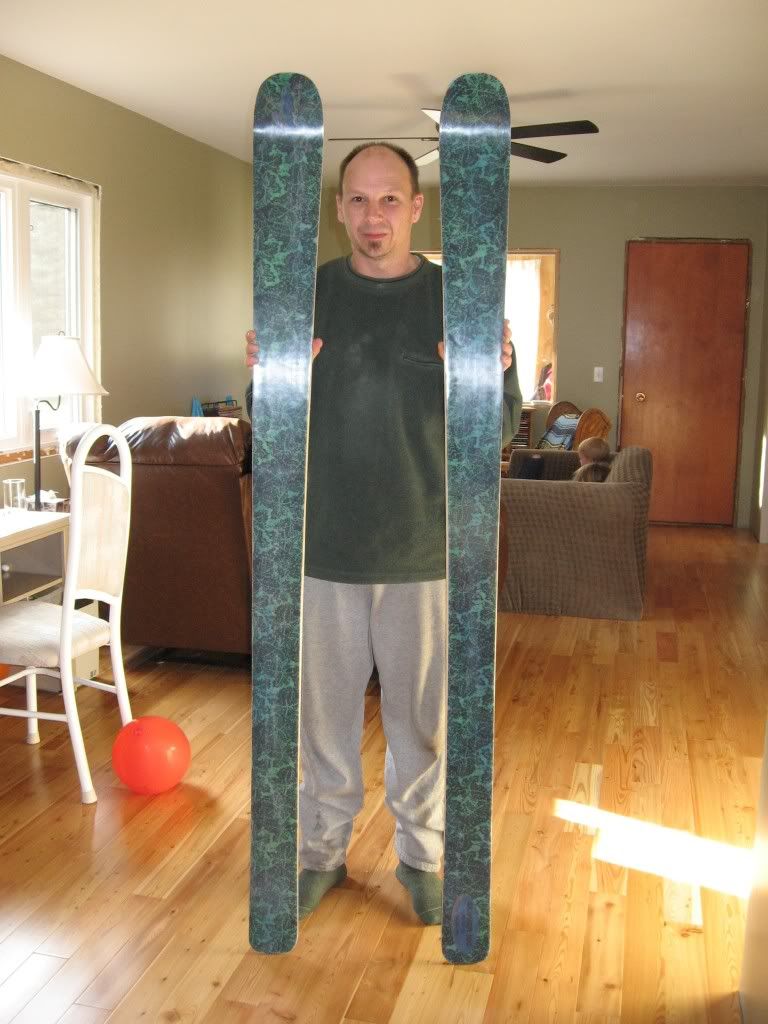
The camber turned out pretty good.
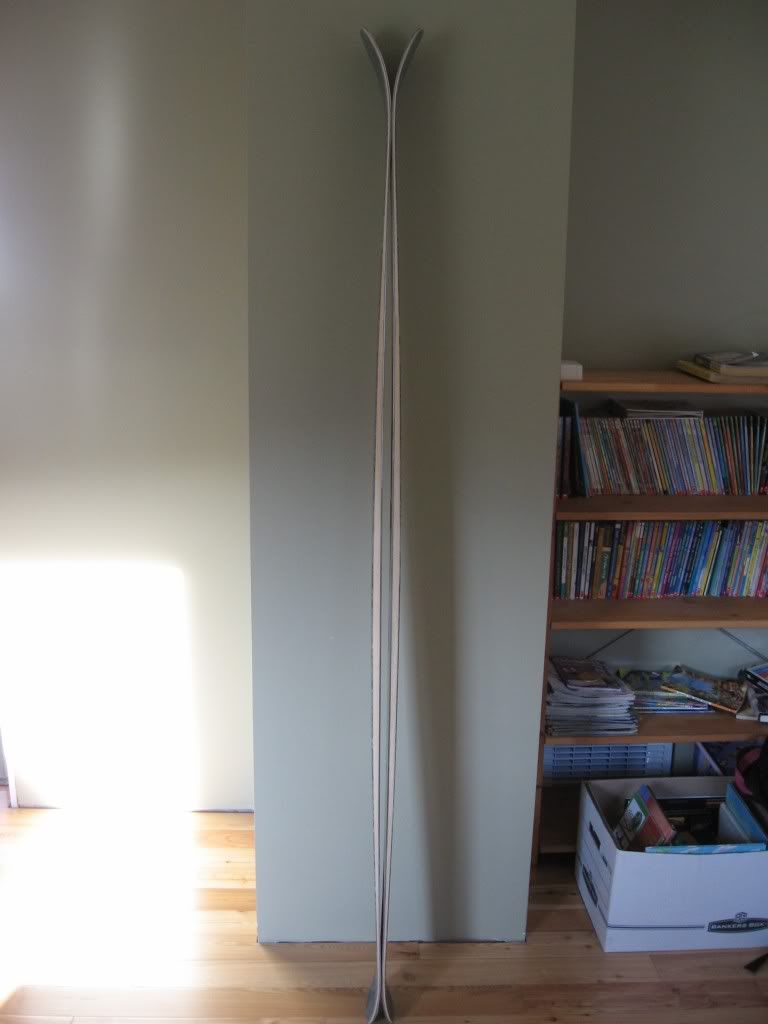
Close up of tips and tails. The top sheet on the one on the left slipped down while i was rolling the air out but once it was trimmed out its only a couple of mills.
Still fighting with air under the top sheet but all in all turned out awesome if I do say so myself (can't wait to flex them. I hope they're as stiff as i think they're gonna be)
sam
Got to work Friday night putting my mold together. Used the same technique as with the 127's, only used an old, too thin core for my camber. Made a new tip mold out of MDF. Reused the old tip mold for the tail. It wasn't quite wide enough so glued some MDF to both sides then ran it thru the router table.
Forgot to get a pic before so this one is after the fact. Should be able to reuse this one a few times.
Saturday morning got up early and headed down to finish up my cores.
Used the same simple jig, but after i clamped it at the running length I hot glued it down so i could get the clamps out of the way. (this way my tips will flow seamlessly not like last time
Cores turned out great 2.3mm at the tip and tails 11.6mm in the middle.Did have a couple of knots pop out near the tip of 1.
I bent 1 core tip+ tail and glued on a piece of aluminum screen for the bindings.
While the core was setting up i cut my base and glued on edges (I bent edges earlier in the week. Getting better, I think it took me about 3 hrs to bend the 4 edges to my template.)
Then it was time for the assembly. When I bent the base into the mold 1 tip edge popped off. What a nightmare. I was minutes away from tearing it right off and starting again. Finally I got it close to where it was supposed to be and left it at that.
Lay-up went pretty smooth and it was in the bag in no time.
Then it was time for a much deserved beverage. It was out of my hands for the night.
Next morning I popped it out of the mold wiped the mold out and started all over again, cut base, glued edges, bent core, and lay-up.
Trimmed out the first ski then headed out to show it off around town.
This morning not too hung over I popped the second one out trimmed the flash off it and have a pair.
The camber turned out pretty good.
Close up of tips and tails. The top sheet on the one on the left slipped down while i was rolling the air out but once it was trimmed out its only a couple of mills.
Still fighting with air under the top sheet but all in all turned out awesome if I do say so myself (can't wait to flex them. I hope they're as stiff as i think they're gonna be)
sam
You don't even have a legit signature, nothing to reveal who you are and what you do...
Best of luck to you. (uneva)
Best of luck to you. (uneva)
Thanks Ben.
Just got home from The Guides Hut,thanks to Alain(sp?)
we got the bases ground, they look awesome.
Unfortunately we were unable to do a stone grind as it seems most stones are only about 135mm wide. I'll try Ski Base to see if they're machine is wider.
Still... the edge to base lines turned out great. There was one concavity where my edge popped when bending the base into the mold (right at the transition, running to tip). Still a bit of epoxy at the tip. All in all I'm as stoked as I've ever been!!

May need another couple passes on the belt after a stone grind.
Now just have to find a pair of rental/demo bindings so everyone can beat them up and see how they're gonna hold up
sam
Now on to the next pair. I'm thinking all around, 135,100,125 with a bit of rocker. Something I can ski on everyday at the hill.
Just got home from The Guides Hut,thanks to Alain(sp?)
we got the bases ground, they look awesome.
Unfortunately we were unable to do a stone grind as it seems most stones are only about 135mm wide. I'll try Ski Base to see if they're machine is wider.
Still... the edge to base lines turned out great. There was one concavity where my edge popped when bending the base into the mold (right at the transition, running to tip). Still a bit of epoxy at the tip. All in all I'm as stoked as I've ever been!!
May need another couple passes on the belt after a stone grind.
Now just have to find a pair of rental/demo bindings so everyone can beat them up and see how they're gonna hold up
sam
Now on to the next pair. I'm thinking all around, 135,100,125 with a bit of rocker.
You don't even have a legit signature, nothing to reveal who you are and what you do...
Best of luck to you. (uneva)
Best of luck to you. (uneva)
Well today was my first big ski building disappointment.
Laid up my latest ski last night. First of the rockers.
I guess my core locator's were not quite tall enough,
so my core shifted... quite a bit!
I have no core under one edge and 1 birch sidewall protruding beyond the other.
So i guess its time to build new cores and chalk it up as experience.
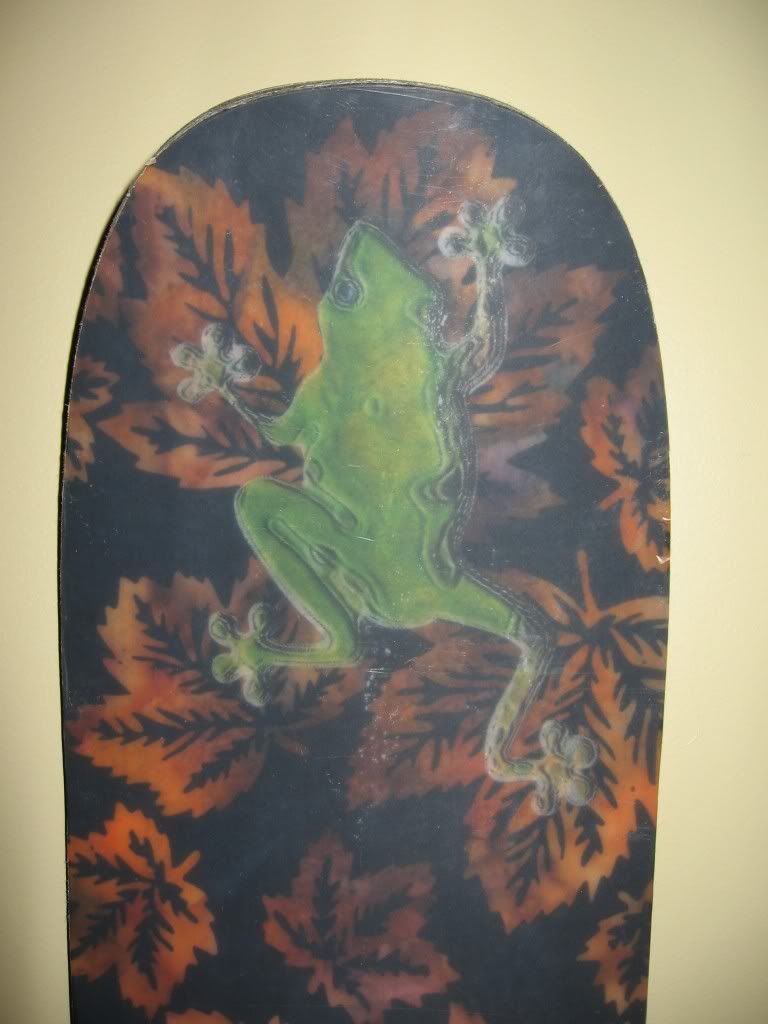
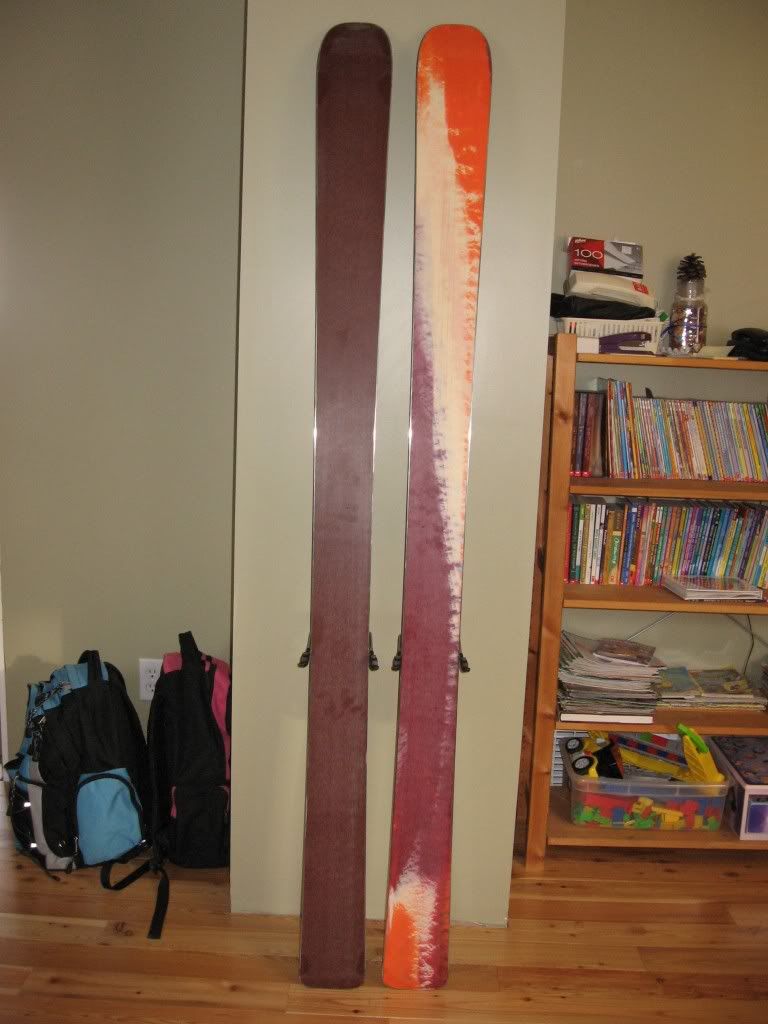
The sad part is i only had enough vista orange base for one pair
now it looks like one will have orange base the other will have brown.
Should still look alright .
now the good part... the camber and rocker designed into my mold came out perfect
I guess I have a bit of time to build new cores while I wait for more materials to arrive.
Less than a month until the ski hill opens. Depending on the mail, I might still have a new everyday front country pair in time.
sam
Laid up my latest ski last night. First of the rockers.
I guess my core locator's were not quite tall enough,
so my core shifted... quite a bit!
I have no core under one edge and 1 birch sidewall protruding beyond the other.
So i guess its time to build new cores and chalk it up as experience.
The sad part is i only had enough vista orange base for one pair
now it looks like one will have orange base the other will have brown.
Should still look alright .
now the good part... the camber and rocker designed into my mold came out perfect
I guess I have a bit of time to build new cores while I wait for more materials to arrive.
Less than a month until the ski hill opens. Depending on the mail, I might still have a new everyday front country pair in time.
sam
You don't even have a legit signature, nothing to reveal who you are and what you do...
Best of luck to you. (uneva)
Best of luck to you. (uneva)
-
skiingfreak
- Posts: 20
- Joined: Sun Sep 23, 2007 8:33 pm
Yup, my bases (oops I meant core) didn't sit all the way down, prebent tips, tails and all.
When i laid up the first pair (kids) I used a strips of paneling as locators.
When i laid up the next pair I used some thin leftover strips of core.
This time I went with the paneling. Obviously it was too thin for me to feel
the core was seated properly. So the core ended up resting 7mm above the base on one side.
I trimmed it out and love the flex. very stiff and lots of "pop".
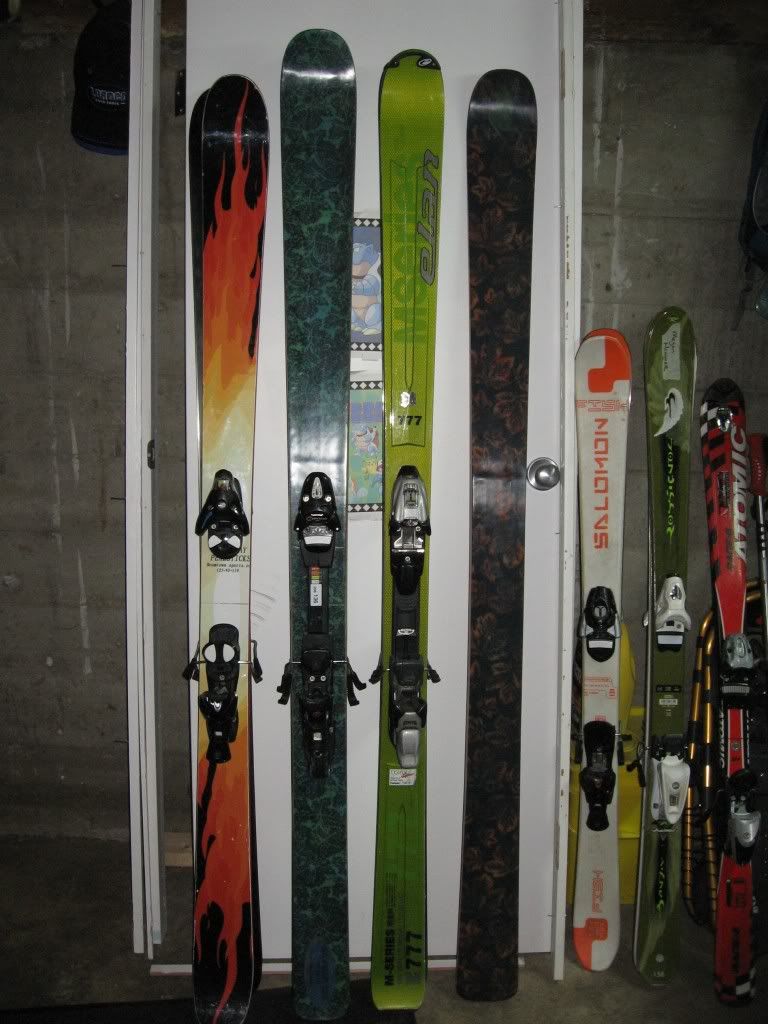
Compared it to, my previous ski "the 186", a Kootenay Peak Stick, and Elan M777.
Propped tip and tails on a 4x4 side by side and stood on them (not very scientific)
Found it was similar in beam flex to the M777 though it seemed livelier. (bouncy-er?)
It had 8hrs under the electric blanket @ 150f so pretty much cured.
I put sharp triangles of triax from boot heel to tail and an equal length piece in front to the tip.
Cores were pine and birch, 12mm at the waist+2mm at the end of the running length, no flat spot in the middle.
I'll post pics later as i intend to do this all again!
sam
When i laid up the first pair (kids) I used a strips of paneling as locators.
When i laid up the next pair I used some thin leftover strips of core.
This time I went with the paneling. Obviously it was too thin for me to feel
the core was seated properly. So the core ended up resting 7mm above the base on one side.
I trimmed it out and love the flex. very stiff and lots of "pop".
Compared it to, my previous ski "the 186", a Kootenay Peak Stick, and Elan M777.
Propped tip and tails on a 4x4 side by side and stood on them (not very scientific)
Found it was similar in beam flex to the M777 though it seemed livelier. (bouncy-er?)
It had 8hrs under the electric blanket @ 150f so pretty much cured.
I put sharp triangles of triax from boot heel to tail and an equal length piece in front to the tip.
Cores were pine and birch, 12mm at the waist+2mm at the end of the running length, no flat spot in the middle.
I'll post pics later as i intend to do this all again!
sam
Last edited by sammer on Wed Dec 31, 2008 7:53 am, edited 1 time in total.
You don't even have a legit signature, nothing to reveal who you are and what you do...
Best of luck to you. (uneva)
Best of luck to you. (uneva)
Sammer,
reading our post on the core shifting... I had this happen a while ago and found this to be a good solution. Read the following post.
http://www.skibuilders.com/phpBB2/viewt ... =standoffs
contact me with any questons about this.
ra
reading our post on the core shifting... I had this happen a while ago and found this to be a good solution. Read the following post.
http://www.skibuilders.com/phpBB2/viewt ... =standoffs
contact me with any questons about this.
ra
rockaukum, thanks for the tip
I've been doing almost exactly as Idris suggested.
I tape down my base with double sided carpet tape,
then align my core exactly where I want it.
while holding it in place I hot glue small wood locators in 4 spots (2 on either side of the core).
then i set the core aside roll out my triax and trim it around the locators.
unfortunately the pieces of wood I chose were just too thin.
I was unable to tell when the core was in position.
Usually I slide the core side to side to feel it locked in.
not sure what happened this time but it felt right.
The locators are sacrificial, they pop off the mold with the ski and get trimmed off with the flash.
I also put a pen line on the side wall of the core and check it with the center line on the mold before I seal up the bag.
Next time i will use something a little thicker 10mm or so.
It just has to be thinner than the finished ski or it holds up the top sheet, and makes it hard to roll out the air.
A lesson well learned
I built a new core block last night and split it in two today.
Hopefully I'll find time to get the sidewalls on it tomorrow, profile it on saturday. Bend a pair of edges.
Then I'll only be a week behind schedule.
thanks again
sam
You don't even have a legit signature, nothing to reveal who you are and what you do...
Best of luck to you. (uneva)
Best of luck to you. (uneva)
yea! skibuilder's order arrived today.
Dropped off the 186's and the 127's at Guides Hut.
We dug around in the bin and found some wide brakes for some old tyrolia rental bindings I had kicking around.
(taking kids binders off her last years pair.)
Core blanks are trimmed to shape have maple sidewalls attached, and are glued to my bench awaiting profiling.
Still waiting for VDS from snowboardmaterials.
Then I'll be off to the races.
Hope to get the "everydayfatties" built before the hill opens.
The brown base material looks great! will definitely be a good match with the vista orange
Will post more when they come together.
sam
You don't even have a legit signature, nothing to reveal who you are and what you do...
Best of luck to you. (uneva)
Best of luck to you. (uneva)
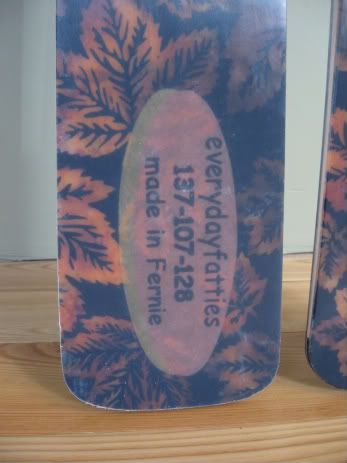
Introducing the everydayfatties
182cm's 137-107-128
Has a slight rockered tip and is very stiff:D
It's taken a bit of time but I got my new cores put together.
3 birch stringers and maple sidewalls.
I glued in a piece of aluminum screen and attached triangles of triax.
This time I went with full tip spacer, the last couple pairs just had tip to tail wood core.
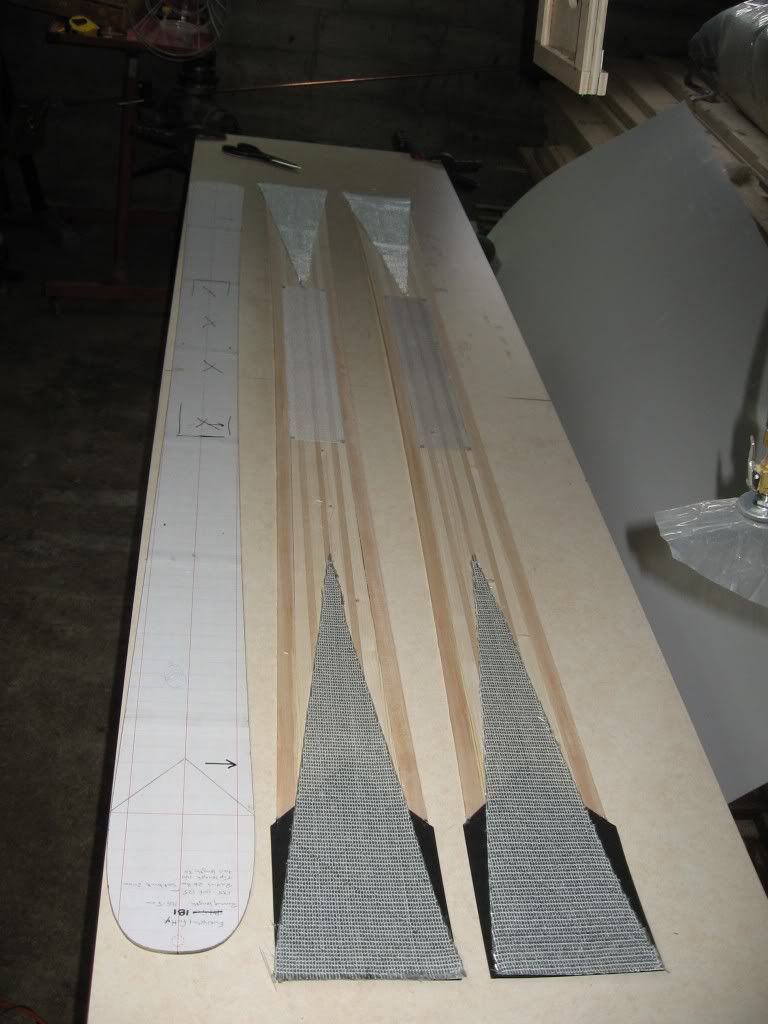
Tip spacer just has a couple dabs of hot glue to hold it until layup.
One dab of glue at the apex of the triax to make sure they come out the same.
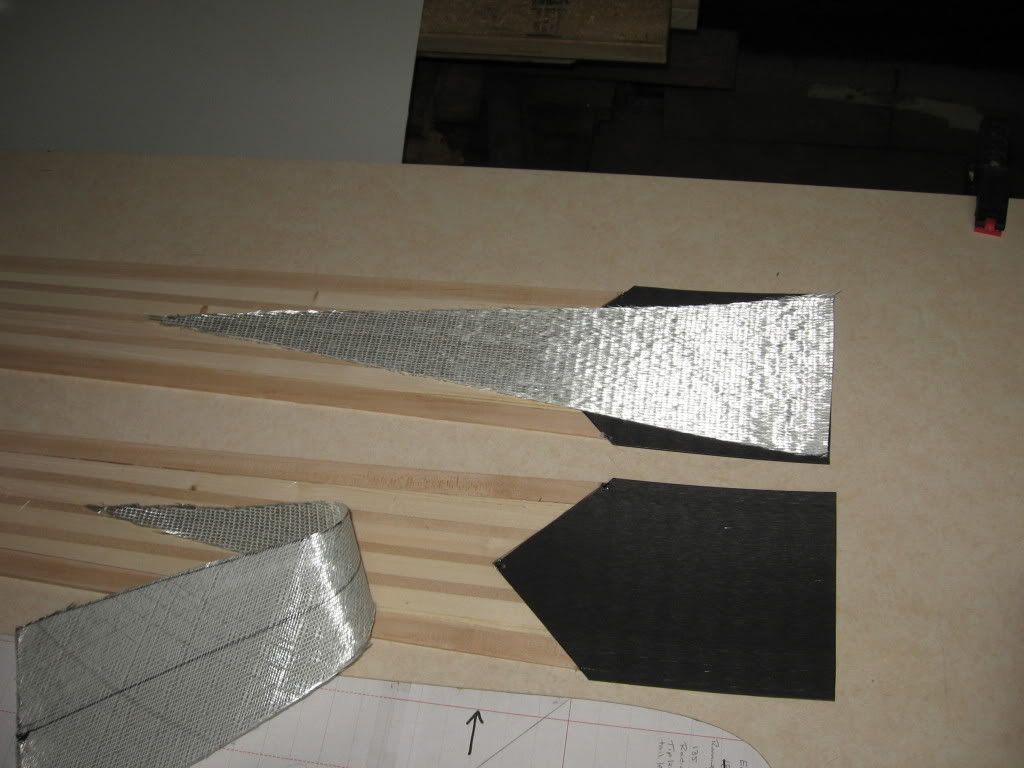
Managed to get 1 laid up and cut out last weekend. Also found time to put binders on the 186's. Here's a pic of both with my other fav skis for reference.
also a closeup of tip and tail
New "everydayfatties"
Managed to do a better job rolling out the air this time.
The mate is in the press as I type. Should get time to trim it out tomorrow. Then I'll post a pic of camber and slight rocker.
sam
182cm's 137-107-128
Has a slight rockered tip and is very stiff:D
It's taken a bit of time but I got my new cores put together.
3 birch stringers and maple sidewalls.
I glued in a piece of aluminum screen and attached triangles of triax.
This time I went with full tip spacer, the last couple pairs just had tip to tail wood core.
Tip spacer just has a couple dabs of hot glue to hold it until layup.
One dab of glue at the apex of the triax to make sure they come out the same.
Managed to get 1 laid up and cut out last weekend. Also found time to put binders on the 186's. Here's a pic of both with my other fav skis for reference.
also a closeup of tip and tail
New "everydayfatties"
Managed to do a better job rolling out the air this time.
The mate is in the press as I type. Should get time to trim it out tomorrow. Then I'll post a pic of camber and slight rocker.
sam
You don't even have a legit signature, nothing to reveal who you are and what you do...
Best of luck to you. (uneva)
Best of luck to you. (uneva)
As promised here's pics of the finished product.
Rockered tip
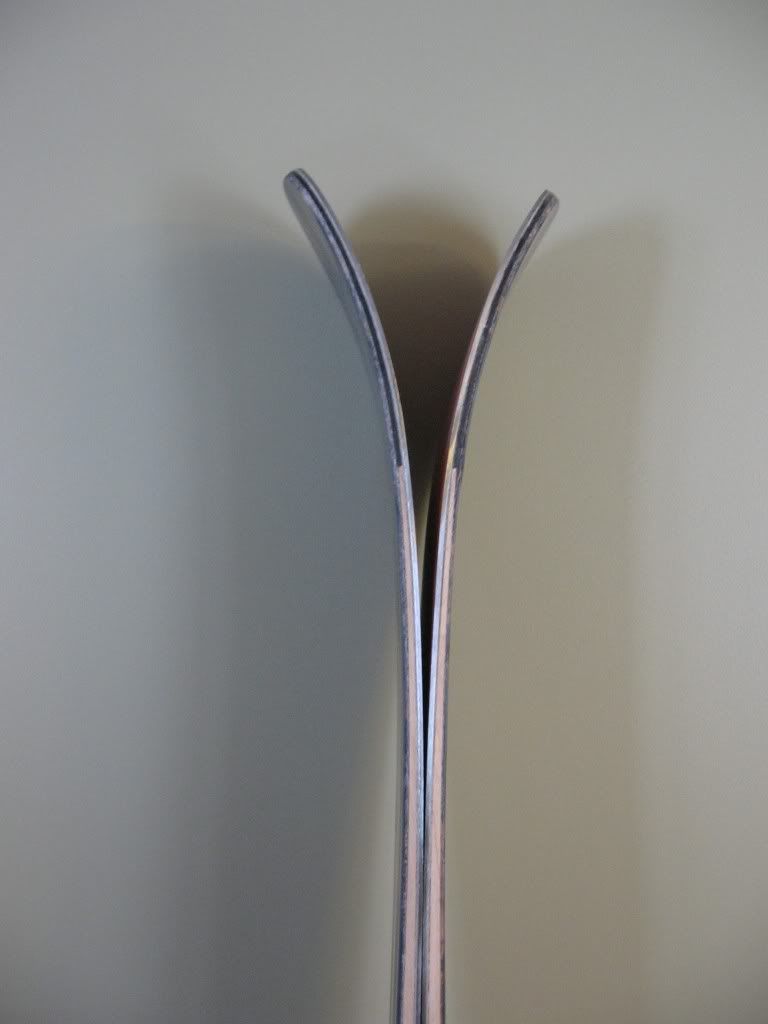
Camber
front view w/ marker speedpoint bindings.

and finally mismatched bases.
almost forgot LOGO
Now just got to wax em up, put some linseed oil on the sidewalls, and wait for more snow
sam
Rockered tip
Camber
front view w/ marker speedpoint bindings.
and finally mismatched bases.
almost forgot LOGO
Now just got to wax em up, put some linseed oil on the sidewalls, and wait for more snow
sam
You don't even have a legit signature, nothing to reveal who you are and what you do...
Best of luck to you. (uneva)
Best of luck to you. (uneva)