Your edges are sticking out proud from your base, your base is the final shape of your ski.
You need to cut your base so the edge will tuck in like this.
I'm assuming you cut out your base with a router around your template.
A lot of us will attach some tip spacer to the ends of the template to get this notch.
I don't have a picture of this but maybe someone else here will post one if you're not following.
I had luck cutting off the base flush with the end of the edges and using tip spacer as base in the tail when I broke an edge while bending.
Wouldn't work well in the tip I don't think.
I've also ground down a protruding edge when finishing as mentioned above.
Small things like this are typical of the mistakes you'll make when building your first few pair. That's why we suggest not using expensive materials until you get it sorted.
sam
You don't even have a legit signature, nothing to reveal who you are and what you do...
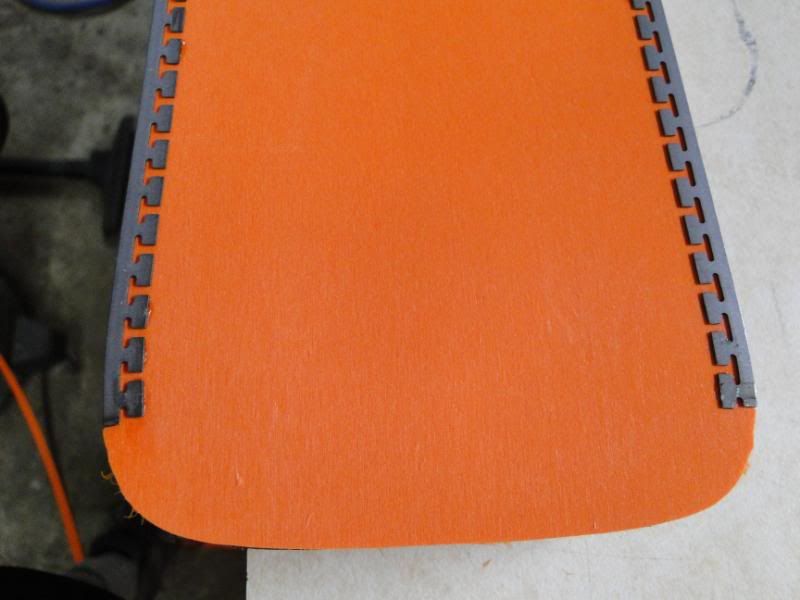
Here are a couple of my old templates with the "notches" at the tips for the 3/4 wrap edges.
And this shows how the edges are "tucked" into the base. Note that after routing your base (if that's how you're doing it), you'll need to go in my hand with an exacto knife or razor blade to cut that corner square, since it will have a radius from the router bit. I cut out my bases with a drag knife on my CNC router, but still have to cut this corner by hand.
(this picture also shows two fails... ground through the base, and my CAD model was wrong and had the two edges at different lengths... ignore that)
Hehe looks a bit wet there jerry!
Clean up the bases with a belt sander, keep a bucket of water and sponge handy as it will heat up and bubble especially near the edge.
I probably wouldnt try to chase every last bit especially if the bases arent perfectly flat.
Next time.
Contact! Stick it on as soon as you glue the edges on.
When you are wetting out scrape it back to remove excess resin.
Glad you have all that carbon on the shelf still? Hehe
Personally I think your tip and tail moulds are too aggressive, they work better with less rise and shallower angle.
Are the blisters everywhere or just near the bend for the tip and tail?
Gives me an excuse to make another pair, and because I have more fibreglass it give me and excuse to make a third pair.
I can't think of a reason as to the location of the blisters, there is one on a tip bend, one 2/3rds of the way down a ski and one on the other ski in the middle.
I've had a few base blisters, had some luck drilling tiny holes in the base, injecting epoxy then clamping until it's cured.
Bummer about the tip spacer. On the next pair find a way to attach your spacers to your core so this doesn't happen again.
A couple dabs of hot glue or medipore tape or staples all are tried and true.
Keep a log of the things that went right/wrong.
Nothing worse than that "oh shit" moment when you repeat a mistake you made a couple pair ago.
sam
You don't even have a legit signature, nothing to reveal who you are and what you do...
Throw up a picture of the blisters if you can
It must be a problem with air getting trapped. Possibly associated with the problem in joining the core and tip spacer leaving an air filled space and this air getting sucked and trapped somewhere?
Could be a depression in your base mold where the base material can drop down into it but not be getting great pressure because the core (inflexible ) bridges across that area?
Blisters are usually a sign of spots that do not get enough pressure. I've only had this occur once when I didn't pay enough attention to making sure the top mold conforms to the bottom mold which lead to a bubble right where the bend of the nose started. To repair this, I cut out the bubble and fitted a new piece of base material that I clamped in place.
chrismp wrote:Blisters are usually a sign of spots that do not get enough pressure. I've only had this occur once when I didn't pay enough attention to making sure the top mold conforms to the bottom mold which lead to a bubble right where the bend of the nose started. To repair this, I cut out the bubble and fitted a new piece of base material that I clamped in place.