First, happy Thanksgiving holiday!
I made a modification to my ski press (named Kublai) that I'd like to share. You might find it useful. I did not do an exhaustive search through this forum to see if anybody else has done this exact design, so I apologize if this is a repeat.
Anyway, I think the illustrations and pictures say it all. At the bottom of this thread there's a link to the video that shows this thing in action. The modification was cheap ($40).
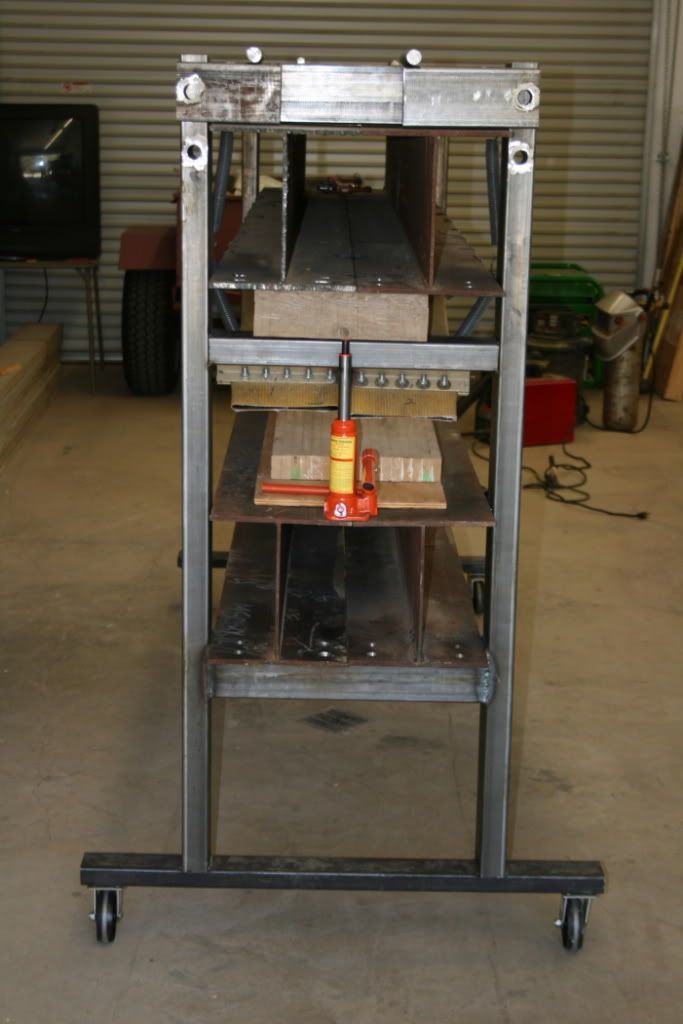
I built the I-beam style, fix cavity ski press named Kublai back in 2007. The original post can be found here: http://www.skibuilders.com/phpBB2/viewtopic.php?t=668
It was a nice design, and the cattrack helps to distribute the pressure. I've pressed many many skis with success. However, the cavity being of fixed height was sometimes a pain. For one, I had to 'squeeze' the cassette into the cavity. Sometimes it would go in easy; other times I had to fight the cassette, and occasionally I would get shifting of parts, etc. Also, adjusting and cleaning the heater and the bottom mold under limited space was tricky at times.
I dreamed of having a top mold assembly that would raise and lower, like some of the clam-shell press designs out there. This way, I could layup then gently close the shell and press.
Over the past few months I thought about building an entirely new press with hinged top beams and using a hydraulic ramp or similar to open and close the press. I started working on the design on pen and paper, but finally thought it was silly to waste the press I already had. So instead, here's what I came up with:

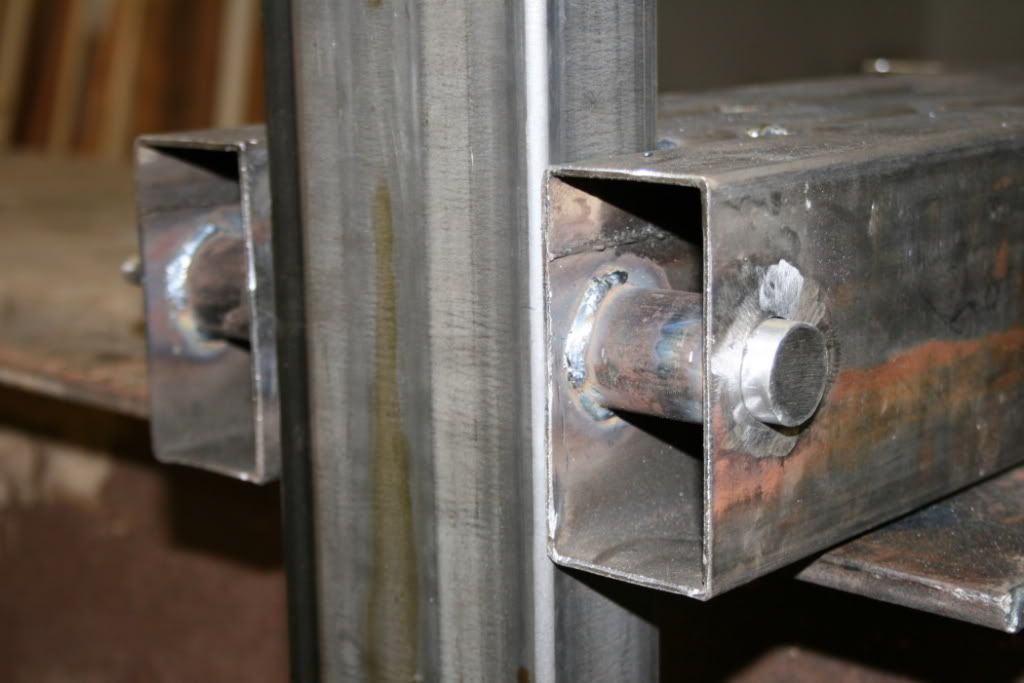
As you can see, the top mold, cattrack, and fire hose now float are not connected to the top beam anymore, but instead the whole assembly (I call it the top mold assembly) is connected to two supports and a beam (made of 4x4 wood). The beam is then supported (balanced) by a cheap bottle jack (Harbor freight $20). I fabricated a small metal clamp that connects the jack to the beam to avoid any slip. The jack itself is fixed to a wooden base to keep it from tipping over, but the base isn't connected to the top beam either. This way I can slide the whole top mold assembly and the jack side to side if I need to make fine adjustments. Notice that the two vertical supports (made of 2x4's) passes through the gap that separates the two top I-beams. I drew dotted lines to indicate that the vertical supports are hidden behind the I-beam. Luckily, I left just enough space for the 2x4's to fit through to connect to the top mold.
As shown above, the bottle jack is raised and thus the top mold is raised well above the bottom mold and cassette. So now I can slide in the bottom mold and cassette!!! Also, I can change out the tip/tail molds with ease.
Show here is a sequence shot of how it all works:

After the bottom mold is slid underneath the top mold assembly, the jack is lowered, and voila, the top mold gently lowers onto the cassette!!! The space between the top beam and the top of the top mold is filled with solid blocks made from scrap 2x4s.
So, I've tested this new modification and it works beautifully. I can raise and lower the top mold so I can slide in the bottom mold. I designed the bottom mold to sit on a tray that I can slide into the press.
I hope this modification is useful to some of you. Please look at the video near the bottom of this page as it shows the press in action:
http://www.skilab.com/projects/rondonnier/
Cheers,
Kam