

awesome
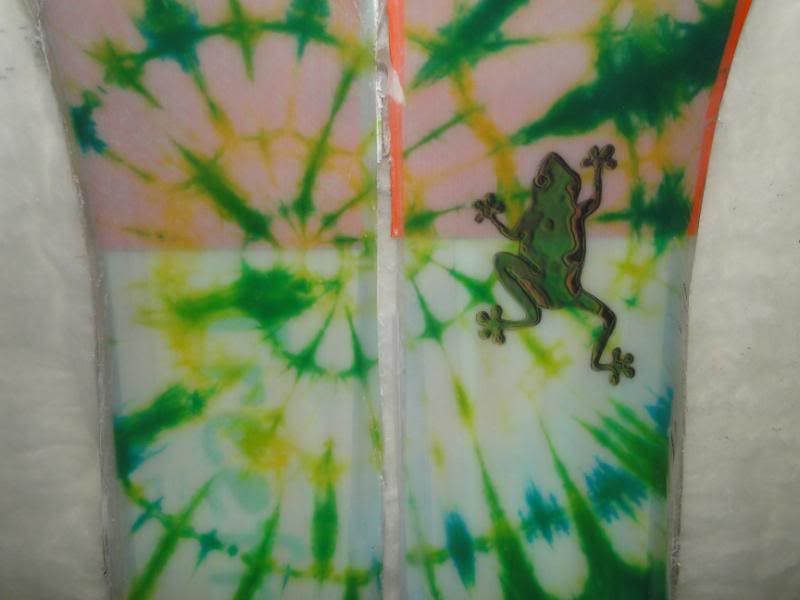
love the tie-dye graphics!
sammer 2011/12
Moderators: Head Monkey, kelvin, bigKam, skidesmond, chrismp
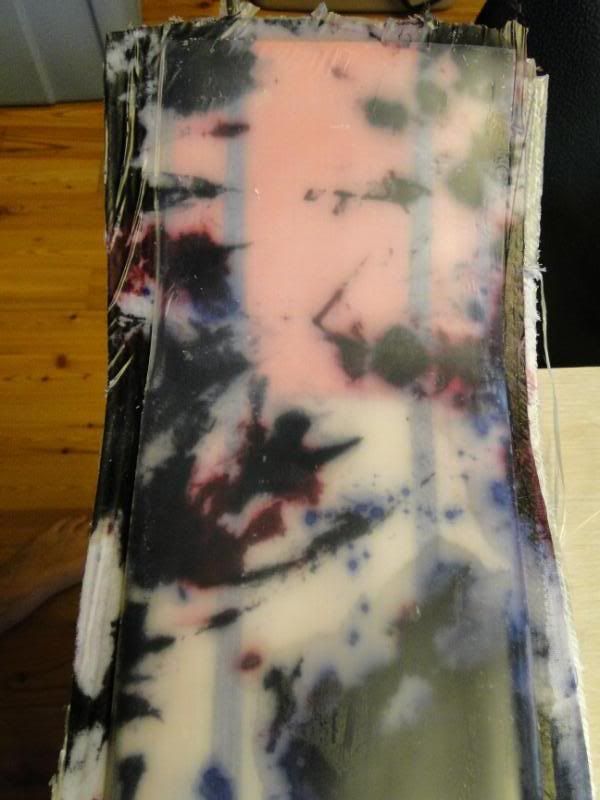
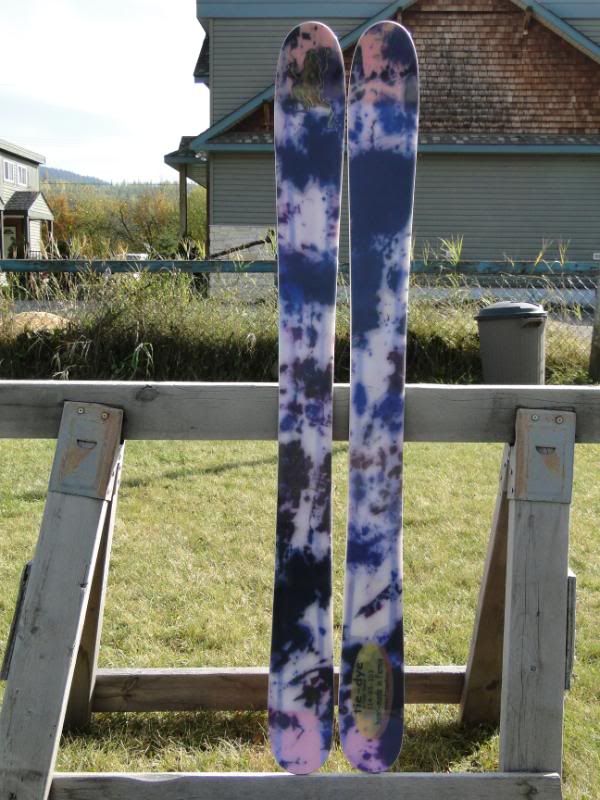
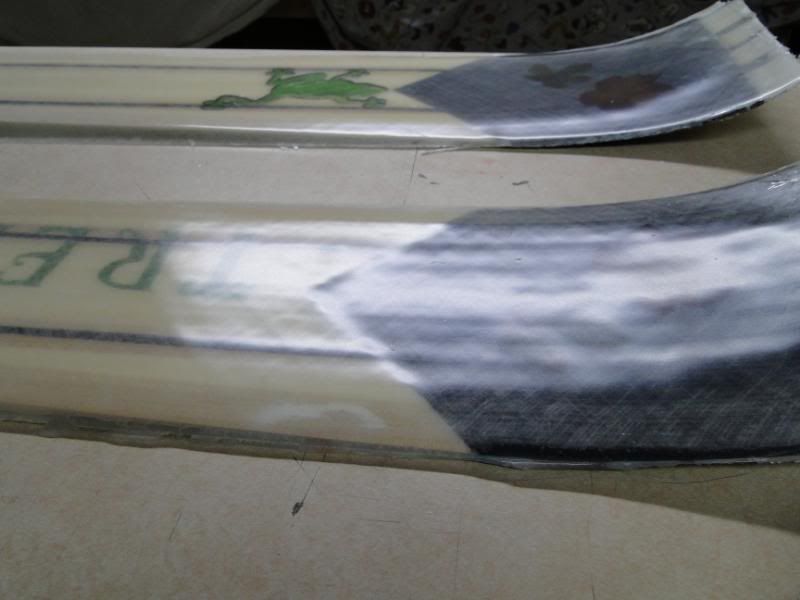
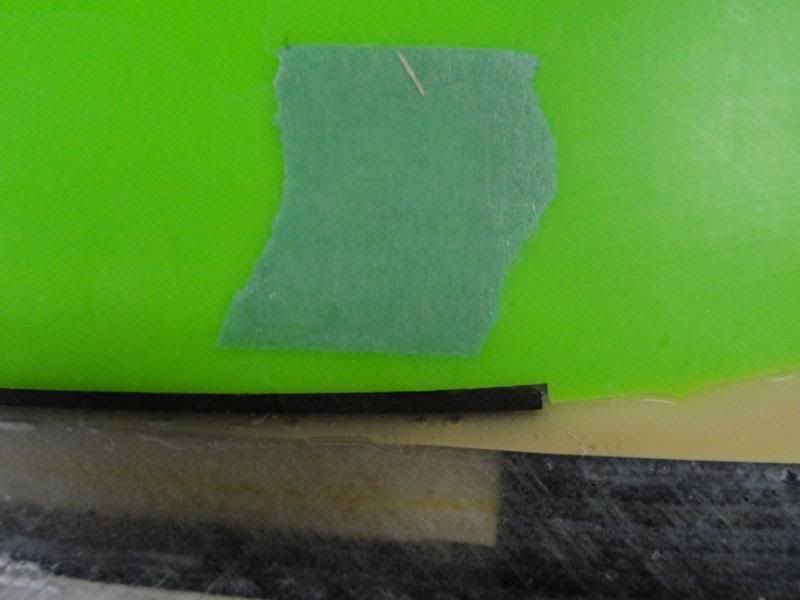
The other ski came out of the bag this week. Just as pretty as the first.
Cut the tip and tail spacers straight across this time as the cores were so thin that I wasn't sure how to cut the 90 without breaking something.
Used the veneer saw to cut it straight across.
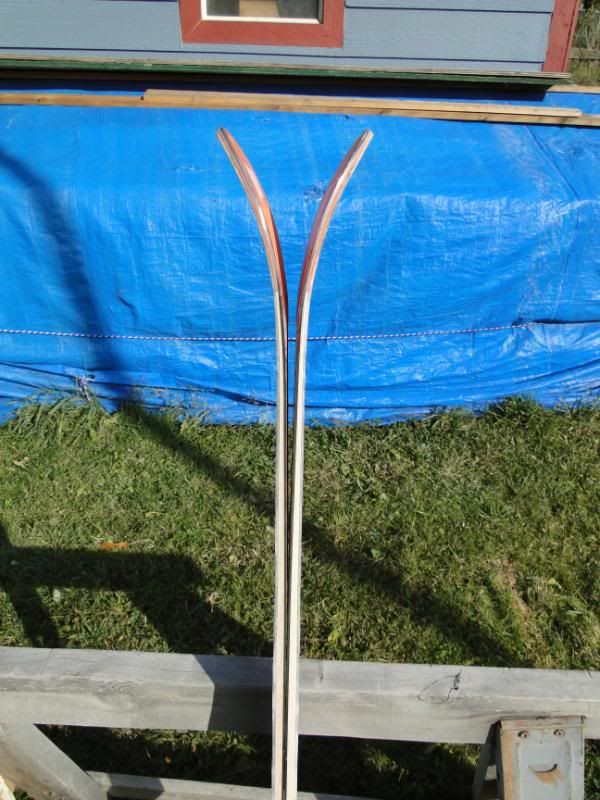
24K CF tow came out nice and straight.(although a little wider on the second one) Hope they're not too stiff!
Waiting for the rain to go away before I can cut them out.
Then we'll see what kind of issues are hiding in there
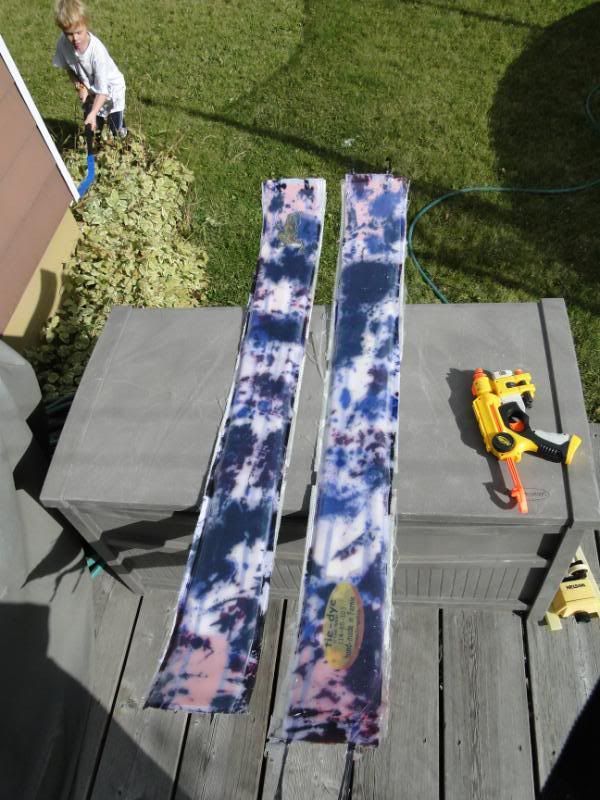
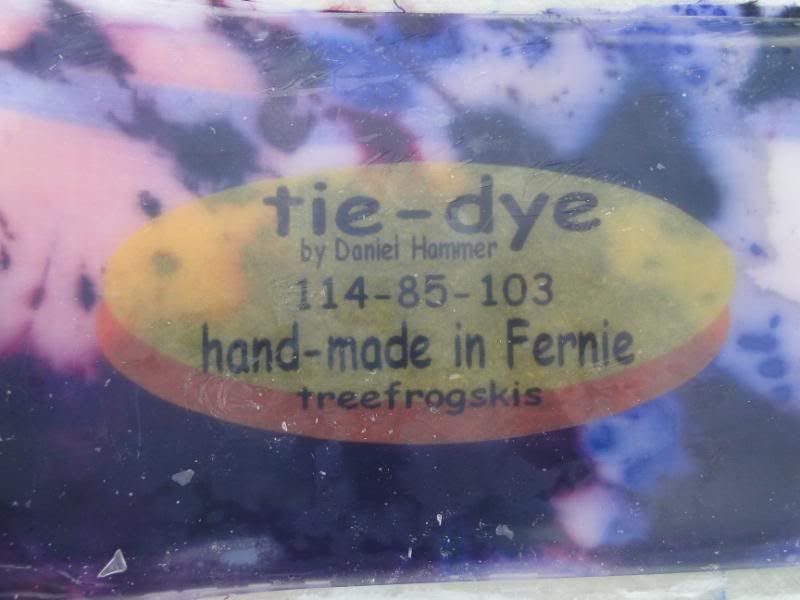
He got his name on them, one of a kind.
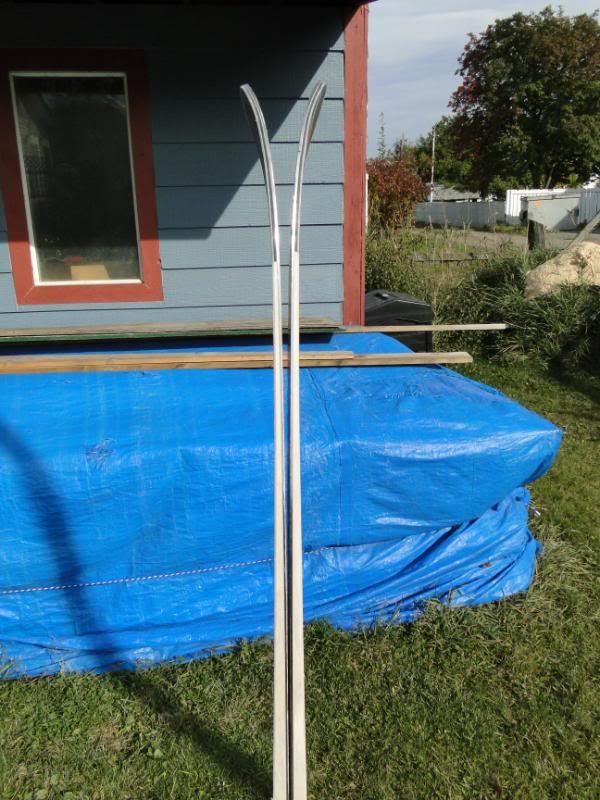
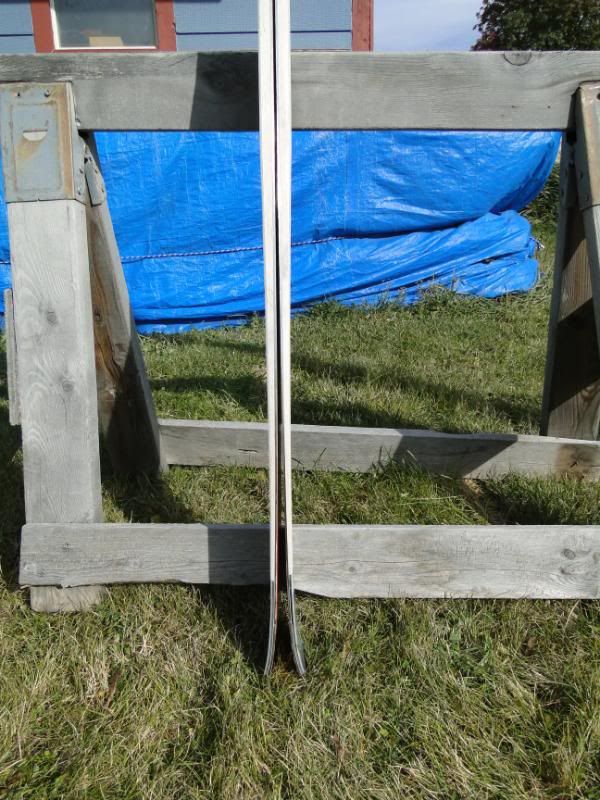
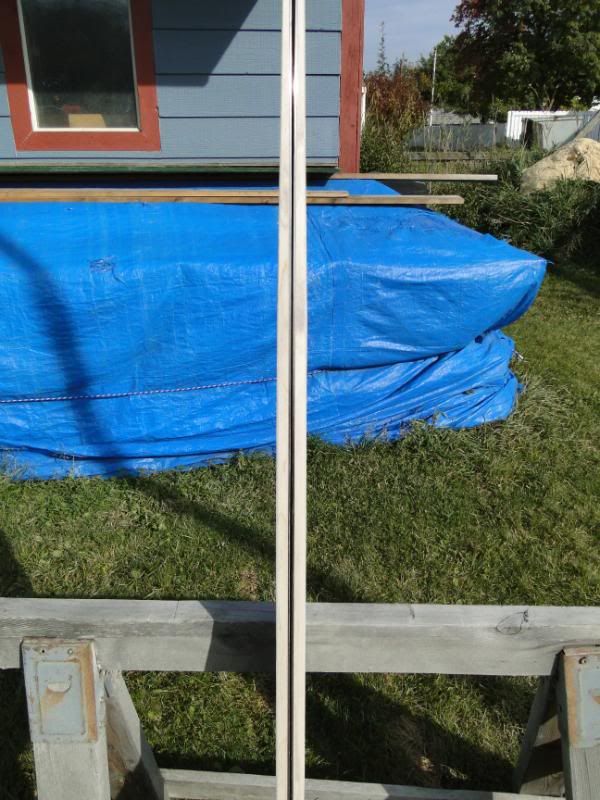
Putting cores together for this years skis this week. Should find time to bend some edges.
Thinking of 4 piece edges like on the armadas. That should get rid of the out of plain joints at the tip and tail. Could cause a whole raft of other issues. Might have to do some experimenting
More later...
sam
Cut the tip and tail spacers straight across this time as the cores were so thin that I wasn't sure how to cut the 90 without breaking something.
Used the veneer saw to cut it straight across.
24K CF tow came out nice and straight.(although a little wider on the second one) Hope they're not too stiff!
Waiting for the rain to go away before I can cut them out.
Then we'll see what kind of issues are hiding in there
He got his name on them, one of a kind.
Putting cores together for this years skis this week. Should find time to bend some edges.
Thinking of 4 piece edges like on the armadas. That should get rid of the out of plain joints at the tip and tail. Could cause a whole raft of other issues. Might have to do some experimenting
More later...
sam
You don't even have a legit signature, nothing to reveal who you are and what you do...
Best of luck to you. (uneva)
Best of luck to you. (uneva)
-
skidesmond
- Posts: 2338
- Joined: Tue Apr 07, 2009 3:26 pm
- Location: Western Mass, USA
- Contact:
Got a chance to cut out the boys skis.
Turned out pretty nice.
Very minor edge bridging which will grind out other than that all's good.
These are full rocker and quite stiff (not as stiff as his last pair)

Not quite sure why little kids gear sucks so badly, his old skis were so stiff I couldn't bend them and his bike weighs more than my hardtail. I guess people don't want to spend the money to get nice stuff for their kids as they'll just outgrow it but it really sucks. OK rant over back to building
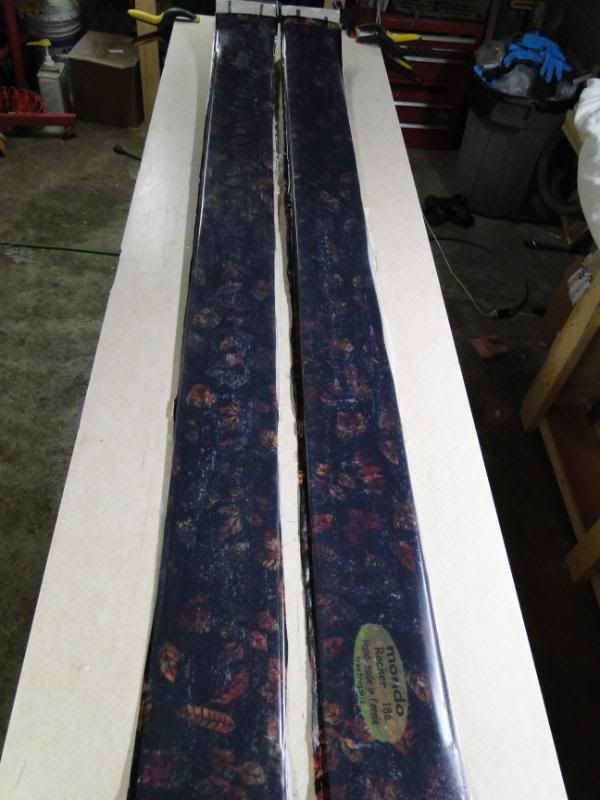
Couldn't wait so I cut out my new pair as well. These ones are the reverse camber with 22m sidecut.
They came out of the press yesterday then got a good 12 hour 120f heat soak last night so I'm thinking they're cooked.
Never made a naked ski before and thought I'd like to keep the weight down.
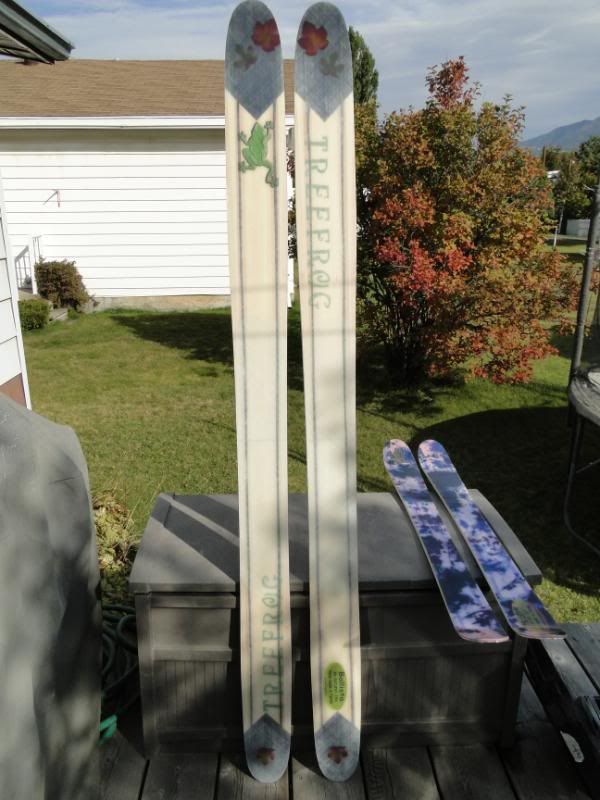
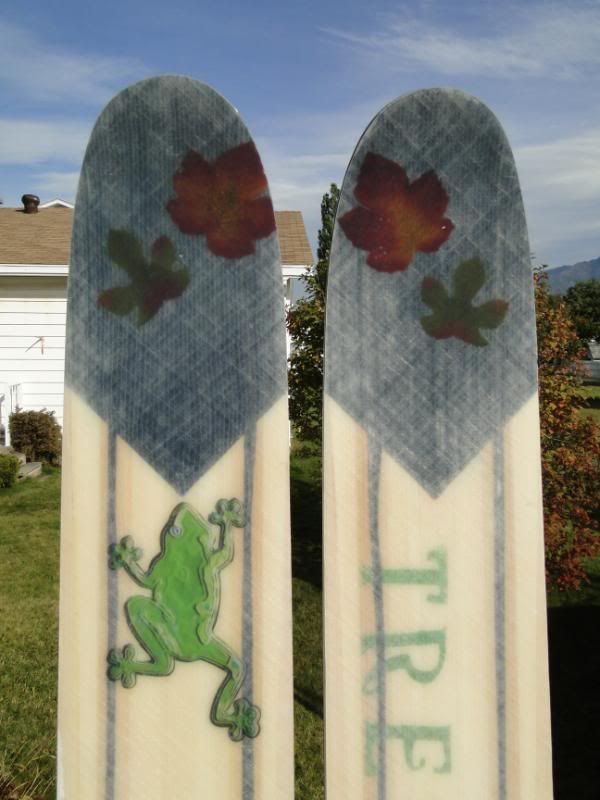
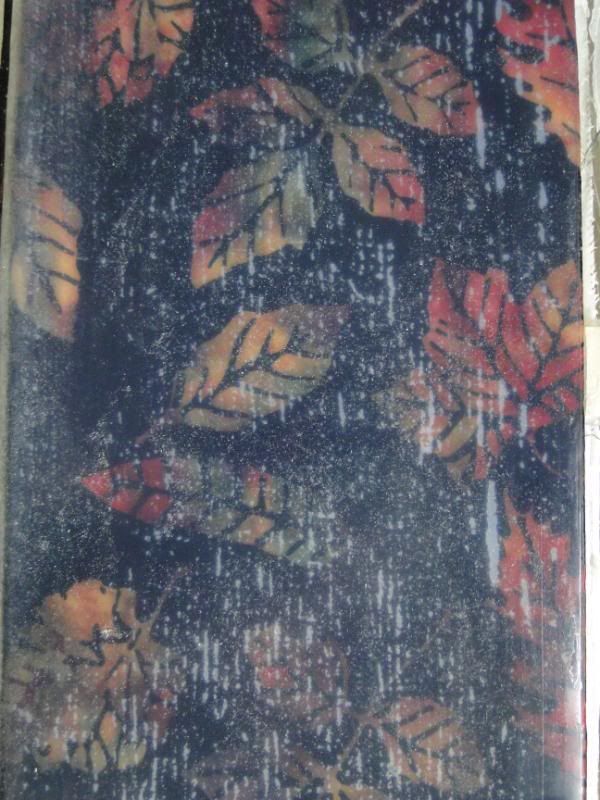
Found these little silk maple leafs at the dollar store thought what the hell.
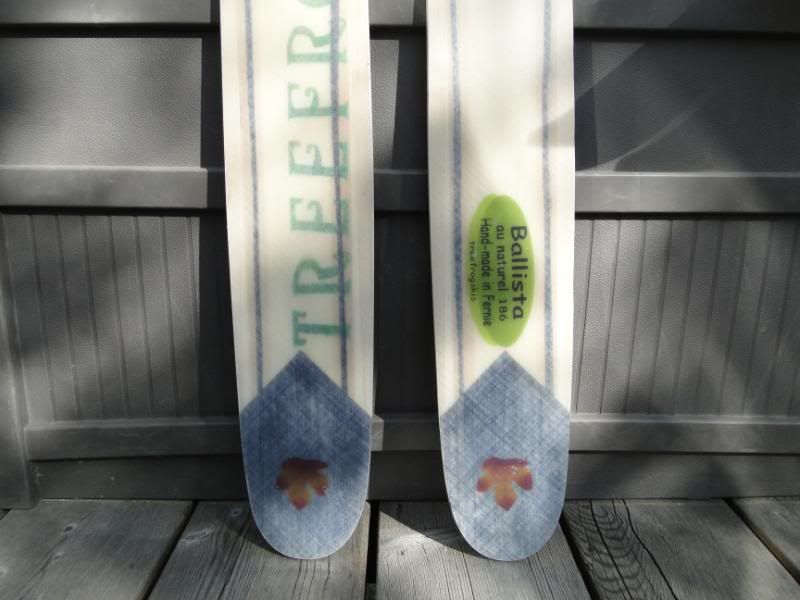
Bases look pretty nice I've always loved this base material.

Very similar rocker to the last pair. I modified the mold a bit so the tip has a bit more upturn and there is about 1mm camber. Pretty hard to see in the pics.
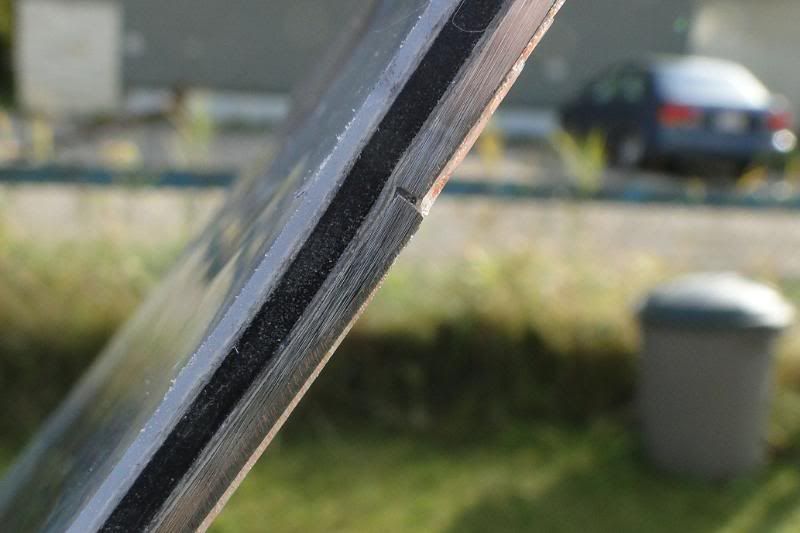
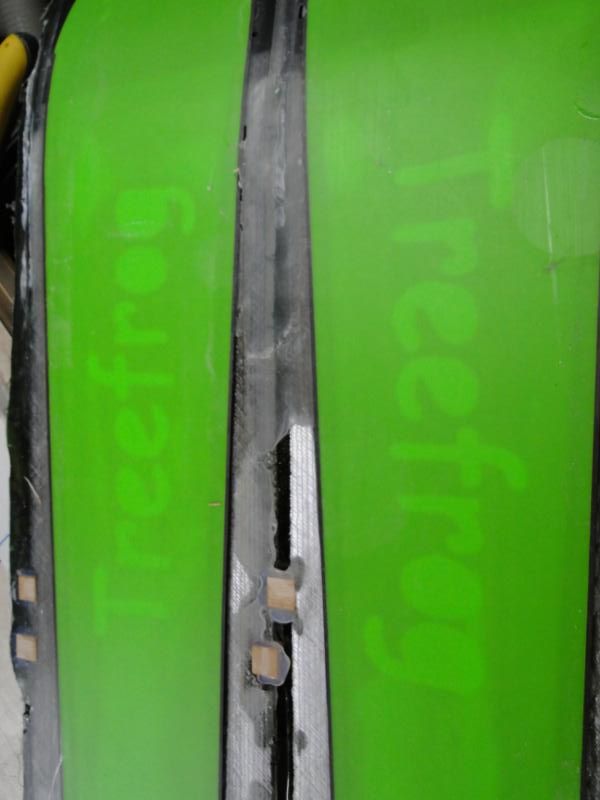
I tried 4 piece edges on this pair. Thought it might cause some issues but you never know until you try.
The tips are really nice almost perfectly in plain.

But the vacuum is not able the generate enough pressure to keep the joint together. This close-up you can see the 2 edge sections don't quite line up. (although I have to say this is the worst one)
One is almost perfect, the other 2 are somewhere in between.
Montucky asked how I dealt with the difference in thickness where the tip spacer meets the core as the ends of the core are close to 2mm and the point where the tip spacer meets the middle is closer to 3mm.
If I had a pneumatic press I would have to watch that a little more closely, but with the vacuum I'm able to fudge a bit.
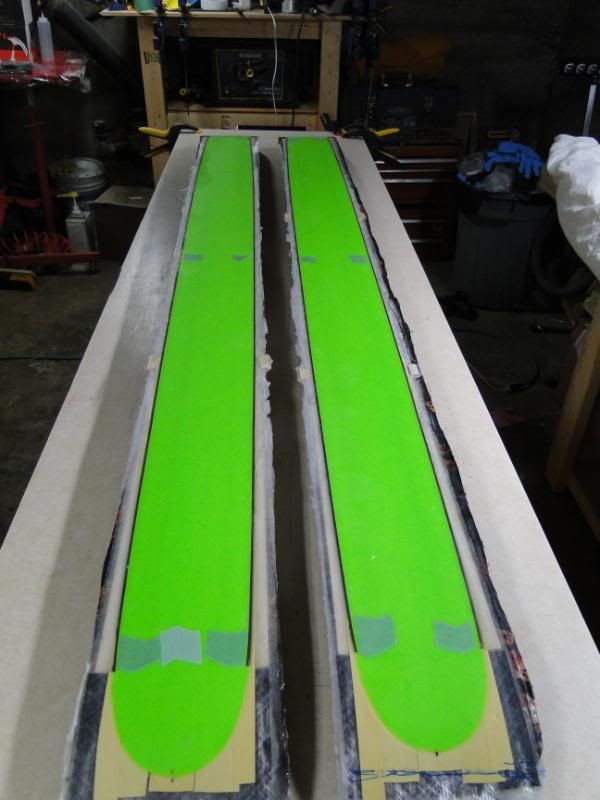
Pull another pair out this morning, these are the reverse- reverse.
Haven't really had a chance to look at them, but to be honest they look like shit! Lots of air trapped under the top sheet. Used a fabric that was really dark, this made the bubbles stand out even more.
Will post pics and a story when I get a chance to assess them more.
sam
Turned out pretty nice.
Very minor edge bridging which will grind out other than that all's good.
These are full rocker and quite stiff (not as stiff as his last pair)
Not quite sure why little kids gear sucks so badly, his old skis were so stiff I couldn't bend them and his bike weighs more than my hardtail. I guess people don't want to spend the money to get nice stuff for their kids as they'll just outgrow it but it really sucks. OK rant over back to building
Couldn't wait so I cut out my new pair as well. These ones are the reverse camber with 22m sidecut.
They came out of the press yesterday then got a good 12 hour 120f heat soak last night so I'm thinking they're cooked.
Never made a naked ski before and thought I'd like to keep the weight down.
Found these little silk maple leafs at the dollar store thought what the hell.
Bases look pretty nice I've always loved this base material.
Very similar rocker to the last pair. I modified the mold a bit so the tip has a bit more upturn and there is about 1mm camber. Pretty hard to see in the pics.
I tried 4 piece edges on this pair. Thought it might cause some issues but you never know until you try.
The tips are really nice almost perfectly in plain.
But the vacuum is not able the generate enough pressure to keep the joint together. This close-up you can see the 2 edge sections don't quite line up. (although I have to say this is the worst one)
One is almost perfect, the other 2 are somewhere in between.
Montucky asked how I dealt with the difference in thickness where the tip spacer meets the core as the ends of the core are close to 2mm and the point where the tip spacer meets the middle is closer to 3mm.
If I had a pneumatic press I would have to watch that a little more closely, but with the vacuum I'm able to fudge a bit.
Pull another pair out this morning, these are the reverse- reverse.
Haven't really had a chance to look at them, but to be honest they look like shit! Lots of air trapped under the top sheet. Used a fabric that was really dark, this made the bubbles stand out even more.
Will post pics and a story when I get a chance to assess them more.
sam
You don't even have a legit signature, nothing to reveal who you are and what you do...
Best of luck to you. (uneva)
Best of luck to you. (uneva)
-
skidesmond
- Posts: 2338
- Joined: Tue Apr 07, 2009 3:26 pm
- Location: Western Mass, USA
- Contact:
nice work Sam !
How high is the front tip on your skis ? looks like there's not much... I did a pair with very few rocker 2 years ago (quite long but not much height) and didn't like them as they were too hard to turn... maybe the shape / stiffness (or lack of) was bad too. They were OK on pure powder but as soon as you're on harder snow it feels like you have 8ft skis ! Binding position might also be an issue but I'm no good skier enough to know that...
How high is the front tip on your skis ? looks like there's not much... I did a pair with very few rocker 2 years ago (quite long but not much height) and didn't like them as they were too hard to turn... maybe the shape / stiffness (or lack of) was bad too. They were OK on pure powder but as soon as you're on harder snow it feels like you have 8ft skis ! Binding position might also be an issue but I'm no good skier enough to know that...
A bad day skiing is always better than a good one at work...

Ben... from the table to the bottom of the edge at the tip is 45mm on the naked pair. They are pretty flat but should float pretty well on those bottomless days we sometimes get here.
Had a bit better look this morning at the full reverse pair.
The top sheets look like hell, lots of small air bubbles under the topsheet.
I used the flouro green base (thought I'd give it another shot)
It sticks OK with the epoxy but crazy glue doesn't touch the stuff.
Did a small test with it and the EMV-045. Holds together alright.
It's almost impossible to get edges to stick!
Tried actual crazy glue, permatex super glue, locktite gel and locktite liquid.
None would do better than to hold them on between the template and the mold.
Gently bending into the mold would crack them off.
Knew better than to try full wrap edges with this base.
Edges were bent as close as I could get and still pulled away in the press.(this is the worst one, shouldn't be a problem, just a piss off!)
Has to be the white backing layer.
It really sucks to work with. The two different materials cause some internal stress which causes the base to become a canoe when you cut it.
trying to press it flat (even if you leave it in a warm room, flat for a few days) does nothing it's still a canoe and will not sit flat.
I love the color but can't wait for it to be gone. Still probably 8m left
Anybody else used this stuff? If so any tips?
The EMV-045 is a bit thinner than the 043, looks a little more yellow in the mixing cup, and seemed to set up a bit faster. (although that could have been the fact I had heat on in the dungeon for the first time ever)
It was probably close to 70f instead of the normal 55, so would make sense. (Trying to get base to go flat!)
I guess we'll see if I can tell the difference when I ski on them.
I'm betting not!
Raining out today so will have to cut them out next week and see whats hiding in there
sam
edited to remove dead link
Last edited by sammer on Mon Nov 28, 2011 8:19 am, edited 1 time in total.
You don't even have a legit signature, nothing to reveal who you are and what you do...
Best of luck to you. (uneva)
Best of luck to you. (uneva)
-
doughboyshredder
- Posts: 1354
- Joined: Mon Sep 17, 2007 7:37 pm
Shame the green base is such a pain, as I really like it.
Have you tried to used a super glue primer to improve the bond? I've not tried this http://www.tognar.com/clear-epoxy/ , but perhaps it's an option?
Have you tried to used a super glue primer to improve the bond? I've not tried this http://www.tognar.com/clear-epoxy/ , but perhaps it's an option?
Bit of a teaser for ya all.
Shattered my right clavicle (collar bone) end of aug and haven't been doing much.
But feeling a bit better now, still cant go back to work, so got some time in the dungeon.
Middle child needed a new pair this year.
The very first skis I ever built were for her and she has long outgrown them.
Turn out looking pretty good.
Need to cut the flash and clean them up but still overall not too shabby!
Finished dimensions should be 131-98-122
142cm full twins
More once they are trimmed.
Gotta get back down there as there are still a few pairs left to build and the snow is already on the ground here.
sam
You don't even have a legit signature, nothing to reveal who you are and what you do...
Best of luck to you. (uneva)
Best of luck to you. (uneva)
Ya time has a way of sneaking past.
With ski season, working 70+ hrs/week this summer and then the mountain bike crash taking me out of the game for a couple months now.
Should be good to go back to work in a couple more weeks so thought I'd better get going on this years builds.
Beside the pair for my daughter, I'm building a carvy pair with full bamboo core, a fat trad style, and a new pair of reverse/reverse.
Last years reverse/reverse turned out really ugly. They were fun to ski but needed a bit more tip curve/rocker.
I have 1 other core glued up just needs sidewalls, not sure what I'm doing with that yet!
Stay tuned...
sam
You don't even have a legit signature, nothing to reveal who you are and what you do...
Best of luck to you. (uneva)
Best of luck to you. (uneva)
Well lots of setbacks in the last week or so.
Final pass with the router blew up a core.

Cut some wood to repair and epoxied it all together.

Used the belt sander to knock it down a bit, then put it back under the router and finished profiling the cores. Turned out better than I thought it would.

Got all the rest of the cores finished up, materials cut and edges bent for the next few pair.
Layed up the bamboo cored turny skis yesterday.
Everything went well and the vacuum was pulling it all into the mold nicely when there was a loud crack and the tone of my vacuum pump changed.
Knew I had a failure but where?
The table on my vacuum frame press broke!
The table is made of 3/4" particle board with a laminate finish on both sides.
I had shimmed my mold to get a bit more rocker in the tail. The shims were about 11" apart and the table got pulled up into the void and cracked the laminate on both sides.

Nothing I could do but put the electric blanket on it and let it suck.
Probably only losing 1/2 my pressure.
Pulled the ski out this morning and it looks surprisingly good.

Has a few minor cosmetic issues.
I'm using a new topsheet that is quite a bit thinner than the crown stuff.
I put a sheet of poly over the layup to keep epoxy off my vacuum membrane, With the crown it didn't matter if there were a few wrinkles but apparently I have to pay more attention to this from now on.

Had a though about graphics on the base. I'm not a fan of die cuts (especially by hand) but wanted to get something on there.
The solution was actually quite simple and looks not too bad
Used a stencil to paint on the back side of the base.
painted the core with a bit of black acrylic paint mixed with water to get a bit better contrast.
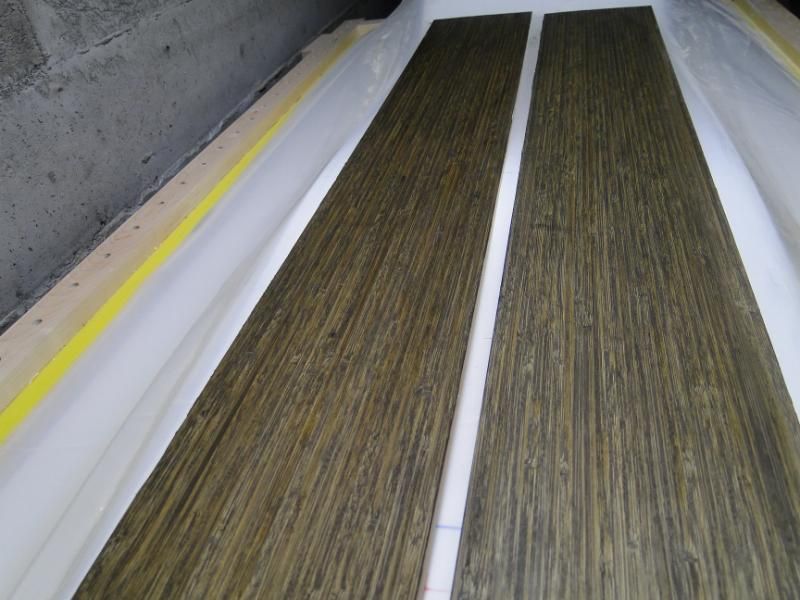
I also used the black paint with water to stain my next core. This one is aspen and fir with maple sidewalls. Looks pretty good as is and might use this for a top graphic.

If I can repair the crack in my table I should be able to get a couple more pair built before the hill opens.
Later
sam
Final pass with the router blew up a core.
Cut some wood to repair and epoxied it all together.
Used the belt sander to knock it down a bit, then put it back under the router and finished profiling the cores. Turned out better than I thought it would.
Got all the rest of the cores finished up, materials cut and edges bent for the next few pair.
Layed up the bamboo cored turny skis yesterday.
Everything went well and the vacuum was pulling it all into the mold nicely when there was a loud crack and the tone of my vacuum pump changed.
Knew I had a failure but where?
The table on my vacuum frame press broke!
The table is made of 3/4" particle board with a laminate finish on both sides.
I had shimmed my mold to get a bit more rocker in the tail. The shims were about 11" apart and the table got pulled up into the void and cracked the laminate on both sides.
Nothing I could do but put the electric blanket on it and let it suck.
Probably only losing 1/2 my pressure.
Pulled the ski out this morning and it looks surprisingly good.
Has a few minor cosmetic issues.
I'm using a new topsheet that is quite a bit thinner than the crown stuff.
I put a sheet of poly over the layup to keep epoxy off my vacuum membrane, With the crown it didn't matter if there were a few wrinkles but apparently I have to pay more attention to this from now on.
Had a though about graphics on the base. I'm not a fan of die cuts (especially by hand) but wanted to get something on there.
The solution was actually quite simple and looks not too bad
Used a stencil to paint on the back side of the base.
painted the core with a bit of black acrylic paint mixed with water to get a bit better contrast.
I also used the black paint with water to stain my next core. This one is aspen and fir with maple sidewalls. Looks pretty good as is and might use this for a top graphic.
If I can repair the crack in my table I should be able to get a couple more pair built before the hill opens.
Later
sam
Last edited by sammer on Tue Sep 03, 2013 7:51 pm, edited 1 time in total.
You don't even have a legit signature, nothing to reveal who you are and what you do...
Best of luck to you. (uneva)
Best of luck to you. (uneva)