Router bridge dust collection

For discussions related to designing and making ski/snowboard-building equipment, such as presses, core profilers, edge benders, etc.

Moderators: Head Monkey, kelvin, bigKam, skidesmond, chrismp

Post Reply
ben_mtl
Posts: 583
Joined: Mon Mar 31, 2008 1:47 pm
Location: Sherbrooke, Quebec
Contact:

Router bridge dust collection

Post by ben_mtl »

Hi all,

I use the router bridge method to profile my cores. I'm pretty satisfied with my setup, not that fast but I get quite accurate results.
I tried the planer crib method in the past but I only have a very cheap planer (-> not that accurate) and I couldn't find the perfect/easiest way to secure the core on the crib..

Anyway the choice of profiling method is not the question...
As some might have noticed, profiling cores generates a lot of dust and the router bridge method is worse that planer as you don't have a dust port directly on the machine.

How do you guys deal with all the dust with router bridge ?

Today I tried to build a "wall" all around my vacuum table setup but it makes manipulating the bridge cumbersome and the fine dust goes all over the place anyways.
I tried to attach my dust collector hose on the bridge, facing the vacuum able -> useless, it grabs some wood chips here and there but a lot of chips/dust flies everywhere.

I was thinking of adding some brushes on the bridge itself to "enclose" the chip projection and somehow plug my dust collector so it "sucks" inside this enclosure (like on CNC routers)... don't know if it will help.

something like that :
Image

Any ideas / pics / thoughts ?
A bad day skiing is always better than a good one at work...
User avatar
EricW
Posts: 225
Joined: Mon Oct 04, 2010 2:50 pm
Location: Eau Claire, Wisconsin

Post by EricW »

I was thinking of some kind of skirt with a hole drilled next to the router for dust. Basically what's in the picture there.

Eventually when I have a CNC I'll have 5hp dust collector with a 5" hose on each side of the router.
skidesmond
Posts: 2338
Joined: Tue Apr 07, 2009 3:26 pm
Location: Western Mass, USA
Contact:

Post by skidesmond »

Is it possible to get a dust pickup accessory for your router?
COsurfer
Posts: 357
Joined: Sun Jul 11, 2010 1:42 pm
Location: Evergreen, CO

Post by COsurfer »

Here is my dust collector on my cnc router. I used 3/4 MDF and then cut my firehose as the "fingers". I have 2-1" pvc tubing running on each side of the router that ties into my shop vac. It is only attached to my router by friction so it slides off easily when I am changing out bits.
Image[/img]
ben_mtl
Posts: 583
Joined: Mon Mar 31, 2008 1:47 pm
Location: Sherbrooke, Quebec
Contact:

Post by ben_mtl »

skidesmond -> I don't think so, it's an old Porter Cable router, an old version of this one (http://www.deltaportercable.com/Product ... ctID=11095)

COsurfer -> I can't see your pic from work, will have a look at it later but I believe it's the same thing I want to try.
A bad day skiing is always better than a good one at work...
sammer
Posts: 933
Joined: Wed Dec 19, 2007 10:37 pm
Location: Fernie B.C.
Contact:

Post by sammer »

Ben, I was thinking something similar.
Putting a skirt around my sled.
I'm still trying to puzzle out the hook up to the dust collector.
Have you made any progress on this?
Any thoughts?
I'm getting tired of having to clean up half my basement after making a core.

sam
You don't even have a legit signature, nothing to reveal who you are and what you do...

Best of luck to you. (uneva)
ben_mtl
Posts: 583
Joined: Mon Mar 31, 2008 1:47 pm
Location: Sherbrooke, Quebec
Contact:

Post by ben_mtl »

Hi Sam,

I made a skirt around the sled out of some door sill rubber thing. Not the best choice of material, I should have taken some real strip brush like the one from McMaster, but it works OK. It's just a bit stiff so sometimes it lifts the sled when I change direction. I did with what was available fast, locally and cheap.
I'll take pics later today to show you the sled.

Unfortunately I can't show it to you in action as I temporarily converted my vacuum base in a screen printing vacuum table.

Ben
A bad day skiing is always better than a good one at work...
skidesmond
Posts: 2338
Joined: Tue Apr 07, 2009 3:26 pm
Location: Western Mass, USA
Contact:

Post by skidesmond »

This is kind of off the wall but what about using the bristles from a paint brush?.. Cut the handle off and glue/fasten the rest of the brush to the base some how..... Just a thought.
ben_mtl
Posts: 583
Joined: Mon Mar 31, 2008 1:47 pm
Location: Sherbrooke, Quebec
Contact:

Post by ben_mtl »

Yes that's a great idea ! Might give it a try wen I rebuilt the bridge with a "factory-built-in" dust port...

Here are the pics :
Top view
Image

Bottom view
Image

How I modified my dust collector hose to fit 2X 2-1/4" vacuum hose
Image

I wanted to have 2 smaller ports so I can have suction over each core and remove dust over the whole width of the vacuum table. The hoses just hang from the ceiling when I profile cores, it works OK !
One improvement I have to make is cover the unused section of the groove in the bridge (the section the router is not covering), the only dust that can escape my system is through this groove, I have some ideas on how to do this.

Also, here is my screen printing test setup, re-using the vacuum table to hold the topsheet material. Hopefully tests should be done early this week, I just have to wait for my friend whose job is screen printing to give me a hand on how to prepare the ink and make the first print.

Image


Also, 3 pairs that are just waiting for the topsheet to be done :
Image
A bad day skiing is always better than a good one at work...
sammer
Posts: 933
Joined: Wed Dec 19, 2007 10:37 pm
Location: Fernie B.C.
Contact:

Post by sammer »

Awesome,
I never would have thought to attach the dust collector to the sled separately!
I was also thinking about using brushes to seal off where the router goes thru the sled. Gonna take some trial and error to get it right.

Might have to work on this this set off.

Thanks Ben!

sam
You don't even have a legit signature, nothing to reveal who you are and what you do...

Best of luck to you. (uneva)
sammer
Posts: 933
Joined: Wed Dec 19, 2007 10:37 pm
Location: Fernie B.C.
Contact:

Post by sammer »

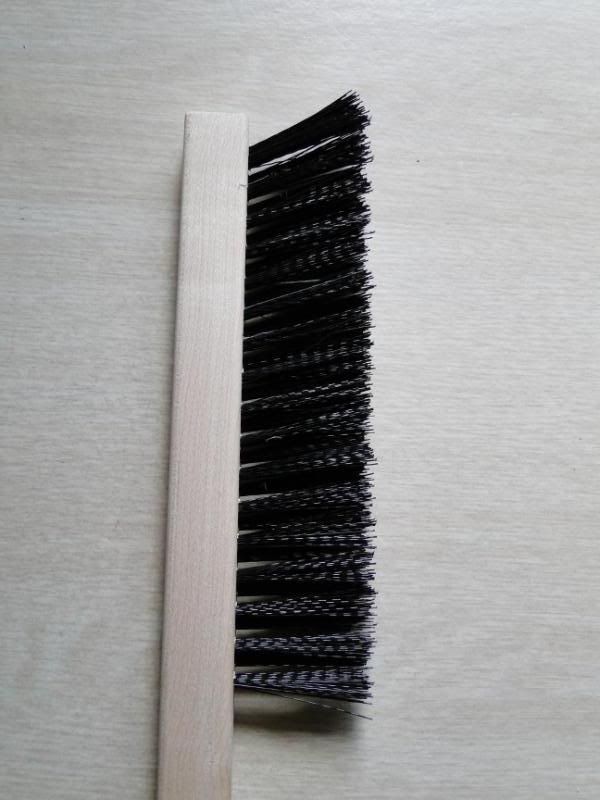
Jumped in my car this morning to run some errands, looked down on the floor and there it was. :idea:
The answer I was looking for.

Image

or more specifically this.

Image

I'll probably need 8 or 10 of them but they are only $2 each.

Now to find the port adapters.

More as this develops.

sam
You don't even have a legit signature, nothing to reveal who you are and what you do...

Best of luck to you. (uneva)
User avatar
Head Monkey
Posts: 310
Joined: Sun Jul 17, 2005 4:53 pm
Location: Carnation, WA
Contact:

Post by Head Monkey »

This is what you're looking for. McMaster part numbers: 74405T71, 8813T2.

Many pics show these in use here: http://www.happymonkeysnowboards.com/MonkeyBlog/?p=246

Good luck!

Mike
Everything I know about snowboard building, almost: MonkeyWiki, a guide to snowboard construction
Free open source ski and snowboard CADCAM: MonkeyCAM, snoCAD-X
Post Reply