Harrison Empires
Posted: Thu Feb 15, 2007 10:49 am
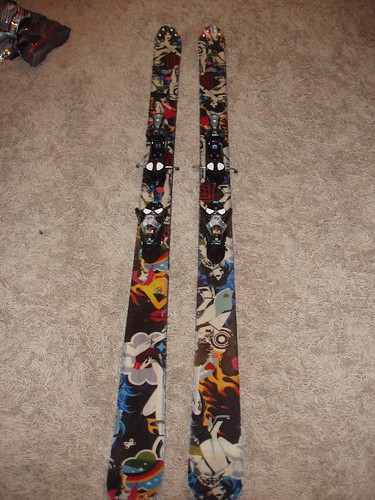
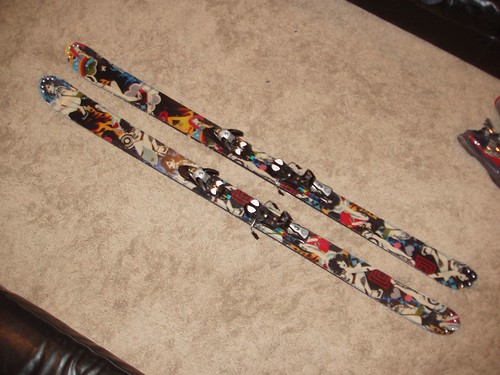
It’s been well over six month since I started on this ski building journey, and now it’s finally time to get some of this stuff down and recorded.
To make this a little more fun you should open this link in another window and let it play in the background:
My progress was obviously slow for several reasons, not the least of which is that besides full time employment my wife and I are in the process of completing a total remodel of our house. I also didn’t want ski building to become something ever I had to do, this was purely for enjoyment and learning.
My first step was to read these forums end to end, and make tons of notes. Several times I got lost in the more technical discussions but the base of knowledge was there. Special thanks to Kam, Kam, Kelvin, G-man, Hose-man, Hafte, Head Monkey and the many others who shared detailed insight and experience. As you're about to see I borrowed liberally from your advice and ideas.
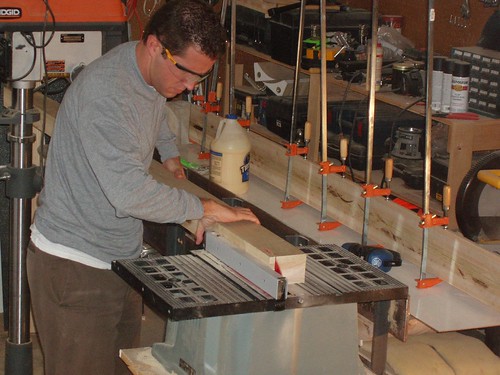
Next came sourcing. This ended up taking way longer than expected. If I could do it over again, I would worry much less about getting the best value, and go ahead and buy some things is smaller quantities. As is, I now have over 300 feet of fiberglass and VDS, so I think I am set for a while. Also procuring the right steel for the press proved problematic for a while. My wife got a big kick when I would start to follow a semi loaded with metal. I would be drooling and saying “ooohh . . that is a beautiful piece of steel, I could use that beam for sure”. She was convince that I had gone nuts. I also almost lost a foot trying to pull a scrap i-beam out from under a 30 foot mountain of scrap steel, and the beam ended up being worthless!
A quick list of my suppliers is as follows:
Steel – Metal Mart, good people and sorry you broke your saw on my beam
Fiberglass – Composites One, more good people and sorry I paid you twice and forced you to process a refund
Epoxy and topsheet fiberglass – West Marine
Wood – Lowes and Mac Beath hardwoods.
Firehose – United fire authority, firefighters are always cool guys.
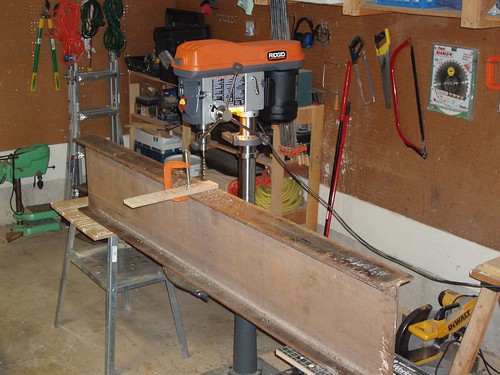
Once I had most of the materials it was time to start work. The basic design for my press was taken from hose-man’s “sideways I-beam” idea. I was really worried about failure and wanted the ability to take the pressure as high as I wanted so I overbuilt a little.
Using the article here:
http://www.rockcrawler.com/techreports/ ... /index.asp
I rounded the shear strength for my 7/16 grade 5 bolts down to 10,000 pounds.
40 bolts holding each side meant my press could withstand 400k of force on each of its halves. With a surface area per side of 1440 square inches that meant that even if my bladders were in contact with the whole side I would still be good to about 280 psi. Since my compressor can only push 120 I feel pretty safe.
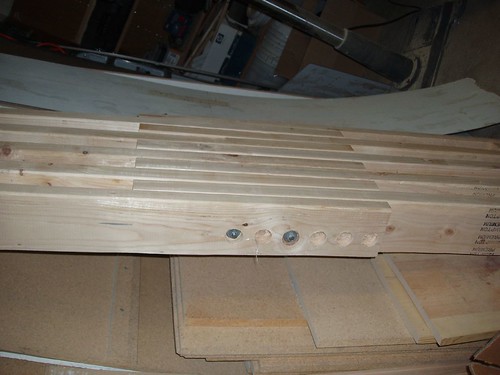
Since I drilled all of the holes before I ever placed a bolt I had to try and line them up as well as possible.
Close up of the joints.
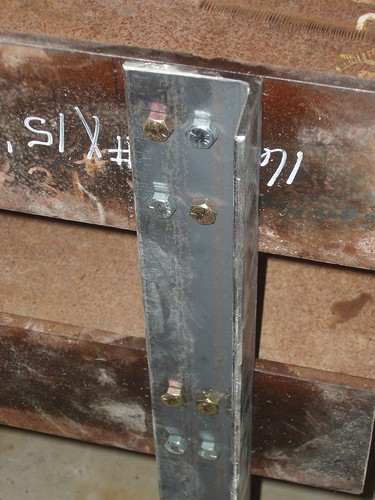
With a little patience and a rubber mallet I was able to get everything bolted together.
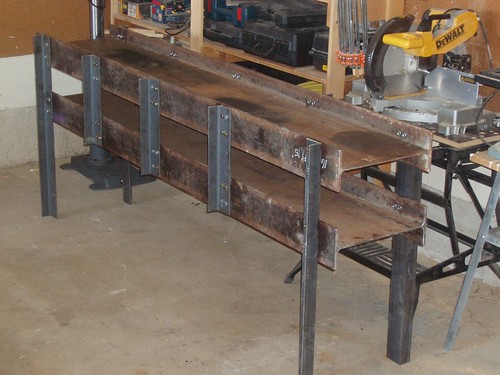
Once I was done the press without mold weighed in at about 500lbs. It is obviously loaded from the end and the opening is 10 inches vertical and 15 horizontal.
I intended to put it on casters but haven't got around to that yet, and I am able to scoot the press around by lifting one end at a time, which is all of the portability that I need for now. The top of the press also makes a nice work surface.
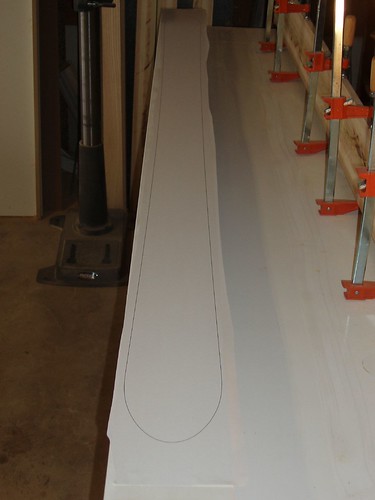
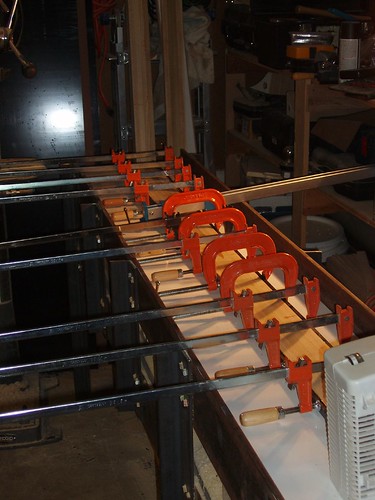
The bottom and tip mold are both solid without any spacing. The tip and tail attachment system is less elegant than I would like but they do the job for now. Mold is designed for 16mm of camber on a 190cm ski but more on that later.
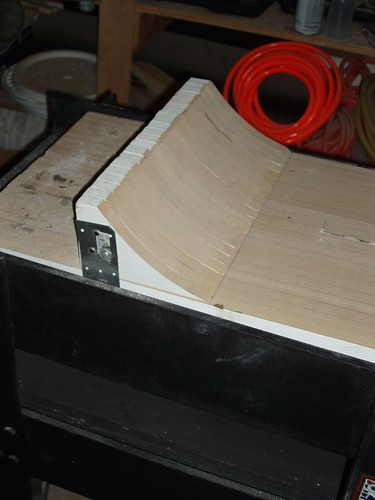
The top mold is spaced and held together by two threaded rods making it adjustable as the ski length changes.
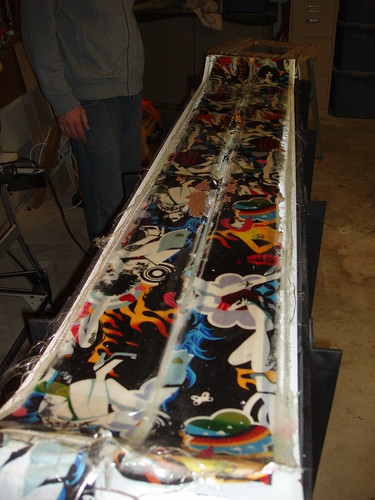
My bladder is a pretty standard affair. After several failures at using silicon I finally ordered the parts from head monkeys bladder instruction and did the job right. I should have done this in the first place and would recommend it to anyone as a bombproof setup
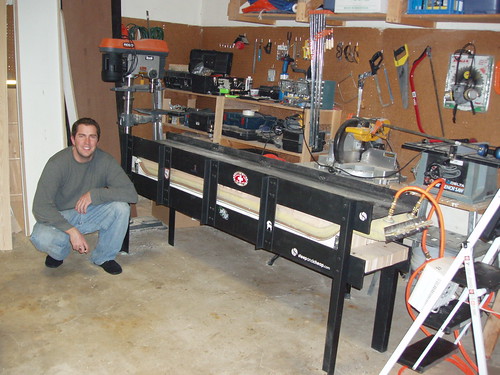
Once everything was put together I just needed a name for my creation. My final inspirational push to complete the press came after watching a snowboard movie premier. The best segment of the movie was set to the music you are listening to now. So I named my press Eileen (she is primarily made from i-beam).
To make this a little more fun you should open this link in another window and let it play in the background:
My progress was obviously slow for several reasons, not the least of which is that besides full time employment my wife and I are in the process of completing a total remodel of our house. I also didn’t want ski building to become something ever I had to do, this was purely for enjoyment and learning.
My first step was to read these forums end to end, and make tons of notes. Several times I got lost in the more technical discussions but the base of knowledge was there. Special thanks to Kam, Kam, Kelvin, G-man, Hose-man, Hafte, Head Monkey and the many others who shared detailed insight and experience. As you're about to see I borrowed liberally from your advice and ideas.
Next came sourcing. This ended up taking way longer than expected. If I could do it over again, I would worry much less about getting the best value, and go ahead and buy some things is smaller quantities. As is, I now have over 300 feet of fiberglass and VDS, so I think I am set for a while. Also procuring the right steel for the press proved problematic for a while. My wife got a big kick when I would start to follow a semi loaded with metal. I would be drooling and saying “ooohh . . that is a beautiful piece of steel, I could use that beam for sure”. She was convince that I had gone nuts. I also almost lost a foot trying to pull a scrap i-beam out from under a 30 foot mountain of scrap steel, and the beam ended up being worthless!
A quick list of my suppliers is as follows:
Steel – Metal Mart, good people and sorry you broke your saw on my beam
Fiberglass – Composites One, more good people and sorry I paid you twice and forced you to process a refund
Epoxy and topsheet fiberglass – West Marine
Wood – Lowes and Mac Beath hardwoods.
Firehose – United fire authority, firefighters are always cool guys.
Once I had most of the materials it was time to start work. The basic design for my press was taken from hose-man’s “sideways I-beam” idea. I was really worried about failure and wanted the ability to take the pressure as high as I wanted so I overbuilt a little.
Using the article here:
http://www.rockcrawler.com/techreports/ ... /index.asp
I rounded the shear strength for my 7/16 grade 5 bolts down to 10,000 pounds.
40 bolts holding each side meant my press could withstand 400k of force on each of its halves. With a surface area per side of 1440 square inches that meant that even if my bladders were in contact with the whole side I would still be good to about 280 psi. Since my compressor can only push 120 I feel pretty safe.
Since I drilled all of the holes before I ever placed a bolt I had to try and line them up as well as possible.
Close up of the joints.
With a little patience and a rubber mallet I was able to get everything bolted together.
Once I was done the press without mold weighed in at about 500lbs. It is obviously loaded from the end and the opening is 10 inches vertical and 15 horizontal.
I intended to put it on casters but haven't got around to that yet, and I am able to scoot the press around by lifting one end at a time, which is all of the portability that I need for now. The top of the press also makes a nice work surface.
The bottom and tip mold are both solid without any spacing. The tip and tail attachment system is less elegant than I would like but they do the job for now. Mold is designed for 16mm of camber on a 190cm ski but more on that later.
The top mold is spaced and held together by two threaded rods making it adjustable as the ski length changes.
My bladder is a pretty standard affair. After several failures at using silicon I finally ordered the parts from head monkeys bladder instruction and did the job right. I should have done this in the first place and would recommend it to anyone as a bombproof setup
Once everything was put together I just needed a name for my creation. My final inspirational push to complete the press came after watching a snowboard movie premier. The best segment of the movie was set to the music you are listening to now. So I named my press Eileen (she is primarily made from i-beam).