Prototype 1
Posted: Fri Aug 09, 2019 7:42 pm
Greetings, fellow ski/snowboard builders 
It was almost a year ago that I made a personal pledge to build my next snowboard. It's now a couple of weeks until my next snow trip, and the board is almost finished, so I thought I'd share some pics of the project. As I'm sure other builders can sympathise, it has been ridiculously time-consuming and quite a learning experience. Definitely not cheaper or easier than just buying a board, but much more rewarding. Can't wait to try it.
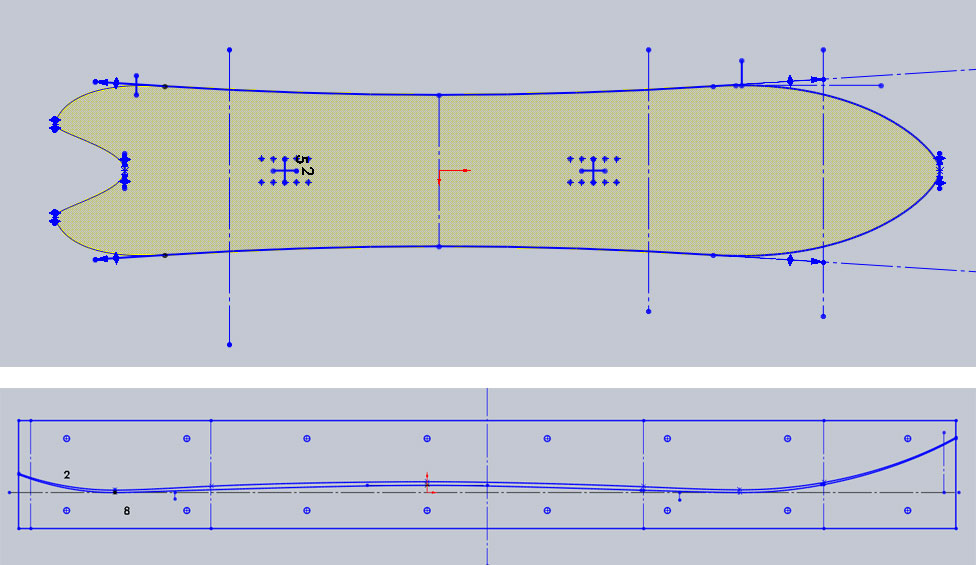
I designed the shape and camber profile in SolidWorks. A little different from anything I've seen on the market. 154cm length, 293mm nose and tail width, 260mm waist width, 7.4m sidecut radius, true twin and traditional camber between the contact points for carving the groomers, with extended nose and swallowtail for float in powder. Also shown is the camber profile / parts for the press.
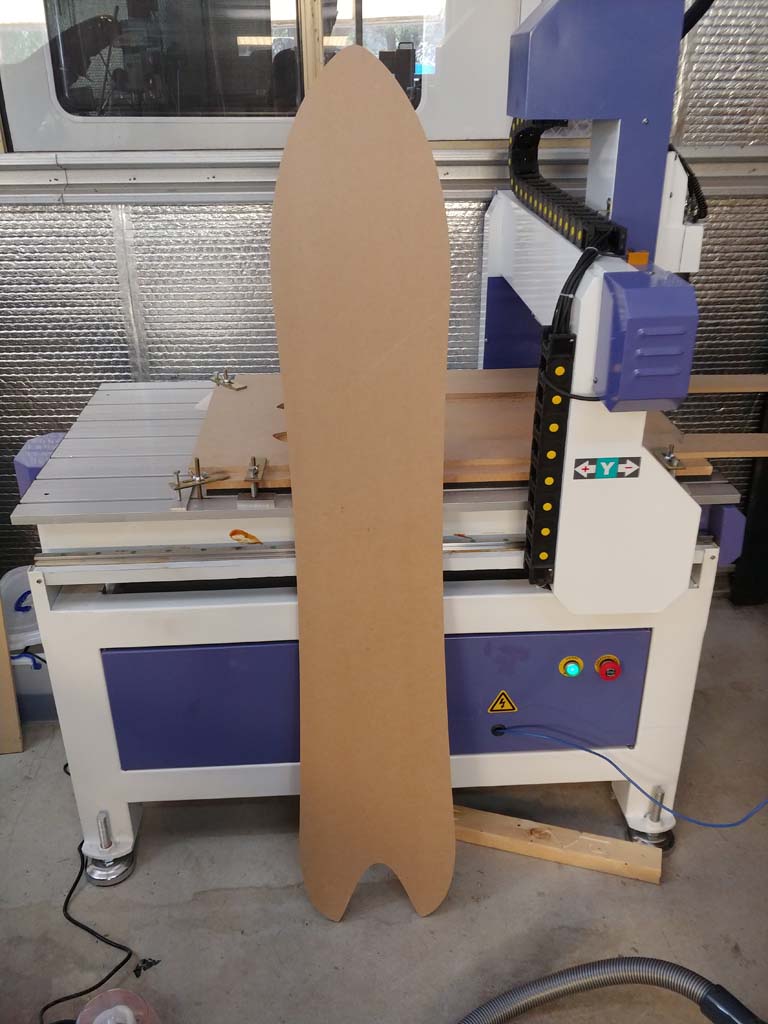
Below is the CNC cut MDF template to be used for cutting the HDPE base to shape using a router follower bit. Base material plus topsheet, fibreglass and steel edge were all purchased from Skilab.
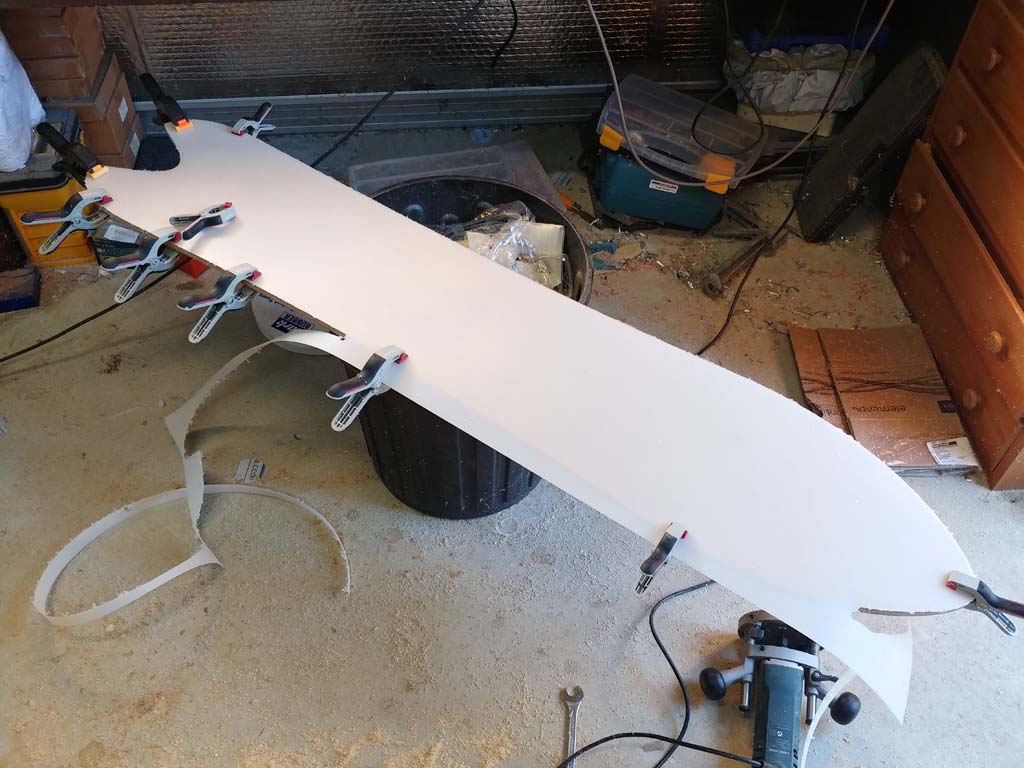
Cutting out the base using router follower bit while clamped to the base template:
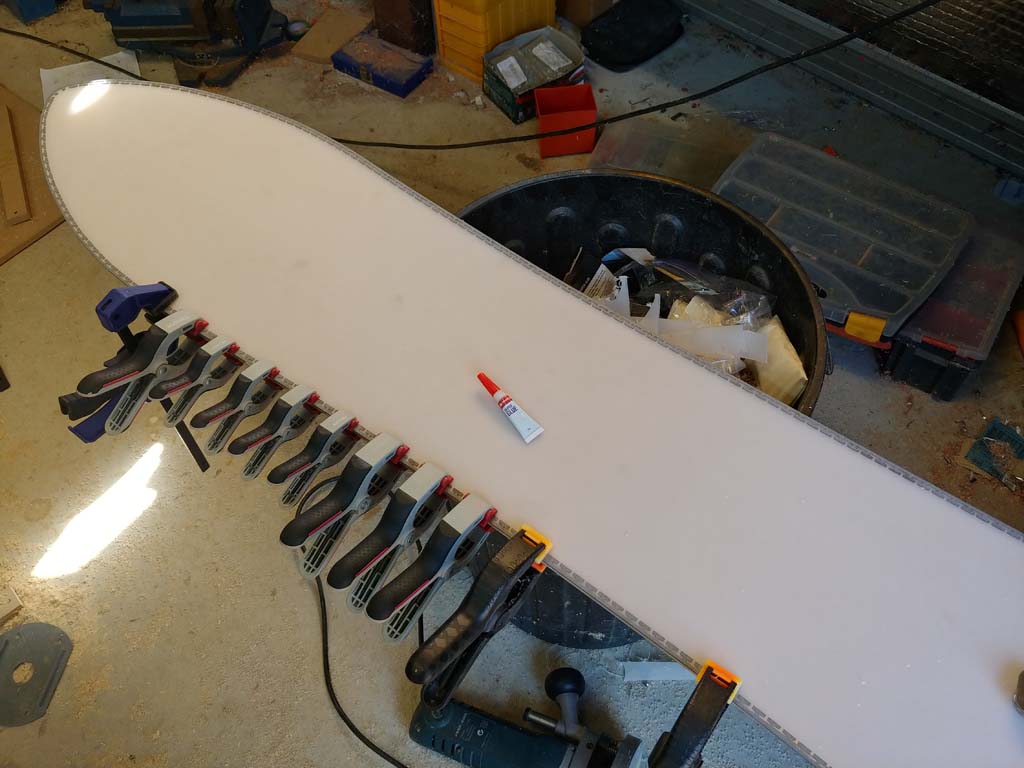
Attaching the steel edge to the base using intermittent supergluing. For bending the edge material I made a sort of custom pair of pliers. It was a tricky job to do neatly - would be interested to know how others bend the edge.
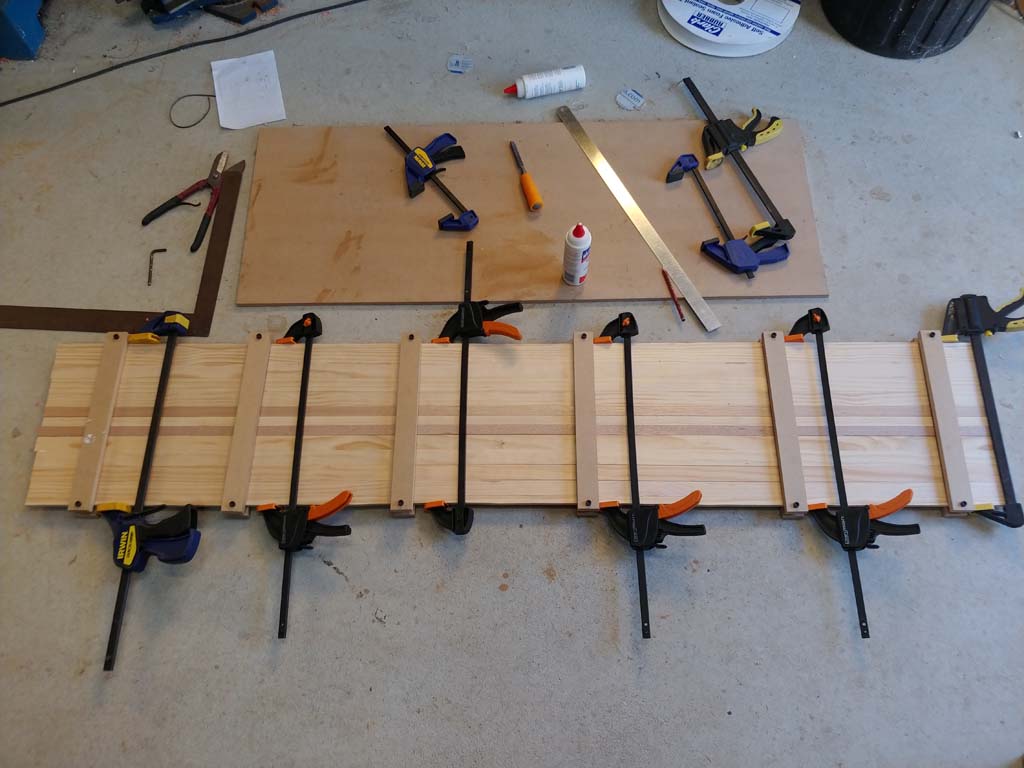
Core was made from laminations of robusta pine with two tasmanian oak stringers running the length of the board at the width of the binding inserts, for added strength there. (I had trouble finding any better options for wood here in Perth, like poplar or maple.) Pictured here is it being clamped after gluing. After this it was run through a thicknesser on both sides to flatten it out properly.
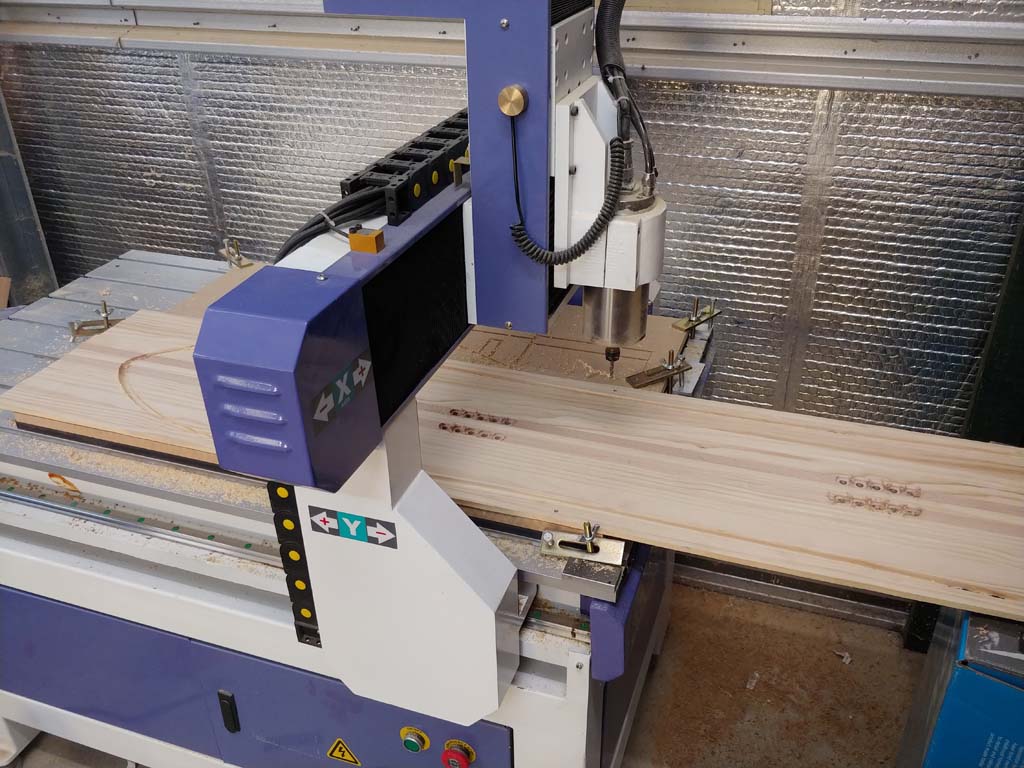
CNC routing of the binding insert holes and a channel for pouring a polyurethane sidewall. My CNC is only 900x600mm bed size so the routing had to be done in two halves, with reference holes in the middle for alignment.
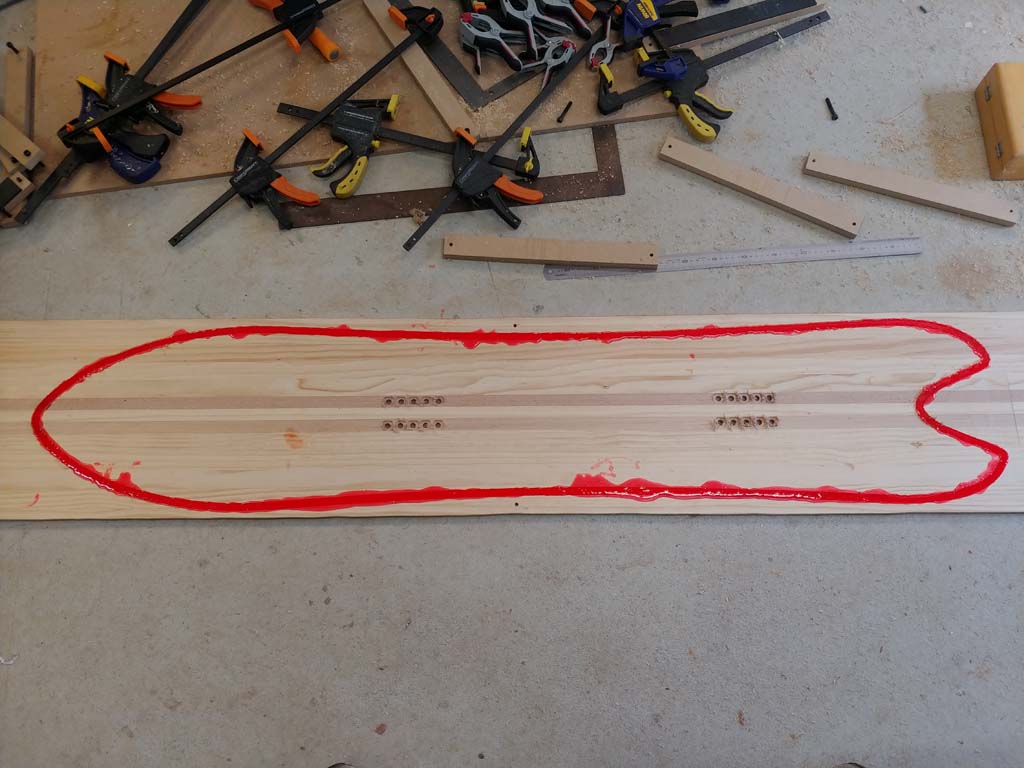
Pouring of the polyurethane into the channel for the sidewall:
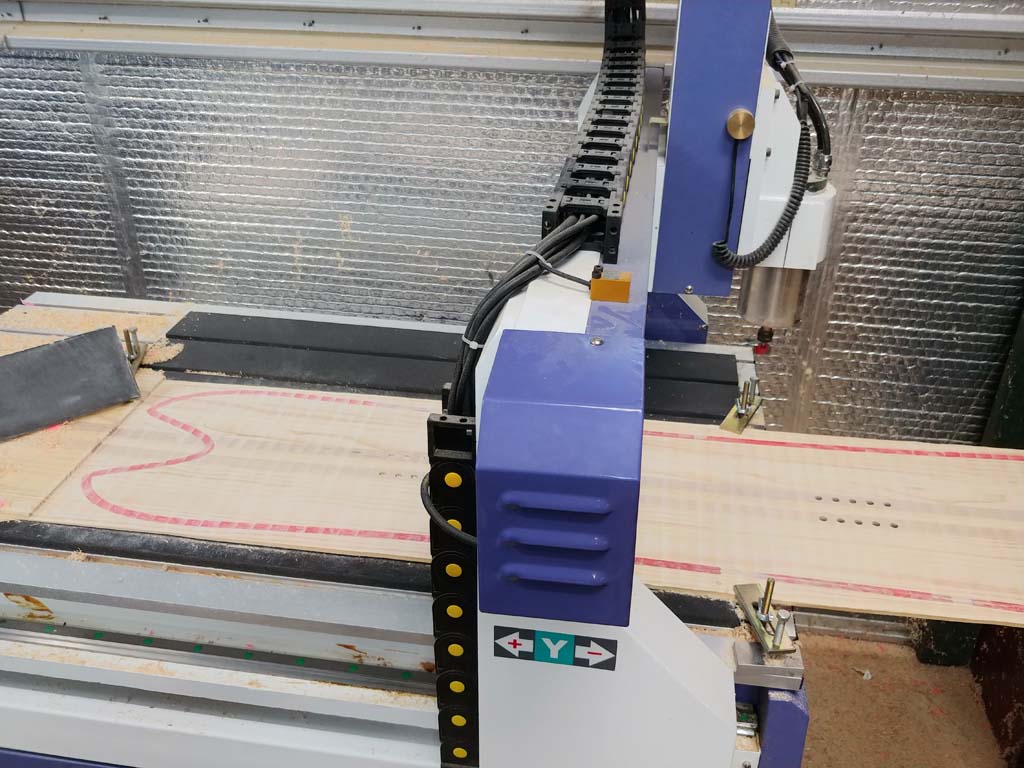
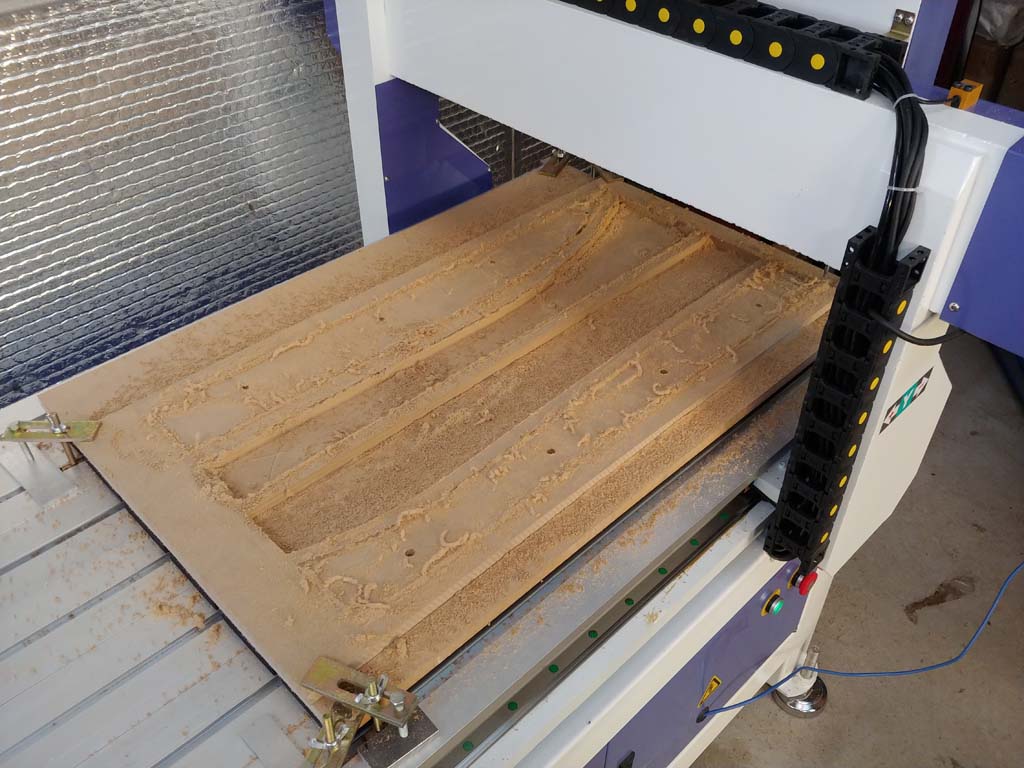
Thicknessing the core in the CNC router, tapering the tip and tail down. The core is about 6mm thick under and between the bindings, tapering down to 2mm thick at the tip and tail.
Almost completed core below, after being cut out around the sidewall on the bandsaw. Last thing was to machine a small 1mm deep step around the edge to accommodate the edge material (since it protrudes slightly above the base).
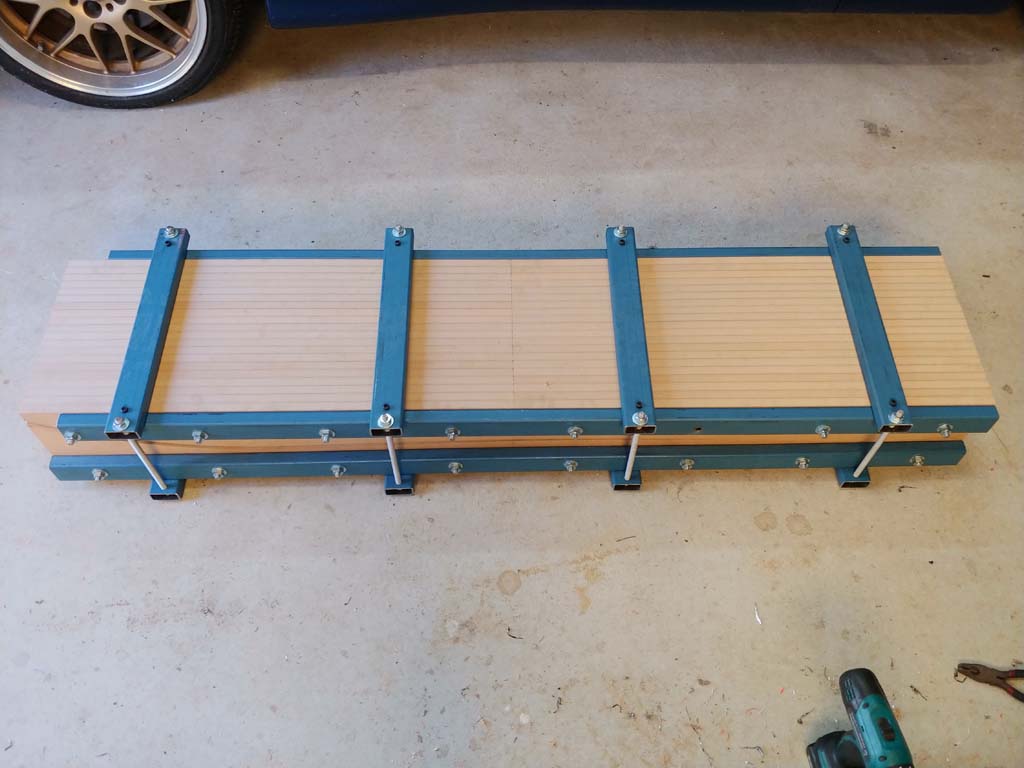
Cutting laminations for assembling a press. In total the press was made from 20x laminations of 16mm MDF. One of the most time-consuming steps! I might have to make more than one snowboard with it, to justify the effort.
Laminations were clamped together between steel bars using M10 threaded rod + nuts.

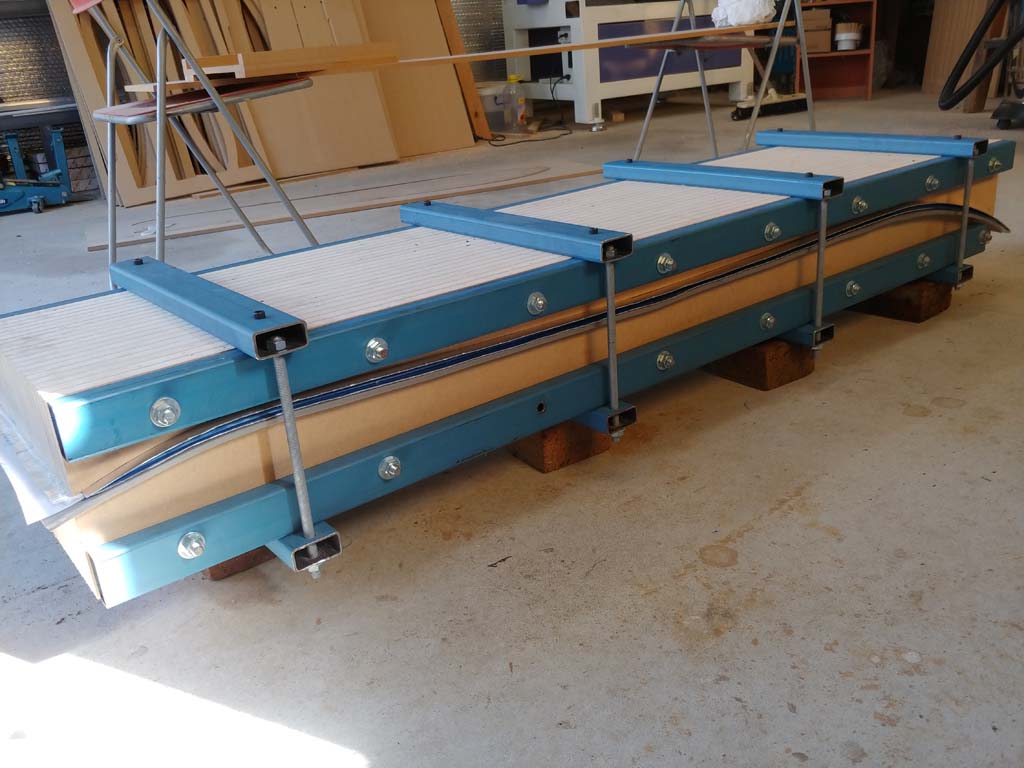
8x M10 threaded rods used to clamp the two halves of the press together. In theory this should be good for a few tonnes of compression. (More would probably be better.)
Getting ready to do the layup. It was done upside down in the hope of keeping the base free of stray epoxy, i.e topsheet, fibreglass, core, fibreglass, base. Fibreglass used was 22oz/sqft triax. Epoxy used was West Systems 105 with the 206 slow hardener.
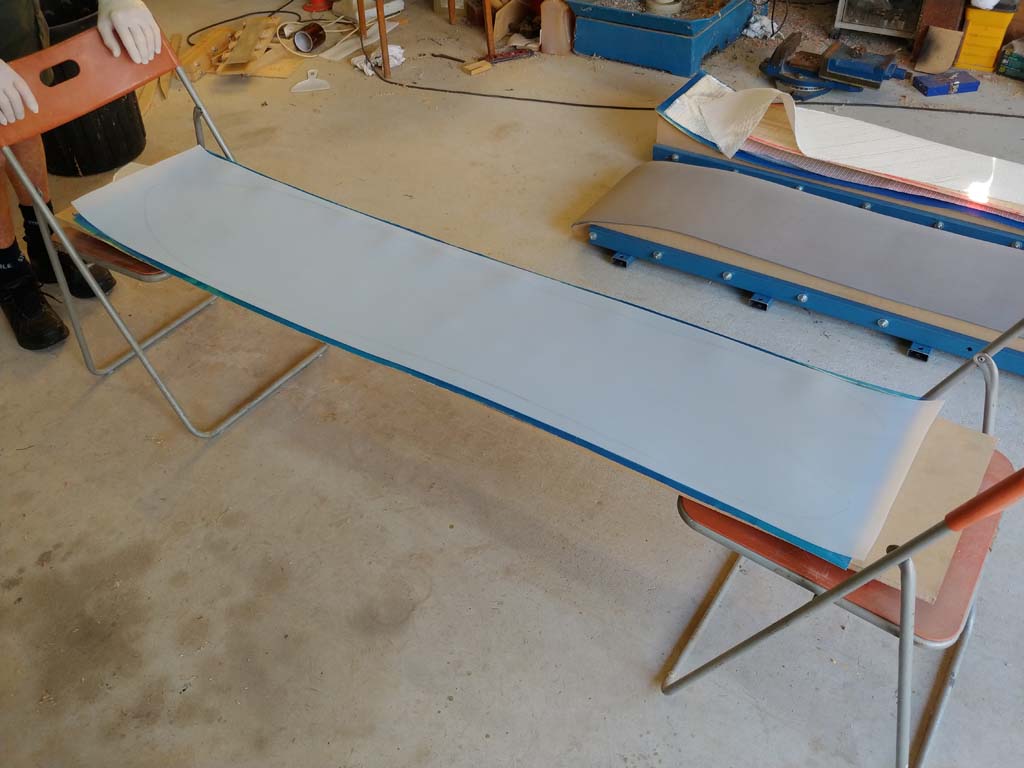
Layup in the press, left for 2 days to cure. Aluminium either side of the layup to prevent epoxy getting onto the wood parts of the press (and to give a nice smooth surface), and a 6mm layer of foam to accommodate any imperfections in the press.
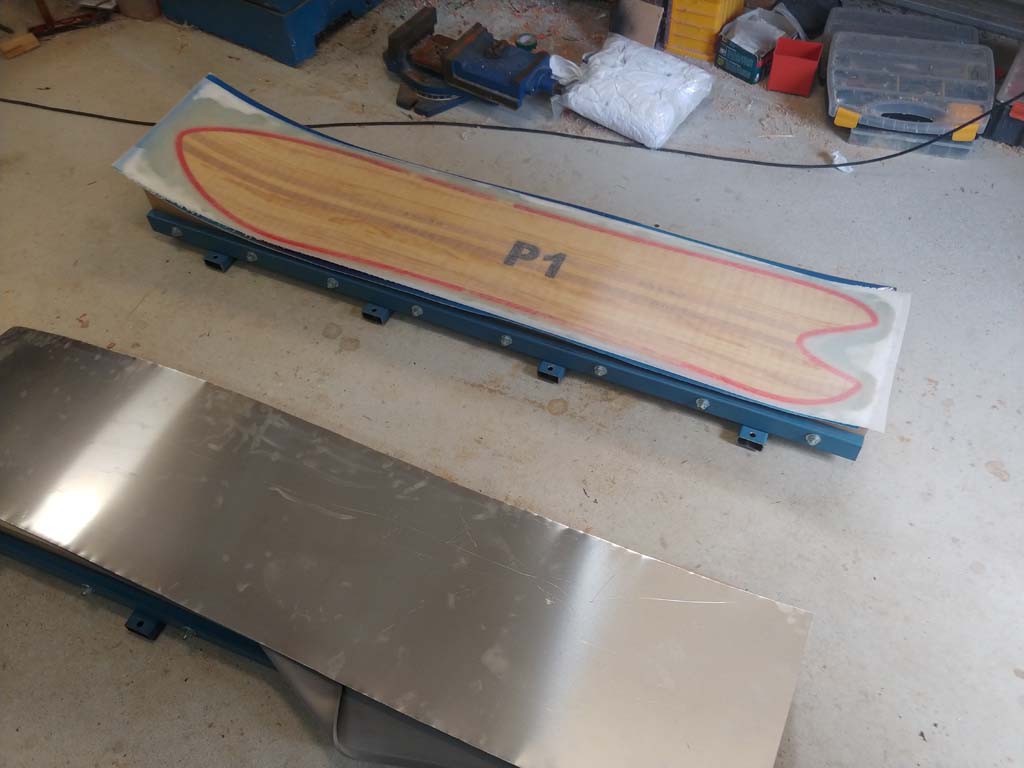
Opening up the press - to my great relief the layers had stayed aligned well. The P1 (prototype 1) text was done with black spraypaint onto the core using a stencil before layup.
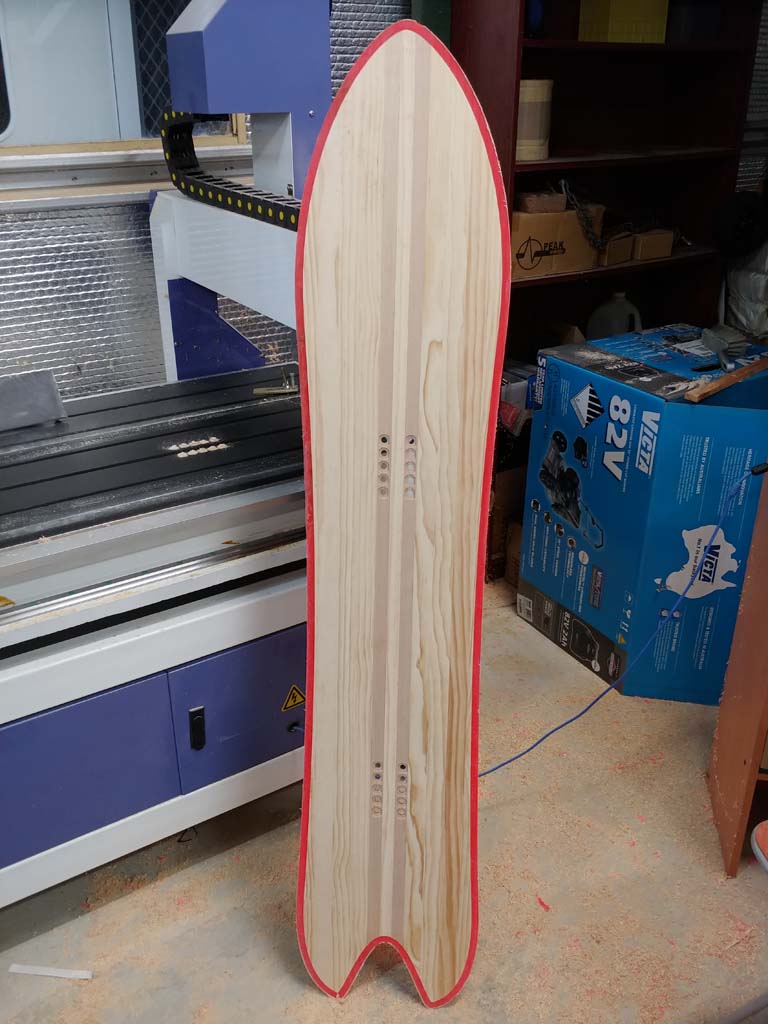
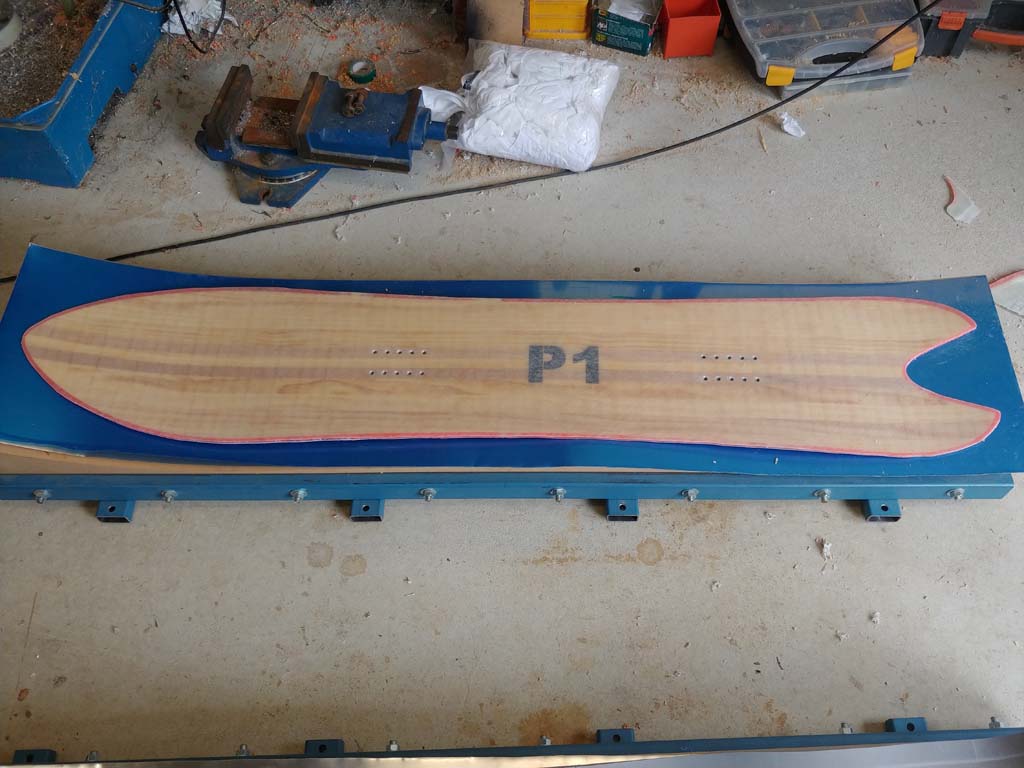
Nearly completed board - binding holes exposed using a countersink bit, and shape cut out approximately using a bandsaw following the steel edge. Still remains to clean up the edge on a linisher, add a sidewall bevel using a router somehow, sand some stray epoxy off the base then give it some wax.
I must confess I was not feeling confident that my first attempt at building a snowboard would succeed at all, so it has been gratifying to get this far. I'm looking forward to trying it out at Perisher (Australia) in a couple of weeks!
It was almost a year ago that I made a personal pledge to build my next snowboard. It's now a couple of weeks until my next snow trip, and the board is almost finished, so I thought I'd share some pics of the project. As I'm sure other builders can sympathise, it has been ridiculously time-consuming and quite a learning experience. Definitely not cheaper or easier than just buying a board, but much more rewarding. Can't wait to try it.
I designed the shape and camber profile in SolidWorks. A little different from anything I've seen on the market. 154cm length, 293mm nose and tail width, 260mm waist width, 7.4m sidecut radius, true twin and traditional camber between the contact points for carving the groomers, with extended nose and swallowtail for float in powder. Also shown is the camber profile / parts for the press.
Below is the CNC cut MDF template to be used for cutting the HDPE base to shape using a router follower bit. Base material plus topsheet, fibreglass and steel edge were all purchased from Skilab.
Cutting out the base using router follower bit while clamped to the base template:
Attaching the steel edge to the base using intermittent supergluing. For bending the edge material I made a sort of custom pair of pliers. It was a tricky job to do neatly - would be interested to know how others bend the edge.
Core was made from laminations of robusta pine with two tasmanian oak stringers running the length of the board at the width of the binding inserts, for added strength there. (I had trouble finding any better options for wood here in Perth, like poplar or maple.) Pictured here is it being clamped after gluing. After this it was run through a thicknesser on both sides to flatten it out properly.
CNC routing of the binding insert holes and a channel for pouring a polyurethane sidewall. My CNC is only 900x600mm bed size so the routing had to be done in two halves, with reference holes in the middle for alignment.
Pouring of the polyurethane into the channel for the sidewall:
Thicknessing the core in the CNC router, tapering the tip and tail down. The core is about 6mm thick under and between the bindings, tapering down to 2mm thick at the tip and tail.
Almost completed core below, after being cut out around the sidewall on the bandsaw. Last thing was to machine a small 1mm deep step around the edge to accommodate the edge material (since it protrudes slightly above the base).
Cutting laminations for assembling a press. In total the press was made from 20x laminations of 16mm MDF. One of the most time-consuming steps! I might have to make more than one snowboard with it, to justify the effort.
Laminations were clamped together between steel bars using M10 threaded rod + nuts.
8x M10 threaded rods used to clamp the two halves of the press together. In theory this should be good for a few tonnes of compression. (More would probably be better.)
Getting ready to do the layup. It was done upside down in the hope of keeping the base free of stray epoxy, i.e topsheet, fibreglass, core, fibreglass, base. Fibreglass used was 22oz/sqft triax. Epoxy used was West Systems 105 with the 206 slow hardener.
Layup in the press, left for 2 days to cure. Aluminium either side of the layup to prevent epoxy getting onto the wood parts of the press (and to give a nice smooth surface), and a 6mm layer of foam to accommodate any imperfections in the press.
Opening up the press - to my great relief the layers had stayed aligned well. The P1 (prototype 1) text was done with black spraypaint onto the core using a stencil before layup.
Nearly completed board - binding holes exposed using a countersink bit, and shape cut out approximately using a bandsaw following the steel edge. Still remains to clean up the edge on a linisher, add a sidewall bevel using a router somehow, sand some stray epoxy off the base then give it some wax.
I must confess I was not feeling confident that my first attempt at building a snowboard would succeed at all, so it has been gratifying to get this far. I'm looking forward to trying it out at Perisher (Australia) in a couple of weeks!