Doing things on the cheap
Posted: Wed Mar 20, 2019 11:31 am
This is my journal on my build thus far. It is a serious wall of text. The TLDR is that I will pull the board out and finish it this weekend. The weekend following I will ride it. I will update after finishing and after first ride.
Unlike many on this site I did not sit on the idea of making a snowboard (or skis) for much more than a few weeks. I tend to make extremely rash decisions but also try to spend almost no money. These two qualities are in constant contention.
I was introduced to the idea from watching the Every Third Thursday episode where they make a board with home depot supplies. This introduced me to the idea of making my own board and after watching several episodes I was sure I had the skills, tools, and capability to make a board. Not only did I think I could make a board well, but I thought that I could do it pretty cheaply too......I'm far enough in at this point to see the stupidity in that thought process.
To start I had to find materials and get them sourced. My wife is even cheaper than I am so I created a estimated budget to convince her that it wouldn't be that expensive. In my defense I honestly thought it wouldn't be at the time. I wanted to buy Canadian where possible and Kindred Snowboards gave was kind enough to sell me all the required materials. The only things I didn't buy from them were the core (which I made myself), and the epoxy as they didn't have any epoxy for unheated pressing. I ended up buying the epoxy from Snowboard Materials. Both of these companies were awesome to deal with.
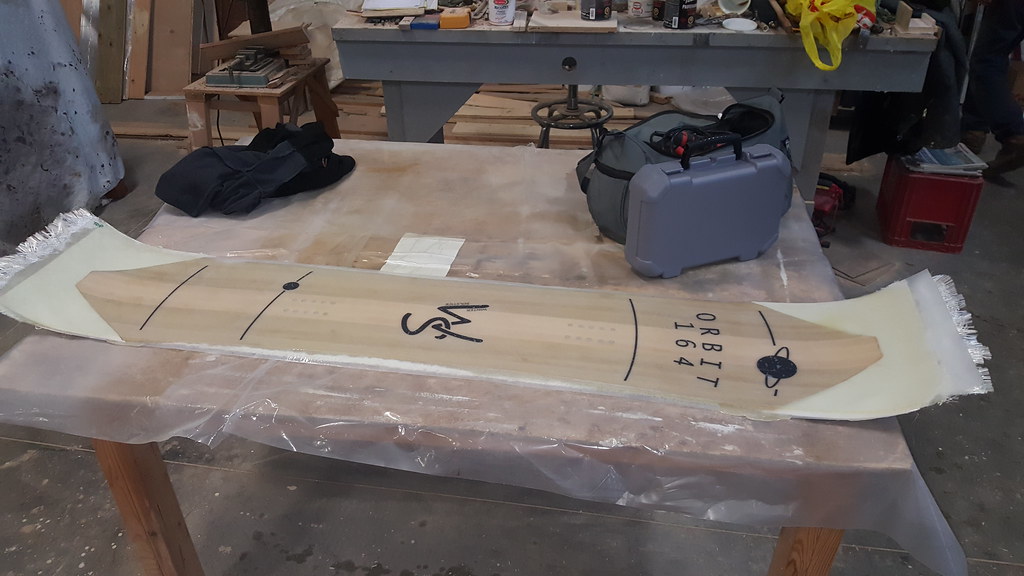
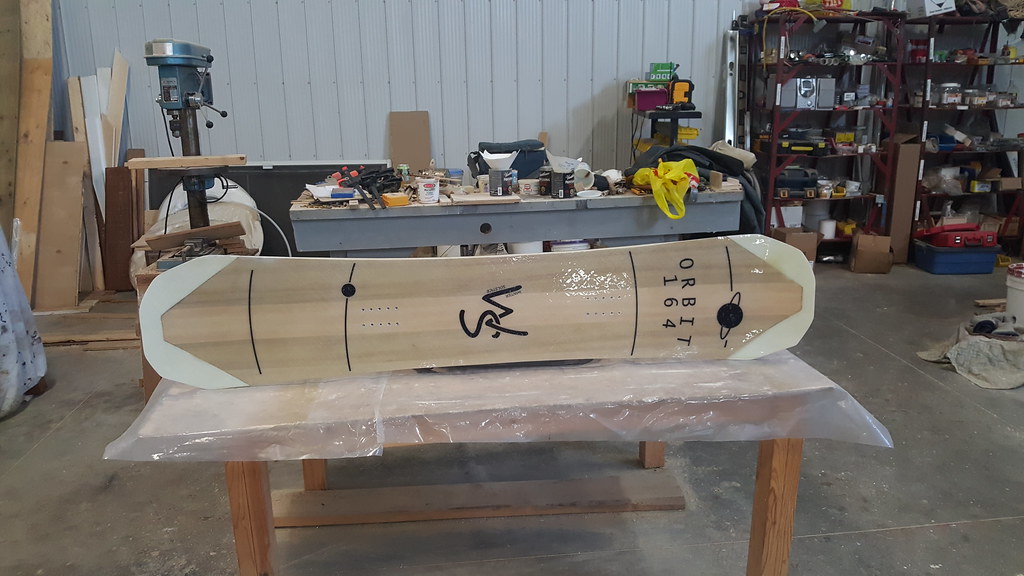
Onto the design. Long and wide board (164 cm long(measured without camber), 28cm waist), twin tip, blunted ends, Hybrid Camber (rockered tips, camber underfoot). I live in Ontario so powder boards make little sense here, and I despise toe and heel drag.
Now onto the part where you all groan at the thought of this. I wanted to do this board correctly so I was going to do plastic sidewalls, triax fibreglass, full wrap edges. Not going to get super complicated with the board design itself but I wanted all the "standard" technology.
Base material: Worked decently well. Routered out the shape with an MDF mold that I cut out by hand. Next board I will find a more accurate method to do this. Board is not perfectly symmetrical.
Full Wrap Edges: This went terribly. Edges were bent close enough I thought. Then I saw the post akiwi made about his first board. The consensus was that his edges weren't good enough and he had to rip them all off and try again. Mine were notably worse than his. I tore off all my edges and started again. Seeing how accurate I had to be and how long it takes for me to bend edges perfectly around the blunted tips I decided a 3/4 wrap was the way to go. I forgot to take pictures of the better results of the edges but you can see my absolutely brutal first attempt in the following pictures.


VDS: This worked great. No issues to report with this yet. Will see when it comes out of the press this weekend.
Fibreglass: Same as VDS. Seemed to be without problem. Didn't even trim it which may yet be a mistake.
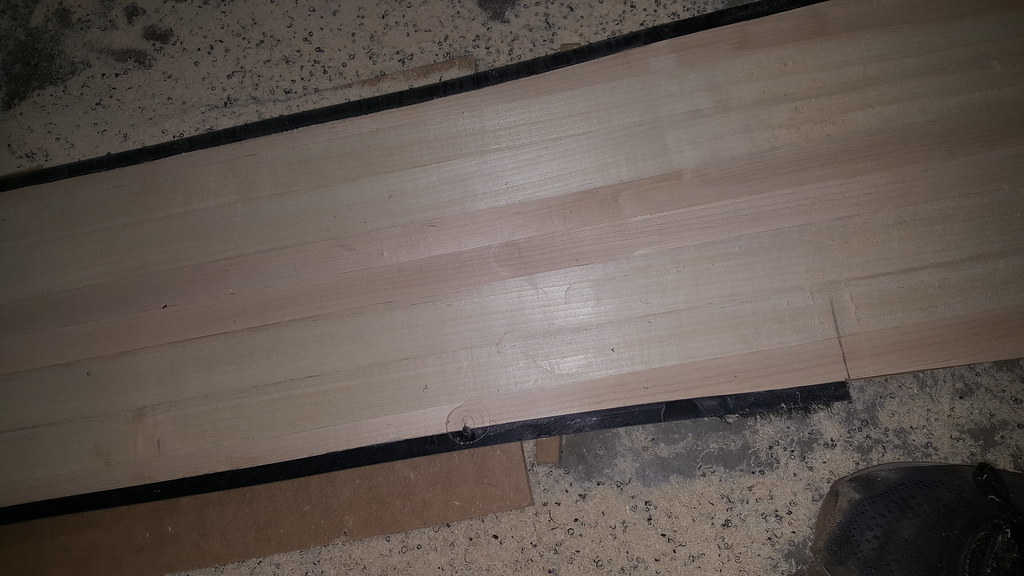
Sidewalls: First I had to plane these down to size. First thought was to use the planer I had (a Dewalt 3 blade planer). This primarily served as an efficient method of destroying some perfectly good sidewall material. My plan to plane down the core was to glue the sidewalls onto the core and then router them along with the core using a router jig to plane the whole core to size. I set-up the router jig to just plane the sidewalls down to the correct thickness which sort of worked but most certainly did not follow health and safety procedure. Following this they were glued to the core.
Core: This went pretty well at first. The idea was I would have maple in the center for better insert hold and maple on the edges for additional stiffness. Between this I would have poplar. A local supplier had some awesome boards with no knots, or cracks. Really good quality stuff. Glued the core together out of .5" thick strips. Then planed it down and used my offset core mold to router out the sidecut. This ripped the glued maple joint apart at one end. The ripped section was glued back onto the core and left for a day. The following day I climb milled this section with the router instead which worked much better. Once the sidecut offset was cut into the core I glued on the sidewalls with CA. This promptly fell apart so I used more and tried again. This seemed to work better and I went to taper this down.
Tapering: Using my MDF router jig I tapered the core to size. 7.5mm in the center down to 2mm at tip and tail. This worked pretty well until about 3mm thickness where the router ripped the entire sidewall off one end, chewed it up, and spat its mangled carcass out. I had some additional sidewall material I decided I would use to patch this section up so I continued on the other end. On the other end I tapered it down to only 3mm (as far as I got on the other end) in fear of the router wanting second breakfast. Now at this point I had made one smart decision and 2 lazy and cheap decisions. The smart decision was putting a screw in the tip end of the jig's rails to prevent the cradle from going all the way to the hold down screws and destroying the router bit. The 2 lazy and cheap decisions were that my jig was only for one end at a time and not the whole board which meant that if you go too far you can push the router cradle off and onto the core....The second lazy decision was thinking that I wouldn't make that mistake and I only needed a screw in the one end. See the results below. This was the end of core #1
Core2: I had a slight rethink on this core. I decided I hated sidewall material and I decided to only use maple in the center. This was due to my poplar being 8/4 poplar boards and my Maple being 5/4. The thicker poplar meant I could have a solid singular board throughout the whole sidecut. The only concern here was protecting the core from water damage. As luck would have it I found about 5 different posts by Sammer about this. I will use Boiled Linseed Oil to protect my edges once I cut out the board and finish the edges. You don't have to say it again. Since this core would simply extend to the edges of the board I cut out the sidecut slightly wider than necessary and will remove the additional when I cut off the flashing and finish the board.
Tapering2 : Having learned my lesson from last time I put stops on both ends and profiled my core down. This worked very well due to the lack of plastic sidewalls and the lessons learned previously. Their was unfortunately one more lesson to learn here. I profiled the core to 2mm thick on the ends with the intention of having a small UHMW tip/tail fill just around the outside of the ends as I don't trust the endgrains to be waterproof enough on their own. What happened was that as I profiled the core thinner and thinner the very thin wood began to lift away from the router table surface at the edges without me noticing and I profiled them to 1mm at the edges. Luckily the core was still 2mm in the center so I used a new tip/tail shape to cover my mistake and keep everything clean.
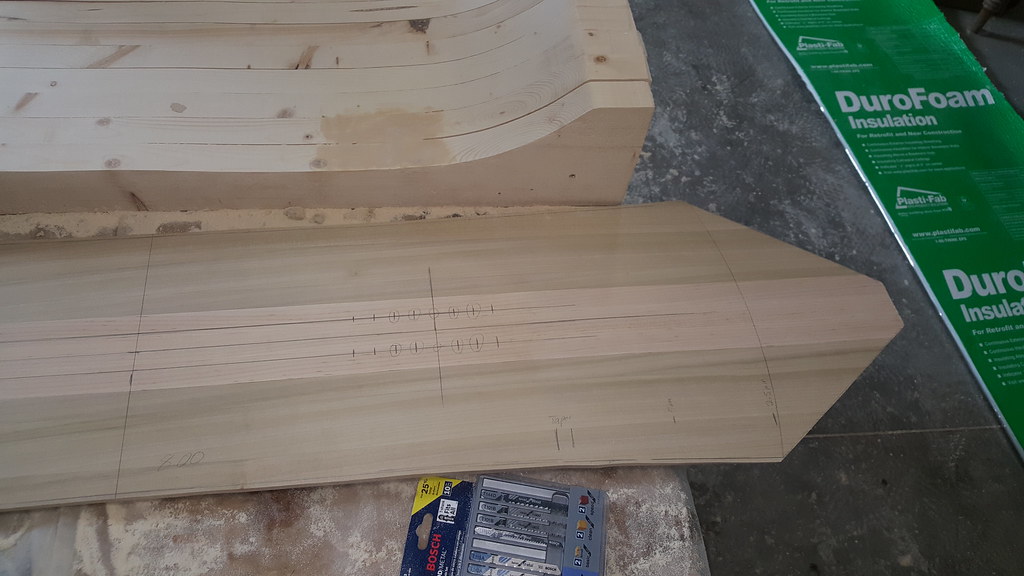

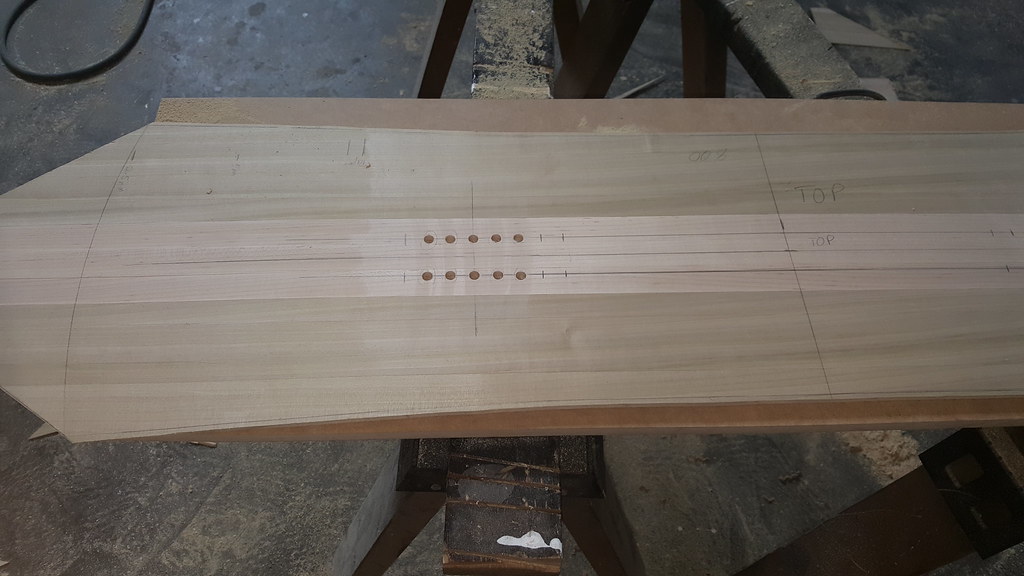
Insert Holes: I know many people on this site have a jig for this. Before the sidecut was removed I used a square and marked the insert holes by hand. I used the current stance on my board as the centers. Then I went one insert out from that set-up in both directions to make it adjustable if I change my stance. Their were several measurement checks and validations done on these before I drilled them to ensure I had it right. Once they were drilled I counter bored the other side for the backs of the inserts but i forgot to take a picture of this. I don't see a problem doing this by hand again for future boards but I do see potential for core ruining error here so it is probably worth making a jig for this.
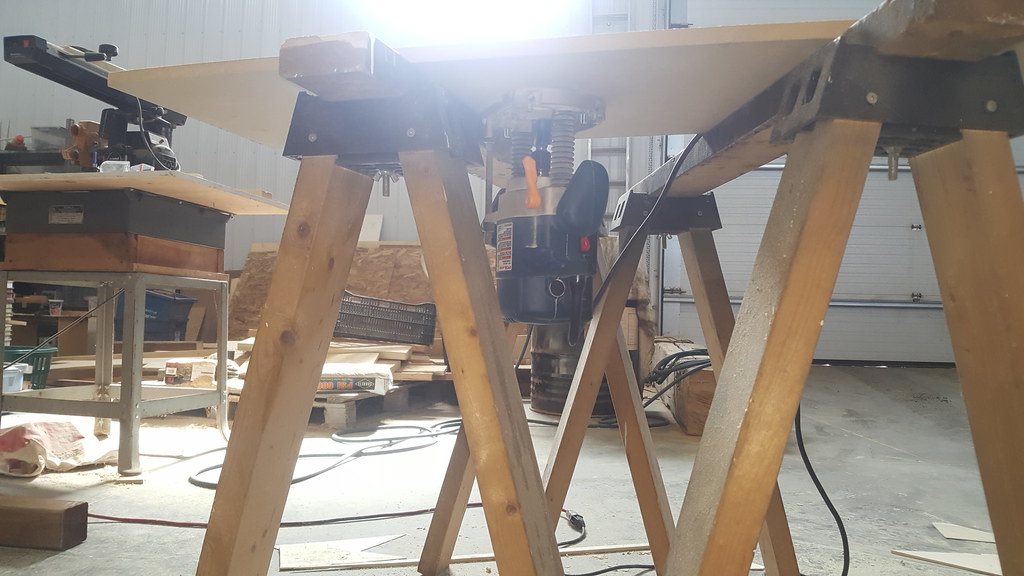
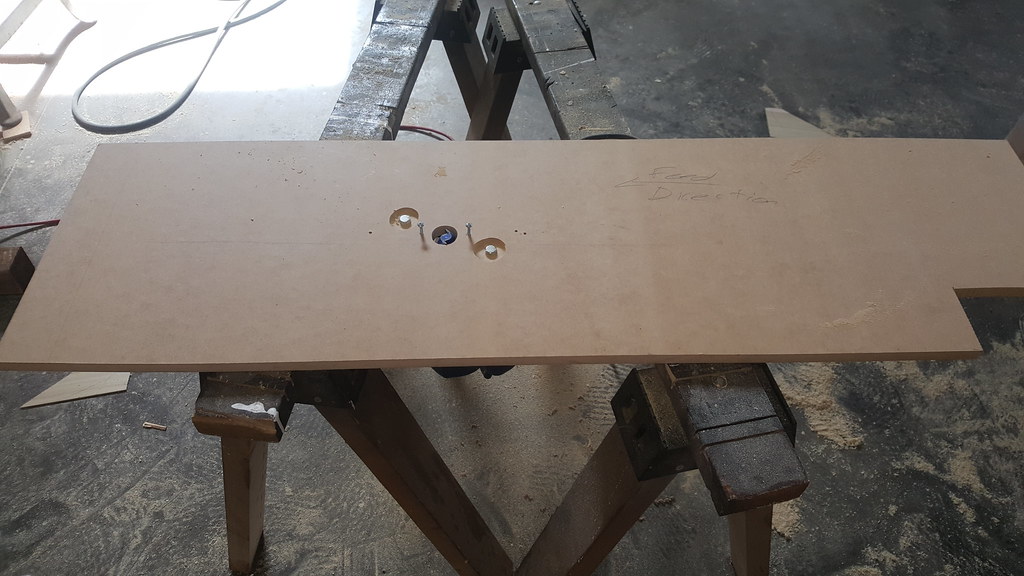
Rabbeting: Kindred Snowboards have been very friendly and helpful whenever I had questions. Due to my issues on the first core I was terrified of rabbeting the core and ruining another but they advised me that I might ruin the entire board if I don't. thought I would just do this with a router and a bit with a bearing. Unfortunately I didn't have a bearing bit with enough offset to go far enough in from the edge of the board to be useful so I thought about it and made a hackjob router table with some MDF and a few sawhorses. I used some screws as the fence by simply putting them where I think they should be and then testing on scrap wood. It worked perfectly and the rabbet came out as expected.
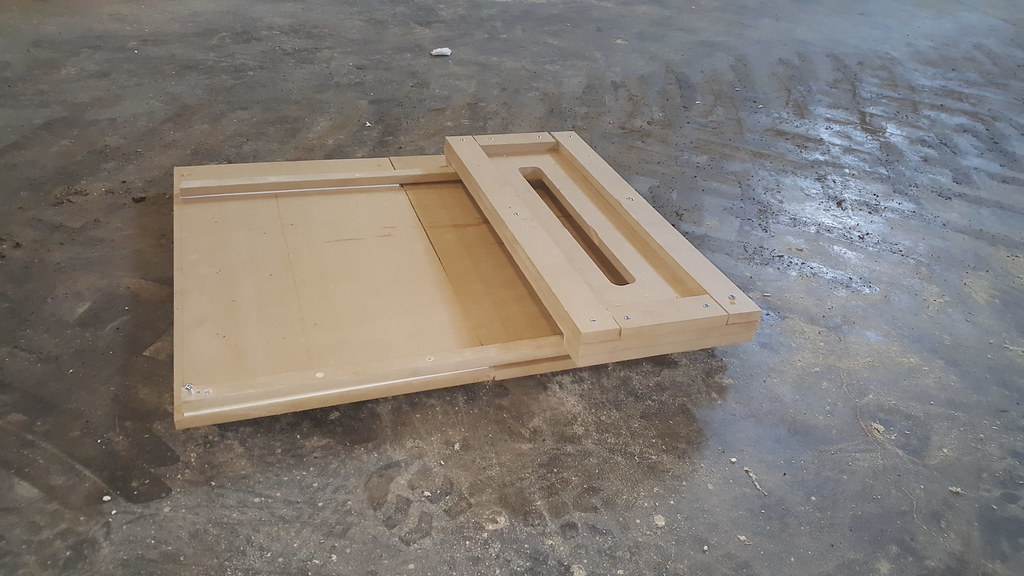
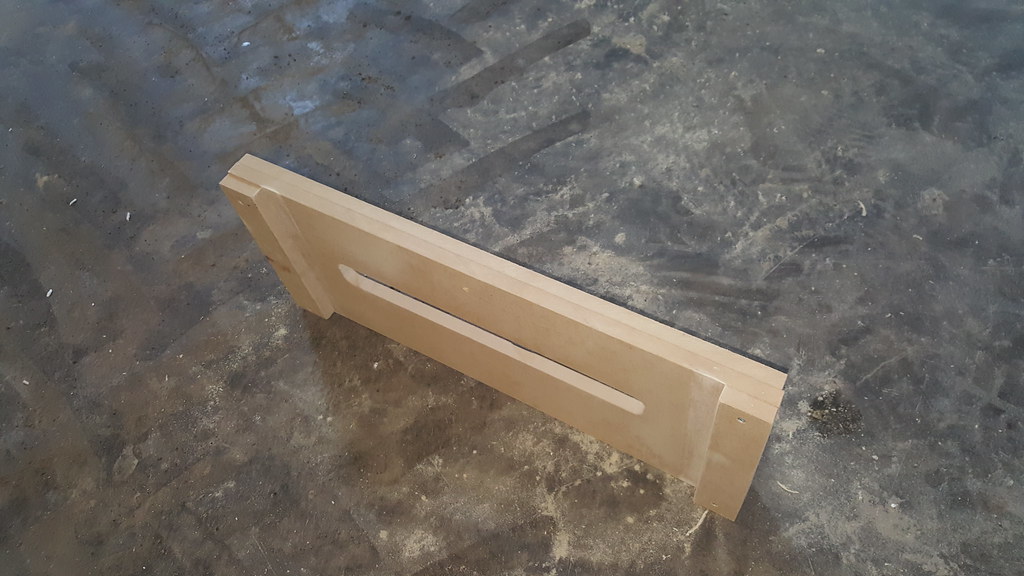
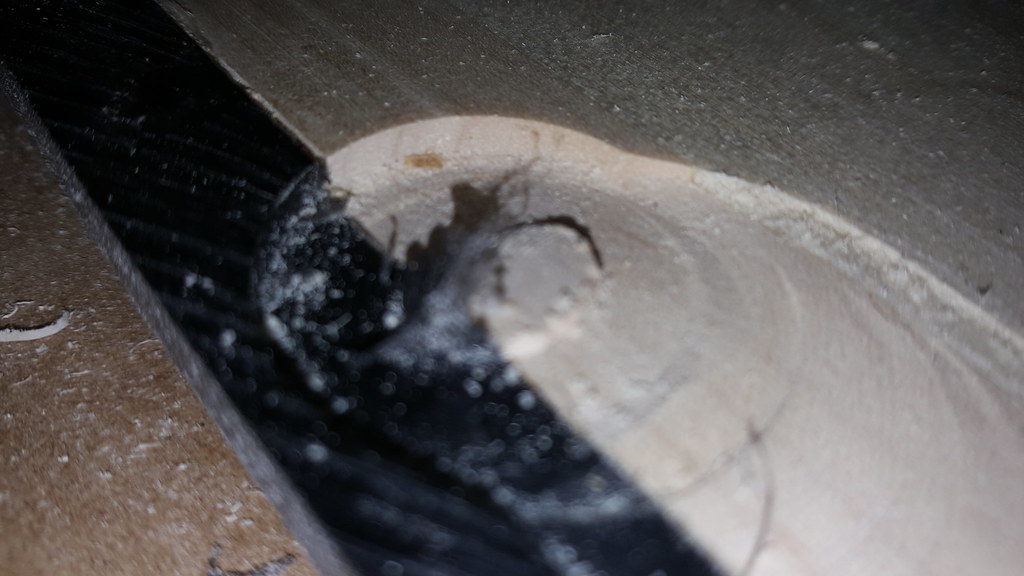
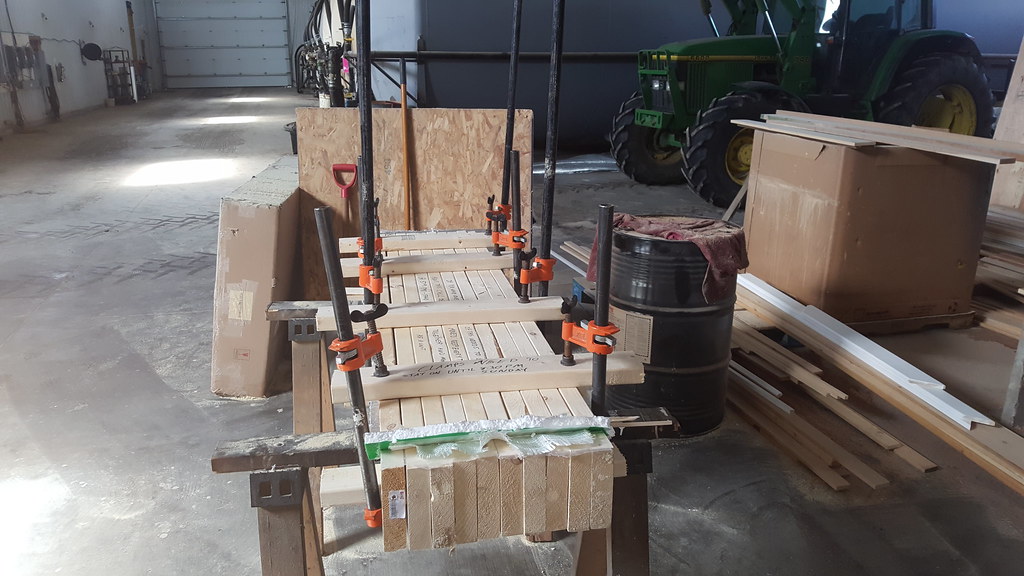
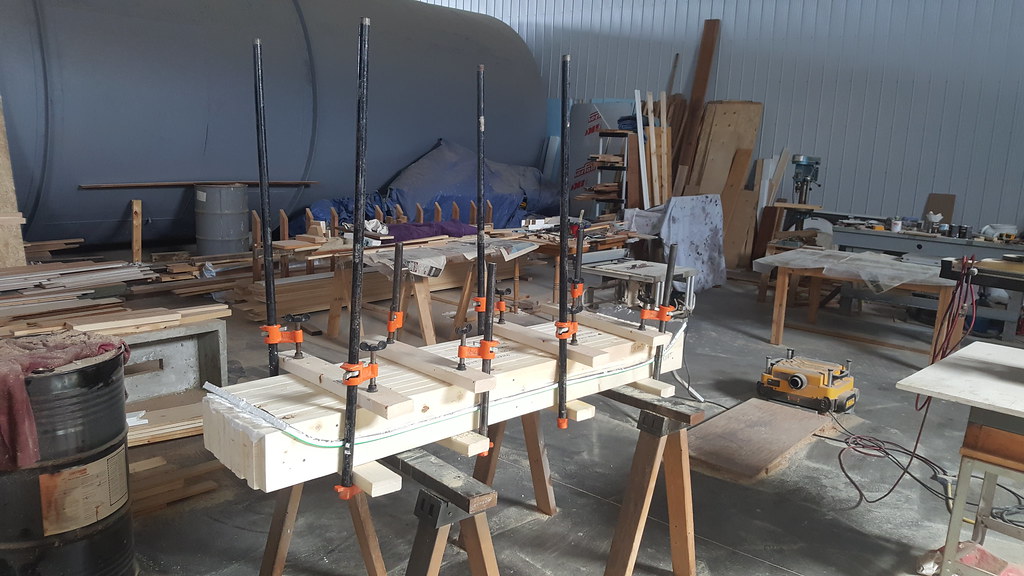
Press: Sorry everyone...I used a really simple wooden screw press for this. I designed the entire board layout and mold on SolidWorks. From here I printed the camber profile 1:1 and cut it out on an MDF template. I used this to cut the basic shape into 2 X 8 for both the top and bottom. Then using a flush trim router bit that was 2-1/2" long I routed them all out to the same shape and screwed the tops and bottoms together. I used a straight edge to check and with the help of a belt sander got them pretty much perfectly flat. Once this was done I put some spray adhesive on and coated the press in wax paper for release purposes. To keep pressure as even as possible across the whole mold I screwed 2 x 4 beams across the bottom of the mold and left some loose pieces for the top. Finally I got a sheet of siding material that would fit between the top and bottom molds to account for any variation between the two molds to maintain a more consistent pressure. I calculated out what the overall force would need to be for a board of this size at the 14 psi people say they get with a vacuum set-up. It came out to 11,000 lbf so I decided to use 8 wood clamps in total when I pressed. The woodfiller you see there is for a knot that pulled out during routing.

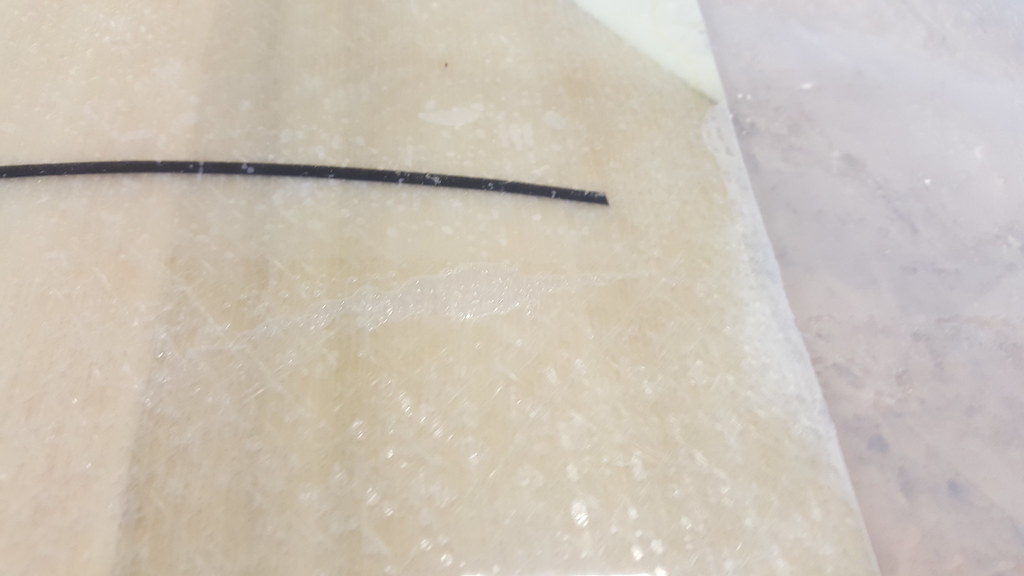
Visuals: These are fairly straightforward. Plain black base (not trying anything fancy here), clear top sheet, simple black graphics printed on rice paper lain on top of the upper fibreglass layer. I went with a clear top sheet because I wanted to be able to see any flaws. Tip and tail material is white. I hope this isn't my last build and I want to learn as much as possible from this.
Tip and Tail: The fill material I used here was put on with cloth medical tape as was suggested. There were 2 problems I had with this method. Many put it on the top where you can see it. I don't like that at all and so mine needed to be underneath. Second problem was that it stuck to the core and the fill material approximately as well on the front as it did on the back. I knew I needed to use a cloth based tape so instead of looking for an alternative I put some CA on the core and the tip fill material at certain spots and then stuck the tape to that. It worked really well but I do realize I may have intoduced a delamination risk using the CA. Time will tell.
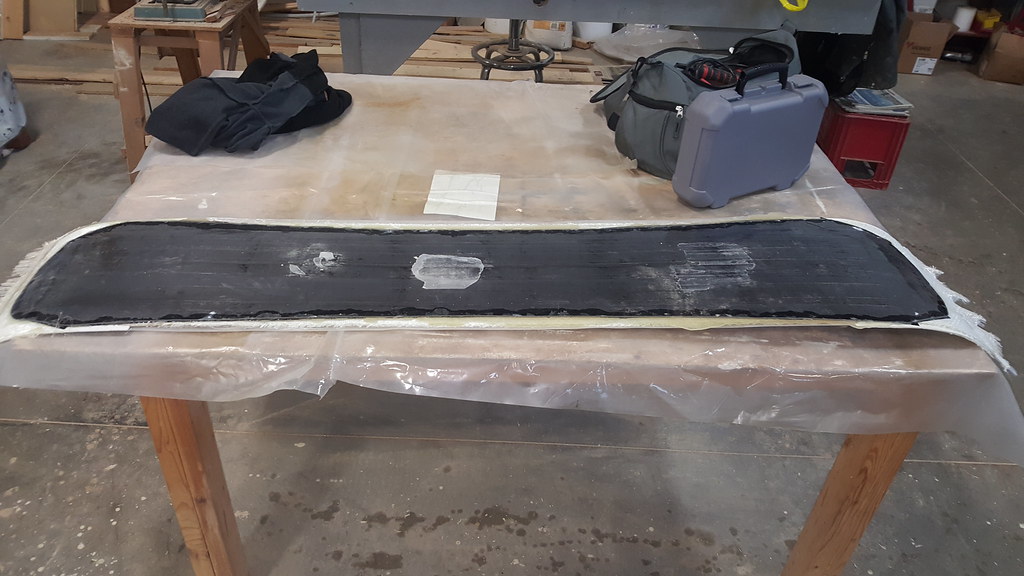
Layup: The final layup was quite straightforward. The graphics were cut out, I did a dry test run and then I disassembled the dry layup. Once I was prepared I got the nerves out and mixed the epoxy. From their the layup went smoothly. Only surprise was how thick epoxy is. If you haven't done it, it acts like liquid honey (or at least this particular epoxy did). It has a 25 min pot life so I set a timer at the moment I mixed the hardener. The dry layup was super critical as I didn't have a moment to spare. I probably didn't have the clamps fully screwed down until 28 mins overall which I hope doesn't cause me any problems. This epoxy recommends 24 hrs to set at room temperature so It got 36 hrs clamped and will get a full week just sitting in the mold before I deflash and finish it. Everything felt tight and like it had solid pressure on it except for one corner. I am hoping that this is only in the corner and that where the board itself is there is good pressure. I will check that for delam carefully once it is removed. The base was coated in the thickest packing tape I could find to prevent epoxy from sticking to it. I look forward to hours of misery pulling it off.
If you made it all the way to the bottom, well done. This weekend it will be removed, deflashed and finished. I will update once that is done.
BAR
Unlike many on this site I did not sit on the idea of making a snowboard (or skis) for much more than a few weeks. I tend to make extremely rash decisions but also try to spend almost no money. These two qualities are in constant contention.
I was introduced to the idea from watching the Every Third Thursday episode where they make a board with home depot supplies. This introduced me to the idea of making my own board and after watching several episodes I was sure I had the skills, tools, and capability to make a board. Not only did I think I could make a board well, but I thought that I could do it pretty cheaply too......I'm far enough in at this point to see the stupidity in that thought process.
To start I had to find materials and get them sourced. My wife is even cheaper than I am so I created a estimated budget to convince her that it wouldn't be that expensive. In my defense I honestly thought it wouldn't be at the time. I wanted to buy Canadian where possible and Kindred Snowboards gave was kind enough to sell me all the required materials. The only things I didn't buy from them were the core (which I made myself), and the epoxy as they didn't have any epoxy for unheated pressing. I ended up buying the epoxy from Snowboard Materials. Both of these companies were awesome to deal with.
Onto the design. Long and wide board (164 cm long(measured without camber), 28cm waist), twin tip, blunted ends, Hybrid Camber (rockered tips, camber underfoot). I live in Ontario so powder boards make little sense here, and I despise toe and heel drag.
Now onto the part where you all groan at the thought of this. I wanted to do this board correctly so I was going to do plastic sidewalls, triax fibreglass, full wrap edges. Not going to get super complicated with the board design itself but I wanted all the "standard" technology.
Base material: Worked decently well. Routered out the shape with an MDF mold that I cut out by hand. Next board I will find a more accurate method to do this. Board is not perfectly symmetrical.
Full Wrap Edges: This went terribly. Edges were bent close enough I thought. Then I saw the post akiwi made about his first board. The consensus was that his edges weren't good enough and he had to rip them all off and try again. Mine were notably worse than his. I tore off all my edges and started again. Seeing how accurate I had to be and how long it takes for me to bend edges perfectly around the blunted tips I decided a 3/4 wrap was the way to go. I forgot to take pictures of the better results of the edges but you can see my absolutely brutal first attempt in the following pictures.
VDS: This worked great. No issues to report with this yet. Will see when it comes out of the press this weekend.
Fibreglass: Same as VDS. Seemed to be without problem. Didn't even trim it which may yet be a mistake.
Sidewalls: First I had to plane these down to size. First thought was to use the planer I had (a Dewalt 3 blade planer). This primarily served as an efficient method of destroying some perfectly good sidewall material. My plan to plane down the core was to glue the sidewalls onto the core and then router them along with the core using a router jig to plane the whole core to size. I set-up the router jig to just plane the sidewalls down to the correct thickness which sort of worked but most certainly did not follow health and safety procedure. Following this they were glued to the core.
Core: This went pretty well at first. The idea was I would have maple in the center for better insert hold and maple on the edges for additional stiffness. Between this I would have poplar. A local supplier had some awesome boards with no knots, or cracks. Really good quality stuff. Glued the core together out of .5" thick strips. Then planed it down and used my offset core mold to router out the sidecut. This ripped the glued maple joint apart at one end. The ripped section was glued back onto the core and left for a day. The following day I climb milled this section with the router instead which worked much better. Once the sidecut offset was cut into the core I glued on the sidewalls with CA. This promptly fell apart so I used more and tried again. This seemed to work better and I went to taper this down.
Tapering: Using my MDF router jig I tapered the core to size. 7.5mm in the center down to 2mm at tip and tail. This worked pretty well until about 3mm thickness where the router ripped the entire sidewall off one end, chewed it up, and spat its mangled carcass out. I had some additional sidewall material I decided I would use to patch this section up so I continued on the other end. On the other end I tapered it down to only 3mm (as far as I got on the other end) in fear of the router wanting second breakfast. Now at this point I had made one smart decision and 2 lazy and cheap decisions. The smart decision was putting a screw in the tip end of the jig's rails to prevent the cradle from going all the way to the hold down screws and destroying the router bit. The 2 lazy and cheap decisions were that my jig was only for one end at a time and not the whole board which meant that if you go too far you can push the router cradle off and onto the core....The second lazy decision was thinking that I wouldn't make that mistake and I only needed a screw in the one end. See the results below. This was the end of core #1
Core2: I had a slight rethink on this core. I decided I hated sidewall material and I decided to only use maple in the center. This was due to my poplar being 8/4 poplar boards and my Maple being 5/4. The thicker poplar meant I could have a solid singular board throughout the whole sidecut. The only concern here was protecting the core from water damage. As luck would have it I found about 5 different posts by Sammer about this. I will use Boiled Linseed Oil to protect my edges once I cut out the board and finish the edges. You don't have to say it again. Since this core would simply extend to the edges of the board I cut out the sidecut slightly wider than necessary and will remove the additional when I cut off the flashing and finish the board.
Tapering2 : Having learned my lesson from last time I put stops on both ends and profiled my core down. This worked very well due to the lack of plastic sidewalls and the lessons learned previously. Their was unfortunately one more lesson to learn here. I profiled the core to 2mm thick on the ends with the intention of having a small UHMW tip/tail fill just around the outside of the ends as I don't trust the endgrains to be waterproof enough on their own. What happened was that as I profiled the core thinner and thinner the very thin wood began to lift away from the router table surface at the edges without me noticing and I profiled them to 1mm at the edges. Luckily the core was still 2mm in the center so I used a new tip/tail shape to cover my mistake and keep everything clean.
Insert Holes: I know many people on this site have a jig for this. Before the sidecut was removed I used a square and marked the insert holes by hand. I used the current stance on my board as the centers. Then I went one insert out from that set-up in both directions to make it adjustable if I change my stance. Their were several measurement checks and validations done on these before I drilled them to ensure I had it right. Once they were drilled I counter bored the other side for the backs of the inserts but i forgot to take a picture of this. I don't see a problem doing this by hand again for future boards but I do see potential for core ruining error here so it is probably worth making a jig for this.
Rabbeting: Kindred Snowboards have been very friendly and helpful whenever I had questions. Due to my issues on the first core I was terrified of rabbeting the core and ruining another but they advised me that I might ruin the entire board if I don't. thought I would just do this with a router and a bit with a bearing. Unfortunately I didn't have a bearing bit with enough offset to go far enough in from the edge of the board to be useful so I thought about it and made a hackjob router table with some MDF and a few sawhorses. I used some screws as the fence by simply putting them where I think they should be and then testing on scrap wood. It worked perfectly and the rabbet came out as expected.
Press: Sorry everyone...I used a really simple wooden screw press for this. I designed the entire board layout and mold on SolidWorks. From here I printed the camber profile 1:1 and cut it out on an MDF template. I used this to cut the basic shape into 2 X 8 for both the top and bottom. Then using a flush trim router bit that was 2-1/2" long I routed them all out to the same shape and screwed the tops and bottoms together. I used a straight edge to check and with the help of a belt sander got them pretty much perfectly flat. Once this was done I put some spray adhesive on and coated the press in wax paper for release purposes. To keep pressure as even as possible across the whole mold I screwed 2 x 4 beams across the bottom of the mold and left some loose pieces for the top. Finally I got a sheet of siding material that would fit between the top and bottom molds to account for any variation between the two molds to maintain a more consistent pressure. I calculated out what the overall force would need to be for a board of this size at the 14 psi people say they get with a vacuum set-up. It came out to 11,000 lbf so I decided to use 8 wood clamps in total when I pressed. The woodfiller you see there is for a knot that pulled out during routing.
Visuals: These are fairly straightforward. Plain black base (not trying anything fancy here), clear top sheet, simple black graphics printed on rice paper lain on top of the upper fibreglass layer. I went with a clear top sheet because I wanted to be able to see any flaws. Tip and tail material is white. I hope this isn't my last build and I want to learn as much as possible from this.
Tip and Tail: The fill material I used here was put on with cloth medical tape as was suggested. There were 2 problems I had with this method. Many put it on the top where you can see it. I don't like that at all and so mine needed to be underneath. Second problem was that it stuck to the core and the fill material approximately as well on the front as it did on the back. I knew I needed to use a cloth based tape so instead of looking for an alternative I put some CA on the core and the tip fill material at certain spots and then stuck the tape to that. It worked really well but I do realize I may have intoduced a delamination risk using the CA. Time will tell.
Layup: The final layup was quite straightforward. The graphics were cut out, I did a dry test run and then I disassembled the dry layup. Once I was prepared I got the nerves out and mixed the epoxy. From their the layup went smoothly. Only surprise was how thick epoxy is. If you haven't done it, it acts like liquid honey (or at least this particular epoxy did). It has a 25 min pot life so I set a timer at the moment I mixed the hardener. The dry layup was super critical as I didn't have a moment to spare. I probably didn't have the clamps fully screwed down until 28 mins overall which I hope doesn't cause me any problems. This epoxy recommends 24 hrs to set at room temperature so It got 36 hrs clamped and will get a full week just sitting in the mold before I deflash and finish it. Everything felt tight and like it had solid pressure on it except for one corner. I am hoping that this is only in the corner and that where the board itself is there is good pressure. I will check that for delam carefully once it is removed. The base was coated in the thickest packing tape I could find to prevent epoxy from sticking to it. I look forward to hours of misery pulling it off.
If you made it all the way to the bottom, well done. This weekend it will be removed, deflashed and finished. I will update once that is done.
BAR