
And: The season here lasts until 3rd of may, so I will have time to test the ski :)
I reflamed the base material of course before laminating on it again. At first I worried that the heat might cause issues with the material that was laminated in the first press cycle. But even if it destroys the outermost epoxy parts - at least 0.1mm, more likely 0.2mm will be taken away before the ski will be ridden the first time.
Puzzle Skis
Moderators: Head Monkey, kelvin, bigKam, skidesmond, chrismp
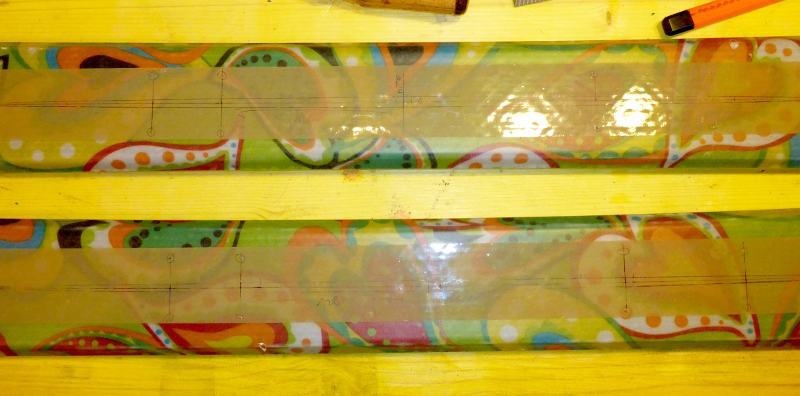
So, lets have a look at the result. The colors are not as bright as they could because the carbon shows though, but I knew that before laminating today. They will come out better than on the pics though, as the thin protection film is still on the topsheet, "dampening" the looks a bit.
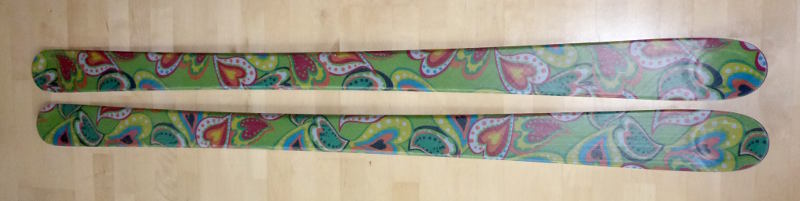
Ah, hope you like hippie design :)
The Skis:
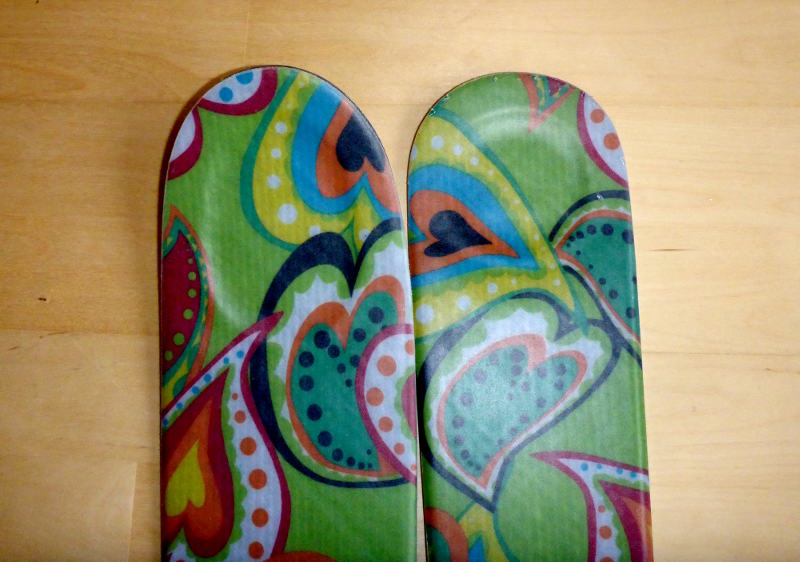
Hollow tip and tail:
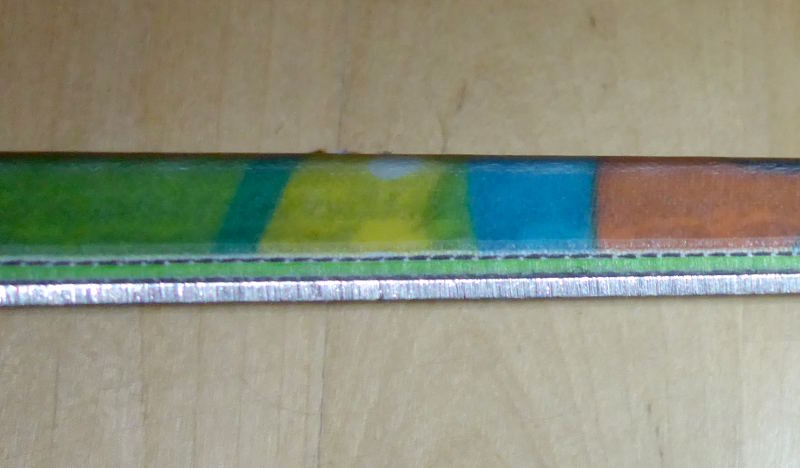
Side view of the cap:
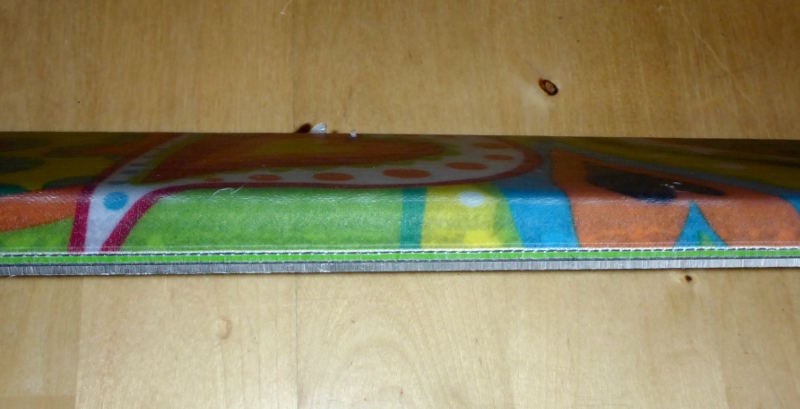
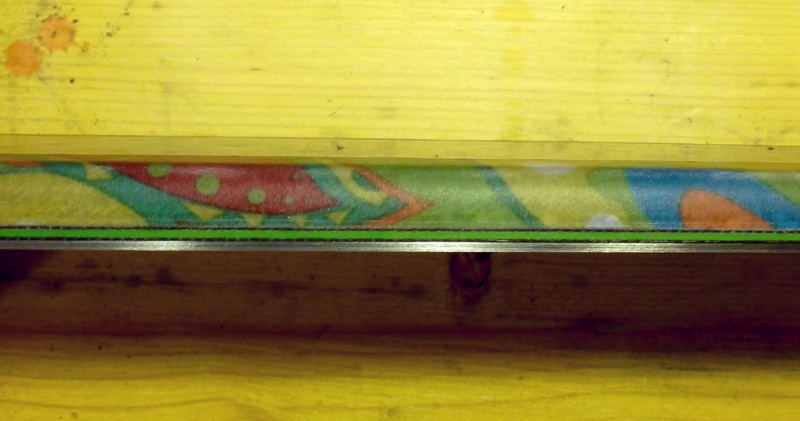
Closeup of the side, from bottom to top: Edge, VDS, carbon, green base inlay, carbon, design, topsheet.
So, what are the things that went so well?
What will I improve/change with the next build?
Ah, hope you like hippie design :)
The Skis:
Hollow tip and tail:
Side view of the cap:
Closeup of the side, from bottom to top: Edge, VDS, carbon, green base inlay, carbon, design, topsheet.
So, what are the things that went so well?
- Clearly on top of the list: pressing the cap. There is not a single point on the skis which is uneven or so. I wasnt sure if the topsheet would like the cap press, but it worked like a charm.
- My idea of eliminating bubbles under the topsheet worked 100%. There is not a single bubble somewhere. What did I do? I turned the topsheet upside down (not on the ski, on a flat surface), and epoxied the design layer on it. Then I turned it back again and put it on the ski - thats it. So if some air is trapped, its between the design and the carbon, not between the design and the topsheet.
Original thread for the idea: http://www.skibuilders.com/phpBB2/viewtopic.php?t=4830
- I cut the topsheet roughly before laminating. There was about 1cm extra on each side. The unneeded resin was able to flow out under the topsheet - I doubt that works if the topsheet is not cut into shape
- Hollow tip and tail concept works - The hollow part is not too soft, and it looks good.
What will I improve/change with the next build?
- I will add more white color to the resin and add a thin layer of white fabric on top of the carbon, so the colors of the design will be really bright.
- As the resin is able to flow out under the topsheet, I will press the top of the ski in ine cycle.
- I will not add any extra layers (like extra vds or thin carbon) above/below the green base inlay - makes everything too complicate.d
- I will have a straight cut between wood core and tip spacer - that half round thing I did at this ski is way too complicated and even makes the base a bit concave in that area.
- I wont accidentally hit the edge with the router when doing the 30° for the cap :)
Last edited by pmg on Fri Apr 17, 2015 10:28 pm, edited 1 time in total.
@Tom: Thats why it was so important to me to successfully cap-press the topsheet. Hope that this 0.5mm topsheet will protect the ski fairly well. I also rounded the top corners quite well (not visible so well on the pics) so the steel edges shouldn't chop in so bad at a single point.
And even if the topsheet is gone, there is still 0.7mm carbon on top of the wood everywhere.
And even if the topsheet is gone, there is still 0.7mm carbon on top of the wood everywhere.
Regarding weight: At the moment the skis are 1530g. So after grinding them and removing the protection layer of the topsheet, they will be somewhere about 1500g or a bit less. Not as light as I thought it would get, but still a nice weight for a stiff ski with this dimensions. They are 1,75 cm long and have 86 mm underfoot.
Thanks for all the sugar :)
The thing I am stoked about is that all the new things I tried in this ski are a success... its quite a list:
1) Hollow Tip/Tail
2) The base strings above the edge
3) Pressing cap with a topsheet to make the ski last long
4) No bubbles under the topsheet.
Now I know that the most important parts of this process work, so I can start fine-tuning. The one thing I will fine-tune is the colors. I will hopefully manage to get a layer white enough (thinking of either normal white fabric with white epoxy or thin fiberglass with white epoxy) below the design so the hippie harts come out as damn bright as they are.
Regarding 3): What I did not mention yet is that I heightened the press mold by 6mm under the ski where its cap (tip and tail are not cap). Took 2 3mm hardboards and quickly routed it in ski shape . Like this I got enough pressure on the sides, otherwise the cap wouldnt have worked so well.
Regarding 4): There is some trapped air, but between the design and the carbon below. With the next ski I will try to monimize that as well - should quite go on its own when pressing all the top layers together. Now I know that the unneeded resin can escape to the sides under the topsheet.
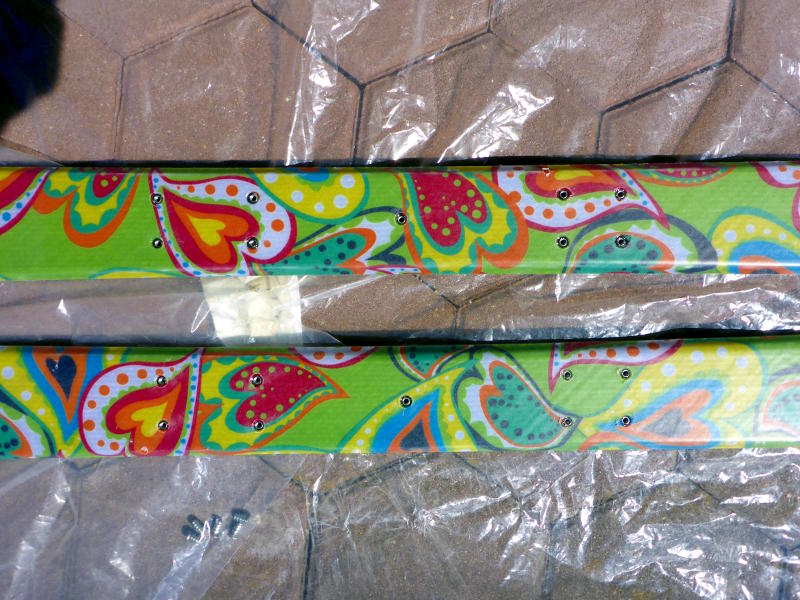
Time for mounting the binding... wanted to do that now (9:30pm), but figured my small room in the cellar is directly below our sleeping room where my girl sleeps with our baby daughter. So no drilling holes, test postproned to somewhen else.
One important thing I always knew, and now had the confirmation: Always double check with the binding that the holes you marked are really correct. In my case one of the marked holes was 3mm off - my notes had an error. Luckily I didn't rush though the temptation was big (wanna test em!!!) and found out before f***ing up my best build so far with misdrilled holes.
Marked holes
And a closeup of the side, now with grinded edges - the green comes out really nice, will take some daylight pics tomorrow.
And some more - a picture in daylight:

From a distance the imperfections of the triax carbon can be seen. So the next ski will have a fibreglass layer on top of the triax to make the surface below the design plain. Not a fibreglass "gelege" (e.g. +45° and -45° layers on top of each other), but a webbing.
For mounting the binding, I use my cheap version of binding freedom. (Rampa, 100 pieces cost 15€ only). at the moment, I am waiting for the epoxy to cure:
Nice work. Inserts probably aren't necessary if you used decent hardwood in the mount zone. I used to use them but found them more of a PITA than anything else.
For the fiberglass pattern a light FG or CF veil material might get rid of that for you without adding to the stiffness of the ski.
For the fiberglass pattern a light FG or CF veil material might get rid of that for you without adding to the stiffness of the ski.
Fighting gravity on a daily basis
www.Whiteroomcustomskis.com
www.Whiteroomcustomskis.com
Well, I mainly use them at the moment because I only have one pair of Marker Kingpin bindings, my new favourite ;) So I switch the binding from ski to ski, only way to do that again and again are inserts.vinman wrote:Nice work. Inserts probably aren't necessary if you used decent hardwood in the mount zone. I used to use them but found them more of a PITA than anything else.
Its a bit more work than just mounting the binding with screws, but once its done its great - even if you put on a new binding, there is no need to fill the old screw holes. And of course they can take much more force before they are torn out.
I never tore out a ski binding so far, but saw quite a few... and as there is poplar under the binding, this is the safer way to go.