Acka Skis

Document your personal work here. Show photos, movies, and share your secrets.

Moderators: Head Monkey, kelvin, bigKam, skidesmond, chrismp

Acka
Posts: 28
Joined: Sun Aug 11, 2013 2:32 pm
Location: Denver, CO

Acka Skis

Post by Acka »

This site has been an inspiration. I have been a passive reader here for over two years. I have learned so much, and read so many thought provoking questions... My entry into ski building had some interesting limitations, so my approach is a combination of best practices discovered here and compromises (like nothing but parking a car allowed in the garage where I was renting when I started this).

I spent nearly a year tooling up, making my templates, making a press from scratch, planning, adapting, etc.. I finished my first pair of skis in time to use them for 2014 spring skiing, which exceeded my expectations - since the first pair was just a proof-of-concept. I never thought the first would see snow.

The Concept:
Image

I'm getting ahead of myself. Lots of pictures and description to follow. I hope some of the adaptions I've made to overcome my set of constraints can serve some new builder as inspiration.

-Acka
Last edited by Acka on Mon Oct 20, 2014 8:36 pm, edited 3 times in total.
Acka
Posts: 28
Joined: Sun Aug 11, 2013 2:32 pm
Location: Denver, CO

Post by Acka »

Design:
I was lucky enough to get my design set using SnowCad (which has since stopped working).
My first design is:
  • Overall Length: 190cm
  • Tip Width: 135cm
  • Waist Width: 98cm
  • Tail Width: 120cm
  • Sidecut Radius: 19m
  • Length of Camber: 150cm
  • Length of Tip: 26cm
  • Length of Tail: 14cm
  • Height of Tip: 5cm
  • Height of Tail: 3cm
  • Height of Camber: 2cm
Image
Last edited by Acka on Mon Oct 20, 2014 8:37 pm, edited 1 time in total.
Acka
Posts: 28
Joined: Sun Aug 11, 2013 2:32 pm
Location: Denver, CO

Post by Acka »

Equipment:

I have a limited budget, so this project was be done with minimal tools. Part of the enjoyment I get from projects like this is figuring out ways to build what I need - safely - with what I have. Sometimes I have to make a template in order to make a template in order to make template in order to make the part I actually want - but I enjoy this.

I'm including this to emphasize it doesn't take fancy equipment to make skis. The tools I required to make my own skis:
  • Router
  • Circular Saw
  • Jig Saw
  • Dremel
  • Drill
  • Basic hand tools
Last edited by Acka on Mon Oct 20, 2014 8:38 pm, edited 1 time in total.
Acka
Posts: 28
Joined: Sun Aug 11, 2013 2:32 pm
Location: Denver, CO

Post by Acka »

Constraints

I mentioned I had some constraints that I had to design around. The primary limitation was that at the time I had a rented garage in which the only power outlet was on the ceiling for the door opener, and I needed to make minimal noise especially at night.

The work-around solution was to design a press which would maintain pressure without electricity or noise. I needed one that doesn't require a compressor to run. I knew this would be suboptimal, so I held the design to something which would keep as many parts reusable when I can upgrade to a steel-beam pneumatic press later on.

I was thrilled when I found this thread by Schoeckl. This hydraulic clamp press concept allowed me to build molds, bladder, etc. which would easily be converted to pneumatic with the only changes being exchanging the clamps for a steel frame. Hurray!
Acka
Posts: 28
Joined: Sun Aug 11, 2013 2:32 pm
Location: Denver, CO

Post by Acka »

Molds:

I knew I wanted an adjustable mold - but there are so many variations you can see examples of around this forum - that I spent a lot of time figuring out a design I would want. The main flexibility I wanted was in creating different lengths of skis (as opposed to different cambers), so I settled on a design with a fixed constant camber and adjustable & interchangeable tip and tail sections.

getting basic shape cut. All 5 main pieces of the final mold were formed from these rectangles.
Image

Camber section ready for skim layer:
Image

Lower mold ready to go. Tip and Tail can be re-positioned for different lengths, or swapped out for different shapes:
Image
Last edited by Acka on Tue Oct 21, 2014 7:50 am, edited 1 time in total.
Dtrain
Posts: 549
Joined: Wed May 18, 2011 12:03 pm
Location: Prince Rupert/Terrace B.C.

Post by Dtrain »

I'm fired up to see more!
Acka
Posts: 28
Joined: Sun Aug 11, 2013 2:32 pm
Location: Denver, CO

Post by Acka »

Molds (continued):

Upper mold needed to adjust to different length skis, but didn't need to be an exact match thanks to the bladder.

Upper mold consists of two interlocking halves, which can slide to adjust the length:
Image

Image

Molds are roughly 18 inches wide. Although I pressed each ski of my first pair separately - to allow me more time for layup and to include what I learned from the 1st into the 2nd - I wanted to ensure my whole setup was plenty wide to press pairs of skis together, or a snowboard, in the future.
Acka
Posts: 28
Joined: Sun Aug 11, 2013 2:32 pm
Location: Denver, CO

Post by Acka »

Bladder:

I relied heavily on the advice from these forums when figuring out the bladder. Thanks especially to Head Monkey for the advice on fittings available at: http://www.happymonkeysnowboards.com/Mo ... nstruction

I was unable to source local used fire hose, so I ordered agricultural hose from globalindustrial.com. 8" Medium Duty Layflat PVC discharge hose. Its rated to 115 psi and is 12.5" wide when flat.

Fittings per Head Monkey:
ImageImage

Initially I clamped with 4 bolts on each end. The arrangement developed some leaks at around 30psi. In this picture you can see the hose pulled itself back into the clamp between the center bolts:
Image

I didn't want to fuss around with multiple iterations, and since it's hydraulic - draining, drying, and refilling the hose with water for each "fix". So I went for overkill after the first leak. I increased bolts from 4 to 7, added additional washers stepping up to larger sizes, put marine grade adhesive inside the hose ends, and added rope across the hose between the clamps like a raised gasket to localize the force of the clamp into one good seal.
Image

After allowing several days for the marine adhesive to cure, this bladder tested up over 40psi with no leaks. Success!

As a side note: since pressing psi is always debated on here... This bladder puts down a contact area roughly 900in^2. So my target ~35psi pressure puts down ~31,500 lbs. I think if we all used lbs or kg force in our discussions we would have less confusion over appropriate pressing force to use, since each of our bladders is slightly different
Last edited by Acka on Thu Oct 23, 2014 10:46 am, edited 1 time in total.
Acka
Posts: 28
Joined: Sun Aug 11, 2013 2:32 pm
Location: Denver, CO

Post by Acka »

Press:

As I mentioned before, the press needs to start out its life has a hydraulic clamp press due to limitations with my work-space.

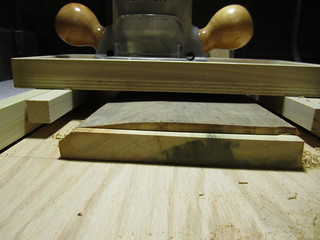
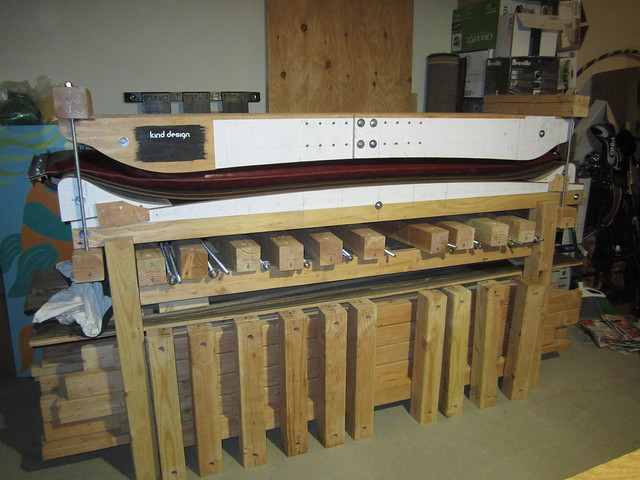
The press utilizes 12 clamps, which each consist of 4x4 lumber and 1/2 all-thread rods. The rod I'm using is rated for 5000lbs. The 4x4's would be the first thing to fail in this design, and they give convenient warning noises if I approach their limit. I was very nervous about the press and did lots of cautious testing.

This brings up my single favorite aspect of hydraulic pressure vs. pneumatic: In being cautious about the safety of the design, I was very nervous about a wooden pneumatic press (and I would continue to advise anyone against it).
  • Since air is compressible, when the volume of the chamber (bladder) changes, it will expand and lose some pressure, but retain much of it. In addition - if the compressor was running it would work to bring the pressure back up. In a design like mine, this would mean that if one clamp failed, the remained clamps would still have a job to do, and with each failure, the force on the remaining clamps would actually increase, instead of dissipating. This would be a dangerous chain reaction which could send failed clamps shooting off. Not Good....
  • Hydraulics are non-compressible (water is near enough for this argument). This means that huge changes in pressure will occur with almost no change in volume. When this property is applied to a clamp style press, the safety of the press does a complete turn around vs. compressed air. As soon as one of my clamps even *started* to fail, the relief in force and tiny change in volume would drastically decrease the pressure. Since no pump is utilized, the pressure is not restored by the system, so pressure immediately drops at the first signs of failure, thus saving the press and not sending parts flying.
I won't dispute the advantages of a pneumatic press. It is my goal to build one eventually. They are very efficient, and would greatly increase production capabilities. My current press takes nearly 15 minutes to assemble and crank up to pressure once the ski layup is inside... There are many many disadvantages to my current press.... However, for someone without a strong (read: safe) steel structure to contain the forces of a normal pneumatic press, and without electricity or running a pump, I think this is a valid option and is working well for me.

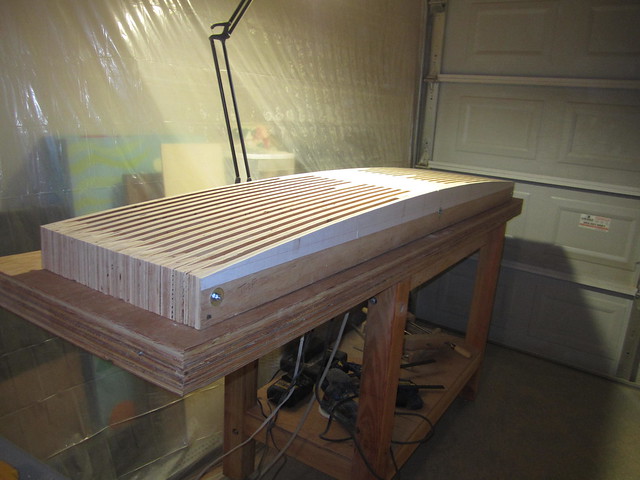
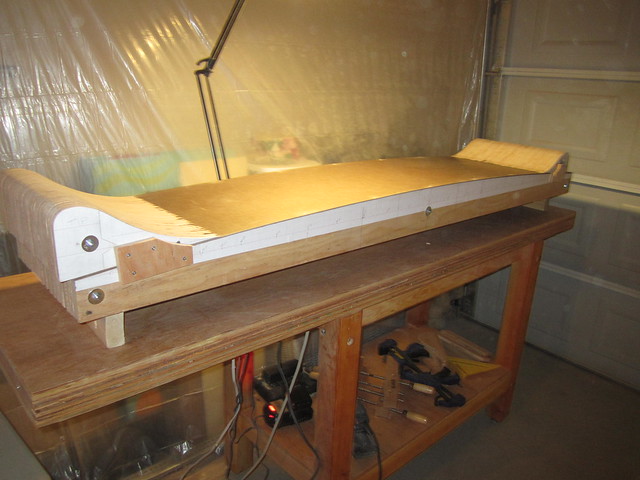
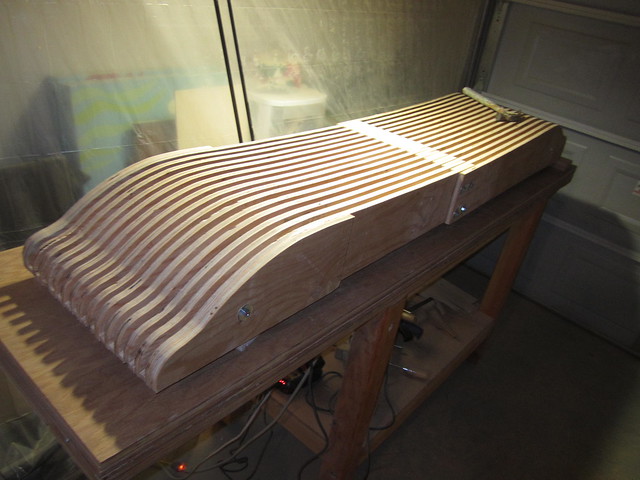
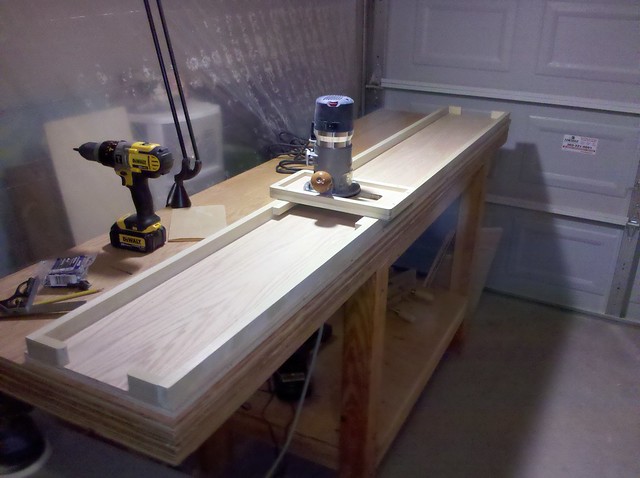
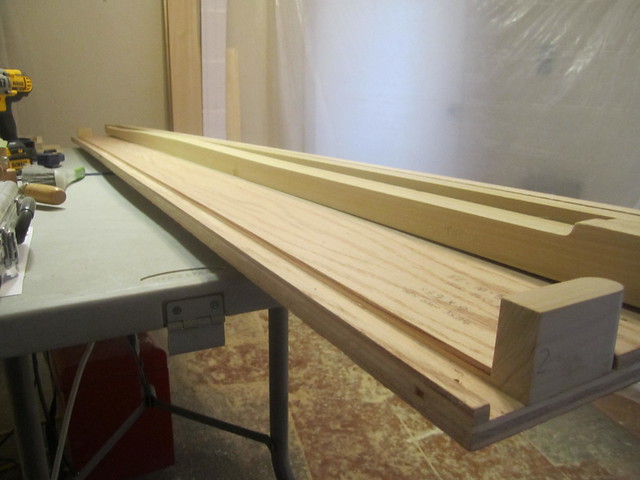
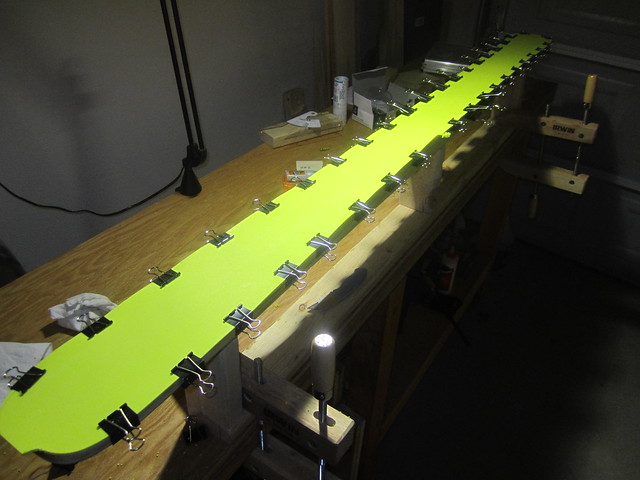
Beginning of press assembly:
Image

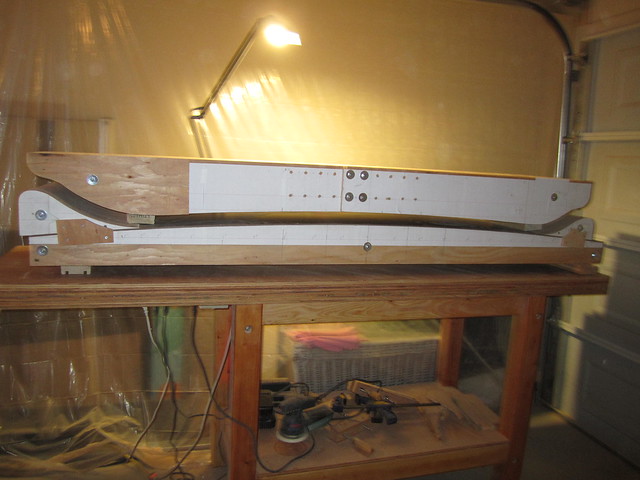
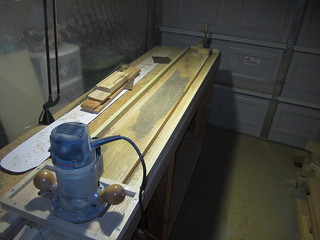
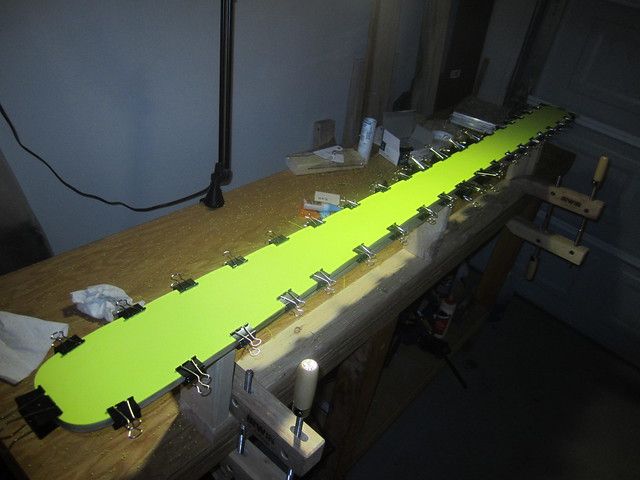
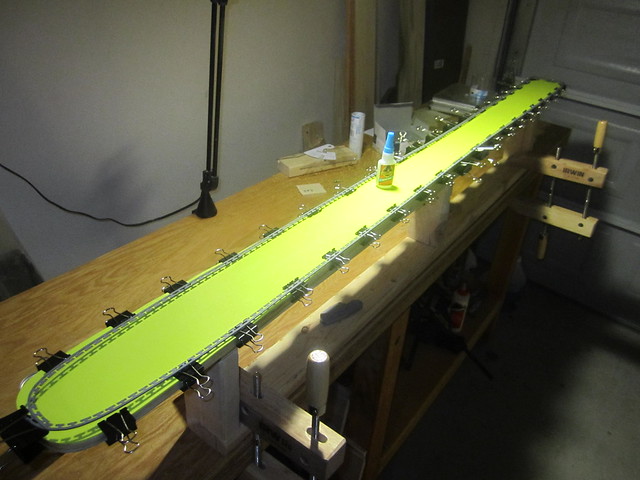
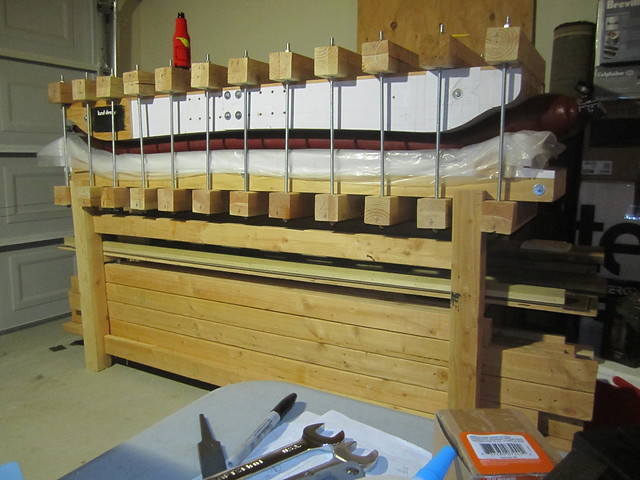
Press assembled and at pressure:
Image

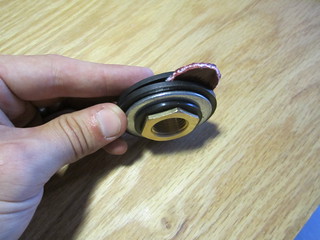
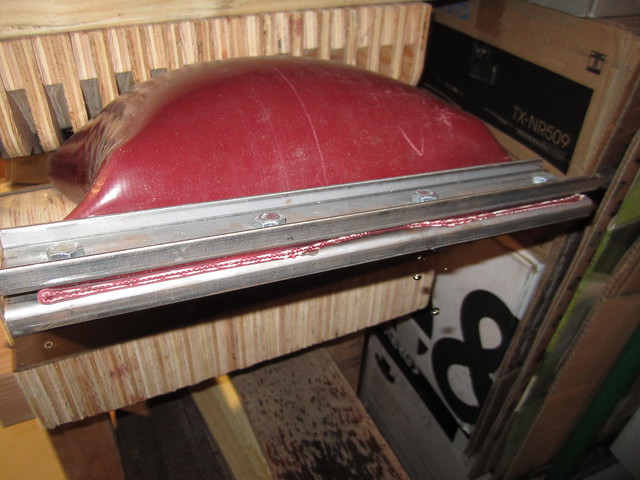
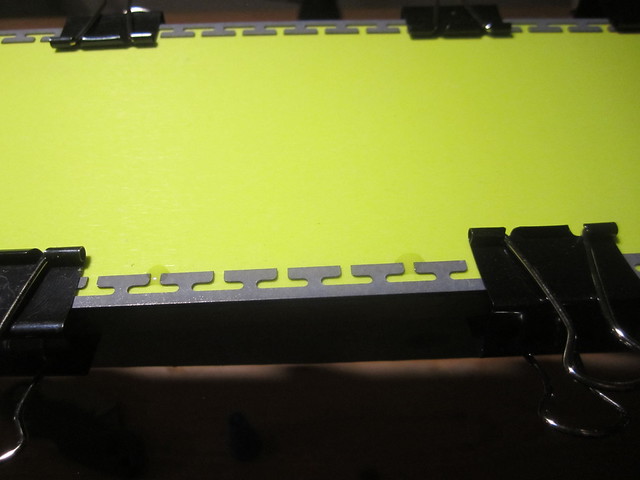
Pressure holding at ~33psi:
Image

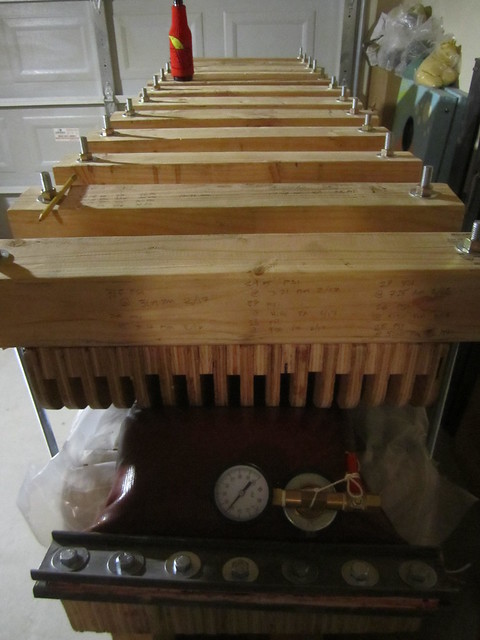
The pressure gauge allows easy reference on how tightly I need to crank down the nuts. It is a hassle to have to assemble/disassemble so much each time I press, but it works great for not requiring any power, and meets my goal of keeping as many parts transferable into a pneumatic press as possible for down the road.
Last edited by Acka on Tue Oct 21, 2014 11:02 am, edited 1 time in total.
Acka
Posts: 28
Joined: Sun Aug 11, 2013 2:32 pm
Location: Denver, CO

Post by Acka »

Core Profiling:

I don't have access to a planer, so my profiling will take the router approach. This setup is producing consistent profiles meeting my quality expectations.

Image

The side rails are interchangeable, allowing me to create flat surfaces (planing) as well as any profile I make side rails for. It is wide enough for a single ski core up to 165mm wide.

Image

The profile I will made for my first design have a 9mm delta tip-waist and 9mm waist-tail. I used a 2mm-11mm-2mm core for my first pair, but the same rails could produce 3mm-12mm-3mm for example.

Using straight rails to plane down some reclaimed wood:
ImageImage

Using profiling rails on a test core:
Image
(hard to see profile, but depth of cut tapers away in the blurry distance)
Acka
Posts: 28
Joined: Sun Aug 11, 2013 2:32 pm
Location: Denver, CO

Post by Acka »

Ski Cores

I had to curb my perfectionist mind-set when it came to my expectations for the first pair of skis. I deeply wanted the first pair to come out perfect, but had to acknowledge that even after studying this forum for over a year I would would be setting myself up for disappointment if thought I could do in one try what others have spent years perfecting. The first pair should be a proof-of-concept and if the skis come out straight and press doesn't explode I would be satisfied.

For this reason I cut some corners in the production of my first pair to save time and money. I decided that the assembly of a properly laminated wood core was something that I could practice independently from the rest of ski building, and wouldn't make-or-break the success of the proof-of-concept first pair made.

So....I didn't bother cutting strips and building a laminated core. My first pair of skis used a single solid poplar board for each core.

Solid core ready for profile:
Image

Tip & Tail spacers joined to core:
Image
Acka
Posts: 28
Joined: Sun Aug 11, 2013 2:32 pm
Location: Denver, CO

Post by Acka »

Templates:

Nothing too special here, so I'll cover this quickly.

I printed my design full size and glued it to some thin hardboard. I carefully cut out half of the shape and sanded for a smooth edge.

I used the router to copy this half-pattern onto a board, then flipped the half-pattern over and routed the 2nd half.

Once I had one template of complete shape, I used it to create a 2nd full template. I then flipped the 2nd template over and trimming the differences to ensure symmetry.

Image
(I used some reclaimed old poplar from a barn, which turned out to have beautiful coloring)
Acka
Posts: 28
Joined: Sun Aug 11, 2013 2:32 pm
Location: Denver, CO

Post by Acka »

Edge Bending

I set out to bend both edges at once with a washer setup I found on this forum:
Image
This seemed to work okay for long sweeping bends, but my desire was always to make full wrap edges and this tool didn't work well for the tight bends. I ended up creating pliers like many folks on this forum and they worked great and with some practice I can now do edges very quickly and with great quality.
Image
The radii at the tip and tail were tight enough that I had to trim back the tabs in order to make the bend:
ImageImage

With patience I was able to shape the full wrap and was very happy with the results.
Image

A lesson learned after my first ski, which I used to improve my second ski: Wait to trim off the the excess edge on one side of one joint until the edge is mostly fastened to the base. Minute imperfections in the edge of the trimmed base material can slightly change the circumference that the edge needs to match. My first ski had a ~1mm gap at the tail for edges which had fit the template perfectly. By waiting to trim off the excess edge until almost done attaching it to the base material on my 2nd ski, I was able to achieve a great full wrap edge.
Acka
Posts: 28
Joined: Sun Aug 11, 2013 2:32 pm
Location: Denver, CO

Post by Acka »

Cutting the Base:

I first let the base relax in the environment the layup would be completed in until it would lay flat.

Then I roughly cut out the ski shape with a box cutter, leaving ~1/2" excess all the way around my template. This shape was left to relax again, the goal being to allow any residual stresses in the material to dissipate before cutting to final shape.

When I was confident the material would not deform any further, I clamped it to my template and used the router to trace the shape in small sections, re-clamping as I finished each section.
Image

Finished cutting:
Image
The most difficult part of this for me was getting the rpm of the router to a proper speed. At first my trim was leaving thin tendrils of base material hanging off - which was a real pain to correct with a razor. It seemed counter-intuitive to me, but I got my best results by turning the router speed down significantly.
Acka
Posts: 28
Joined: Sun Aug 11, 2013 2:32 pm
Location: Denver, CO

Post by Acka »

Attaching Edges:

My approach here is no different than anyone else's I've found. This section will be quick.

Immediately after trimming the base material, I clamp the pre-bent edges on top of it - moving in small sections. I didn't want to allow any opportunity for the base material to deform at all prior to having the edges attached to help it hold its shape.

Image

I applied Gorilla super glue every few centimeters, per usual:
Image

After allowing plenty of drying time, I can unclamp the base and check out the quality from the snow-side:
Image
Post Reply