Acka Skis

Document your personal work here. Show photos, movies, and share your secrets.

Moderators: Head Monkey, kelvin, bigKam, skidesmond, chrismp

Acka
Posts: 28
Joined: Sun Aug 11, 2013 2:32 pm
Location: Denver, CO

Post by Acka »

Graphics:

For graphics I used a full layer of rice paper in my layup. I used standard acrylic paint to create the graphics.
Image
I will touch on the results of this when I summarize the final product, but I will advise anyone reading this now to NOT include a full layer of paper. The visual result exceeded my expectations, but the paper introduced a weak bonding layer between the paper and my top sheet.

Paper is a feasible medium for graphics if used in small pieces which are away from the edges of the ski, but will never be optimal.
Acka
Posts: 28
Joined: Sun Aug 11, 2013 2:32 pm
Location: Denver, CO

Post by Acka »

Layup:

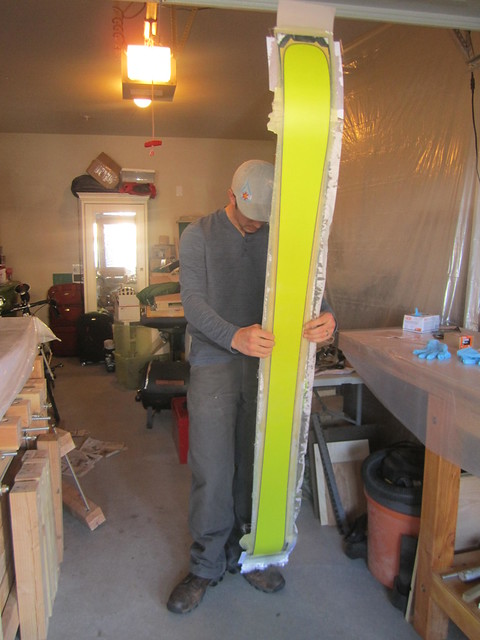
As I mentioned, I planned to layup one ski at a time for my first pair, to give me double the chances to improve my process. I got some extra hands to help out, and got started.

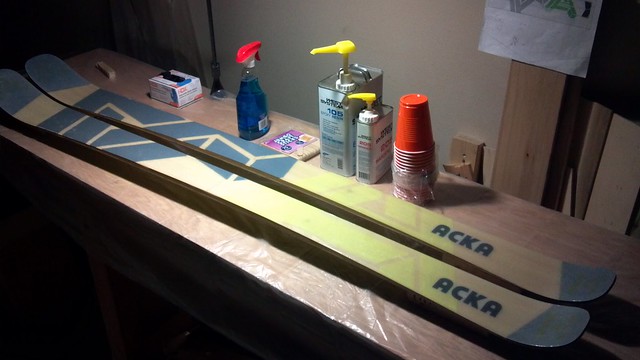
A note about epoxy: I used West Systems 105/205. I considered using 206 for longer pot life, but was concerned about curing in my unheated garage. I believe in the low 60's F 206 doesn't cure. In any case the 205 proved to have plenty of life and I'm happy with my choice.

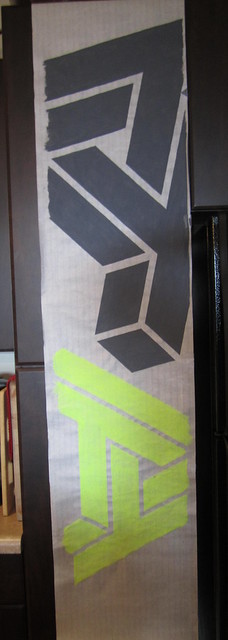
I attached a single base down the center of my press with some 3M adhesive spray, and used car wax all around it to ease removal. I was very careful not to get ANY wax on anything but the mold.

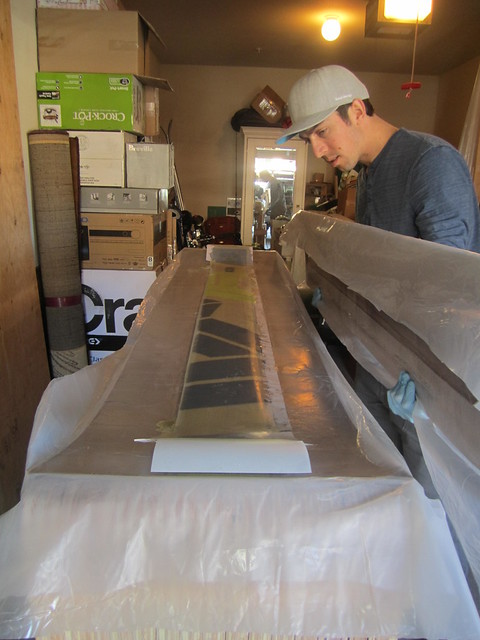
Then it was time to mix epoxy and start the clock:
Image

Image

Image

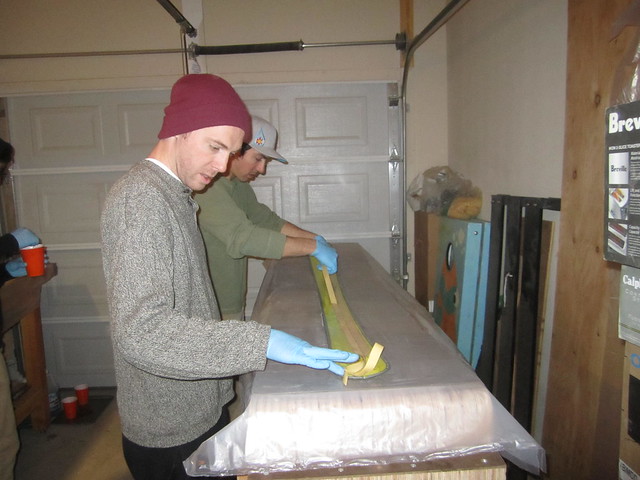
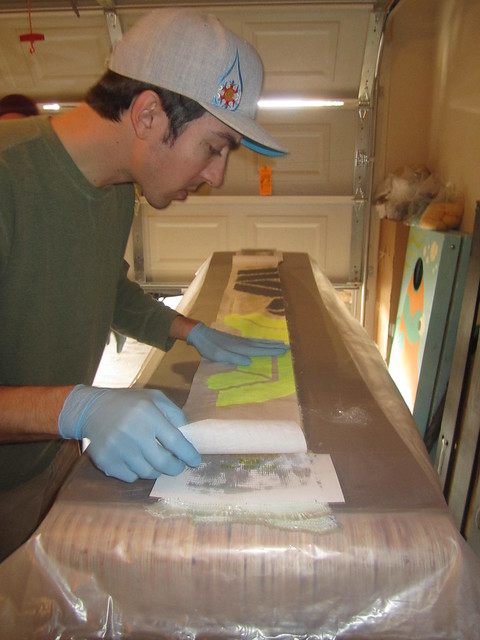
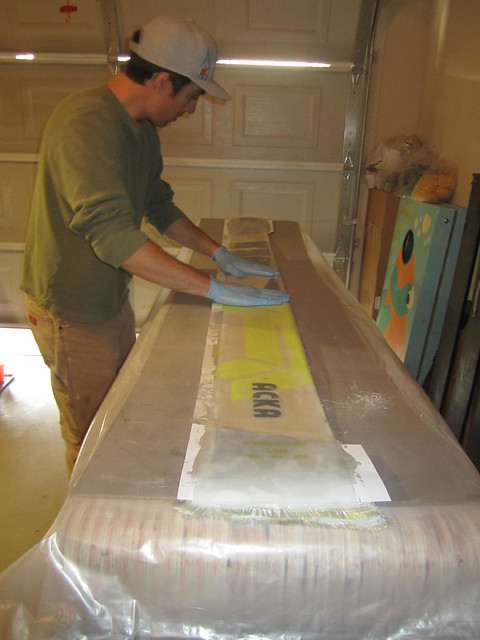
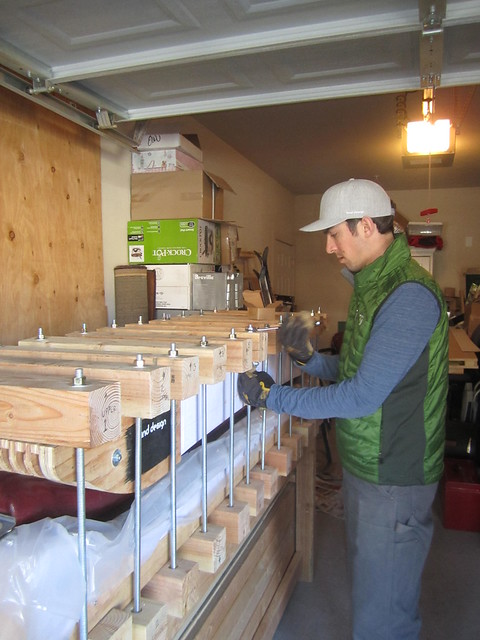
It took about 15 minutes to stack the layup, and ~10 minutes to assemble the press and tighten it down to pressure.

Note: I didn't mention this earlier with the limitations of my garage - but with a passive design not using electricity, heat curing was also left out. This is a feature I can add later - for these skis I cured at ~65 deg F for 24 hours, @ 33psi (~30,000 lbs)
Last edited by Acka on Tue Oct 21, 2014 12:24 pm, edited 1 time in total.
Acka
Posts: 28
Joined: Sun Aug 11, 2013 2:32 pm
Location: Denver, CO

Post by Acka »

One Ski Down!

The day after layup was like Christmas for me. I couldn't wait to open the press and see what was inside

Image

What a sweet feeling....

Image Image

....and I knew I was hooked....
pmg
Posts: 480
Joined: Sat Dec 01, 2012 8:59 am
Location: Sonthofen

Post by pmg »

Hi Acka,

very nice journal! I wish my first ski looked like this :)
Acka wrote: As a side note: since pressing psi is always debated on here... This bladder puts down a contact area roughly 900in^2. So my target ~35psi pressure puts down ~31,500 lbs. I think if we all used lbs/kg force in our discussions we would have less confusion over appropriate pressing force to use, since each of our bladders is slightly different
I really like this idea, and I think kg/m² would be the thing to go for, so non americans also understand it without a calculator :)
Acka
Posts: 28
Joined: Sun Aug 11, 2013 2:32 pm
Location: Denver, CO

Post by Acka »

Second Ski:

I've tried to make note throughout this journal so far of any thing I learned from the first ski to do differently on the second.
  • Don't cut excess edges off until attaching edges to base
  • Spend more time during layup working out air bubbles. The assumption that these would be worked out purely by pressing force was false.
  • Place shims during layup under the core where it overhangs the base (the overhang is greatest at waist of ski). The force of the press cracked my core in the first ski where it was cantilevered.
I also got the same people to help with the 2nd layup, so they were already familiar with the steps.

Image
Last edited by Acka on Thu Oct 23, 2014 10:46 am, edited 1 time in total.
Acka
Posts: 28
Joined: Sun Aug 11, 2013 2:32 pm
Location: Denver, CO

Post by Acka »

Concept to Creation:

How did I do bringing my idea to life?

Concept:
Image

Prototype:
Image
Acka
Posts: 28
Joined: Sun Aug 11, 2013 2:32 pm
Location: Denver, CO

Post by Acka »

Now for the fun part:

I never expected my first pair to be usable. I fully expected them to be tested a little and then turned into the worlds most expensive (in hours) set of shot-skis.

I was so fortunate that my process worked well enough to warrant mounting these skis and getting some real testing in. If only you could see the stupid grin on my face my first day on these....

Image

Image

Image
Dream
Posts: 33
Joined: Mon Sep 15, 2014 11:52 am

Post by Dream »

From another long time lurker...awesome job!
Is that St. Mary's?
twizzstyle
Posts: 2204
Joined: Tue Mar 07, 2006 8:25 pm
Location: Kenmore, Wa USA

Post by twizzstyle »

Awesome job on your first few pairs. A great example of how doing your research, and proper preparation, will yield good results even your first time around. Each pair will only get better and better from here.
Acka
Posts: 28
Joined: Sun Aug 11, 2013 2:32 pm
Location: Denver, CO

Post by Acka »

Summary of Prototype:

These skis were a blast to ride. Unfortunately that was almost entirely due to my pride in them.

The truth is, they need a real core... They are pretty chattery (unsure of technical term). It will take the 2nd iteration to really judge if I can make a quality ski.

On the plus side. Things that exceeded my expectations:
  • The skis came out of the press straight and as designed. The bases needed minimal tuning and were ready to go.
  • I love the graphics. I like a ski which displays the core, along with the art.
  • The skis have lost almost zero camber or tip/tail over the summer
  • The stiffness is a what I had hoped for
On the down side. Things I need to improve on:
  • The core has very limited damping (chatter-y ?). I knew this would be a weak-point due to my choice of materials. Lots of room for improvement & experimentation here.
  • The use of paper layer as graphics has proven to be poor. The rice paper appears to have bonded well to the fiberglass underneath it, but poorly to the top sheet above it. Around the edges of the ski, even though I seals the edges after beveling the sidewalls - the are small delaminations starting to propagate.
  • I didn't include a cat-track in my first use of my press. This was not over-sight, but due to time/materials/cost/and under estimating the impact of skipping it. Adding a cat-track to my press is on the must-do list before the next set of skis.


Thanks everyone who's read this far. I hope you found this thought provoking. I will check in to answer questions and comments as often as I can. I will post updates when I make progress on the next iteration of the project - although I'm expecting a daughter (my first) any day now and will probably not be spending much time in the garage this winter.

-Acka
Last edited by Acka on Tue Oct 21, 2014 3:25 pm, edited 1 time in total.
Acka
Posts: 28
Joined: Sun Aug 11, 2013 2:32 pm
Location: Denver, CO

Post by Acka »

Dream wrote:From another long time lurker...awesome job!
Is that St. Mary's?
First picture was first ever day on them, which was A-basin.

2nd and 3rd pictures were St. Mary's in early June.
gav wa
Posts: 381
Joined: Tue Feb 18, 2014 8:58 pm
Location: Perth

Post by gav wa »

Are you pressing both skis at once? If you are doing only one at a time why are you so keen on a cat track? Your bladder is heaps wider than a ski
skidesmond
Posts: 2337
Joined: Tue Apr 07, 2009 3:26 pm
Location: Western Mass, USA
Contact:

Post by skidesmond »

... And so now you're hooked! :D Awesome job!

We're all familiar with the grin. I still get it with every ski I've made and even with the ones I've been skiing on for a few seasons now.

Your layup looks pretty typical which was a smart thing to do on your first build. As for the chatter or lack of damping... That's a life long challenge. The snow conditions look a bit choppy. Take the skis out under mid winter conditions and see how they handle.

I still use the washer setup to bend edges and modified pliers. The washer setup is super cheap and it works. I then use the pliers to fine tune the bending.

The little bit of delam you're experienced could be from a number of things. An epoxy with a longer pot life is probably a good idea. I imagine by the time the layup is done and the press is assembled, tighten and pressurized a fair bit of time has passed. The epoxy could start to kick-in by then.

A cat track could also help to even out the pressure across the ski.

Great job! Looking forward to seeing the next pair!
sammer
Posts: 933
Joined: Wed Dec 19, 2007 10:37 pm
Location: Fernie B.C.
Contact:

Post by sammer »

How long from the time you pressed them till you cut the flash?
Any warm room post cure in that time?
My bet on your tip delams would be resolved with some post cure heat.
West slow hardener does need a good long time to fully cure.

sam
You don't even have a legit signature, nothing to reveal who you are and what you do...

Best of luck to you. (uneva)
Acka
Posts: 28
Joined: Sun Aug 11, 2013 2:32 pm
Location: Denver, CO

Post by Acka »

gav wa wrote:Are you pressing both skis at once? If you are doing only one at a time why are you so keen on a cat track? Your bladder is heaps wider than a ski
For the first pair I pressed one ski at a time - which gave me double the chances to improve my process. I will press both at once from now on, so cat-track will be needed for this.

Additionally, the large bladder without a cat-track kind of envelopes the layup when at pressure. This has negative effects:
  • 1) It bends the sides down, where force is concentrated - this cracked a core for me
    2) If the bladder envelopes the layup enough to contact the lower mold, then I can no-longer document the force I'm pressing my skis with, since the bladder is exerting some of its force onto the mold itself.
    3) The bladder concentrates force at the edges of the layup, this can inhibit a good squeeze out of my extra epoxy and air bubbles. With a cat-track the pressure is limited to vertical force only, leaving nice low-pressure areas next to the layup for epoxy and air bubbles to work their way out.
The final advantage is that it is a simple, non-permanent press modification. If any of the assumptions I've made above prove false, I can just take it back out and carry on my way :)
Post Reply