Touring Ski - first try

Document your personal work here. Show photos, movies, and share your secrets.

Moderators: Head Monkey, kelvin, bigKam, skidesmond, chrismp

Post Reply
pmg
Posts: 480
Joined: Sat Dec 01, 2012 8:59 am
Location: Sonthofen

Touring Ski - first try

Post by pmg »

Hi,

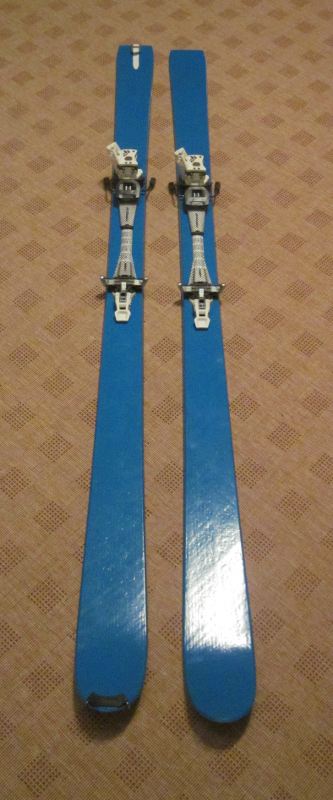
time to show some work - the finished ski is hopefully done by the end of the week. Its going to be a classic touring ski, 78mm underfoot and 174cm long. I want the ski to be quite hard because I'm used to riding pseudo race skis everywhere. So the final weight will be around 1300g per Ski.
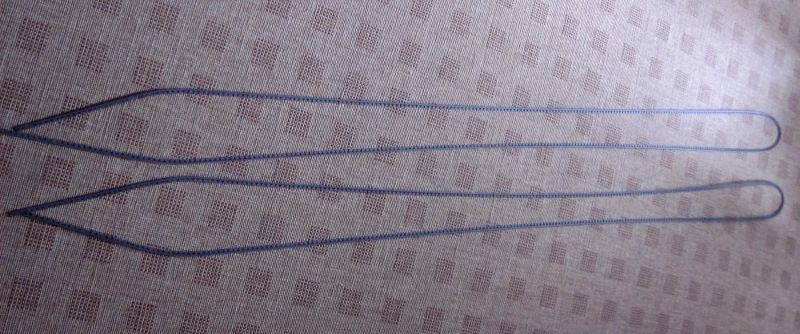
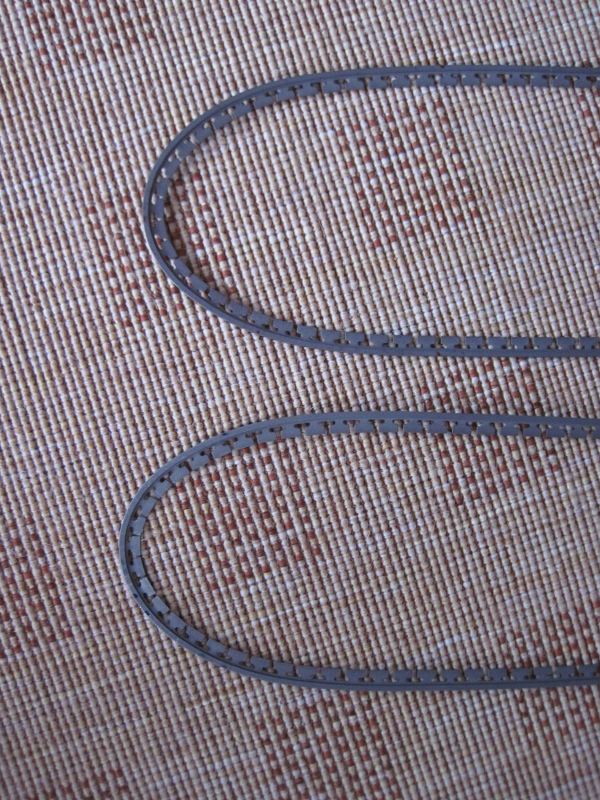

1) Symmetric Model
I built 2 pairs of Skis last season, and both skis weren't really symmetric. After some searching I found the model not to be entirely symmetric, though it was carefully done. So I have a new way of creating the models, a bit more work but it ensures that they are really symmetric:
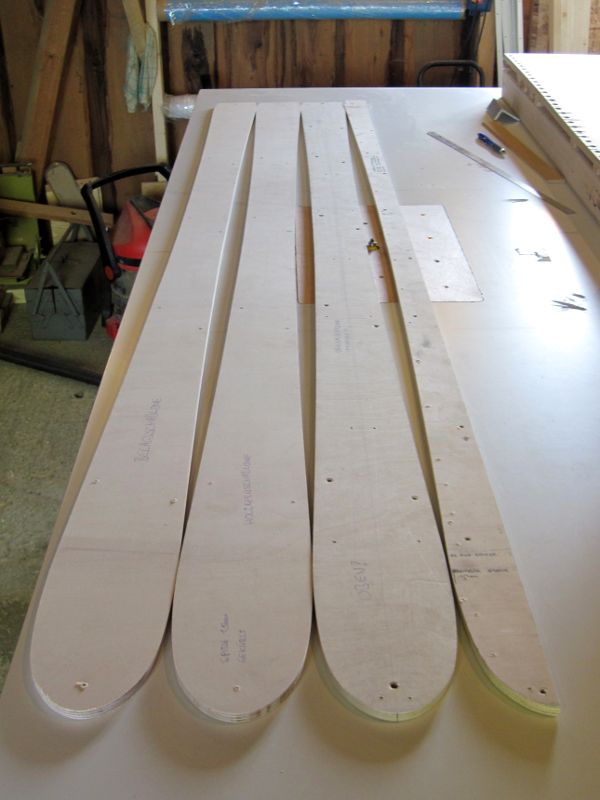
Image

From right to left:
- half model
- full model 1
- full model 2
- base model

So I started with a model of only half of the ski. Then router copied it twice on full model 1. Result: symmetric.
To make super-sure the model is symmetric and to have a spare model in case I destroy one I did a second full model. After routing it, I flipped it and put it on full model 1 again, then routed both full models again using the other as model. Hope this is understandable, the result are really symmetric models if you don't have access to any CNC router.
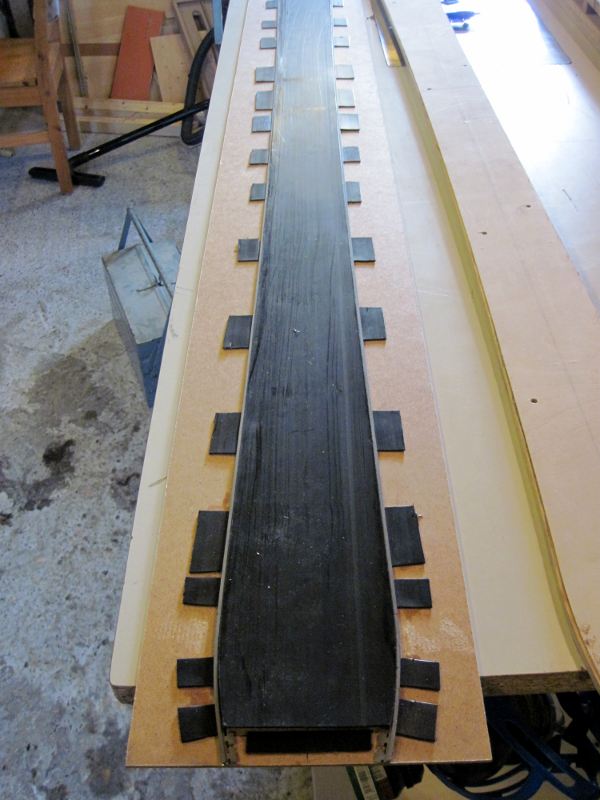
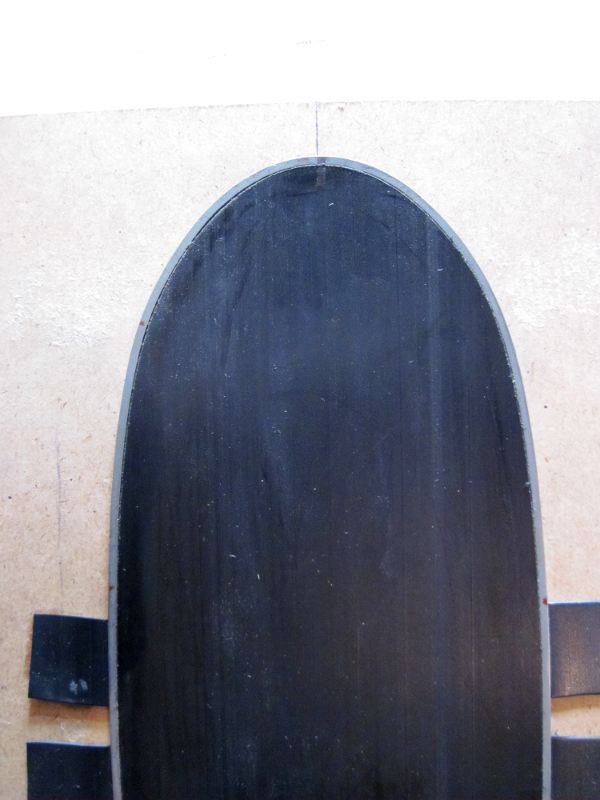

2) Nice edges
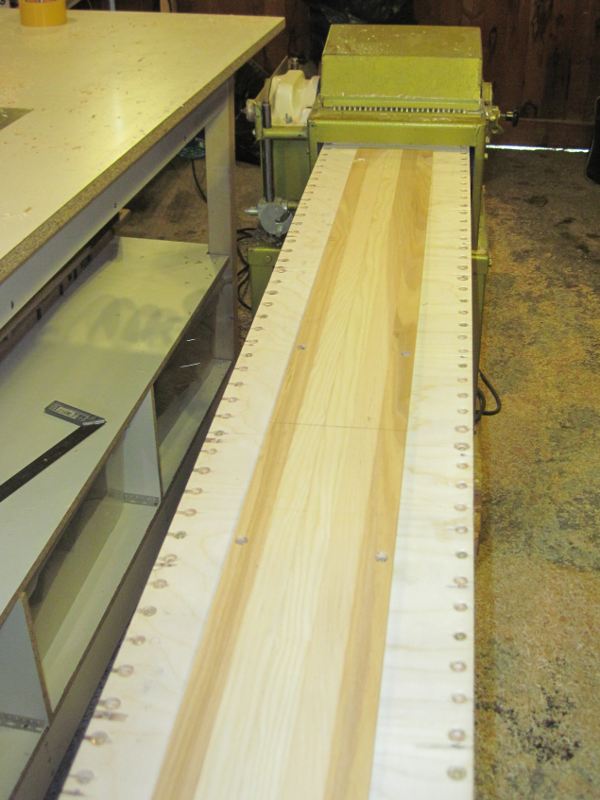
I found some nice edges on skibaumarkt.de: 4m long pre-wrapped - only one edge for the whole ski. So I gave them a try, though I worried it would be a neverending task to do a full-wrap.
Well, in the end it took a movie long (good way of doing the edges - if the mind is occupied you get less impatient) and the result is really nice. Will take some pictures when the base is finished and the edge is glued around.


Image


Image
gozaimaas
Posts: 663
Joined: Fri Feb 10, 2012 4:17 am
Location: Nagano Japan

Post by gozaimaas »

Respect on the edge skills!
pmg
Posts: 480
Joined: Sat Dec 01, 2012 8:59 am
Location: Sonthofen

Post by pmg »

Nice Edges, Part 2

Had some time to do some more work: routed the base and glued the edges to it. I really like the 1 piece edges, will only work with them from now on.

Image
From the excess base material, a form to keep the base in place is made. I also use this form for glueing the edges to the base. This ensures the edge is directly at the base over the full length. It also saves working with all the cramps: I just put some slow drying superglue on some teeth of the edge, put the edge and the base in the form (it fits perfect - have to press it in) and thats it.
Note how the edges at the end are about 2cm longer than the base - thats wanted. With the first 2 pairs, there was some trouble that the ends of the egdes delaminated quickly because they were bent less. I hope that the ends of the edges get bent more like this. If this does not help, there is no other way but to pre-bend the edges vertically.

Image
One of the tips with a full wrap single edge. Not perfect, but good enough.


3. Wood core
Well, as usual: glueing wood together, planing it, and planing it to final thickness using a negative form. It took some time to adjust the planer blades, but now there is a thickness difference of less than 1/20mm over the whole 25cm the planer can do. Good enough for me ;)

Image
pmg
Posts: 480
Joined: Sat Dec 01, 2012 8:59 am
Location: Sonthofen

Post by pmg »

Hi,

didnt take pictures from the rest of the building process, but everything worked as planned - and I'm quite a perfectionist ;)

Some pics taken just now inside, will take some nice ones tomorrow at the first ski tour of the year.

Ski is 174cm long, is about 116-78-106, so a classic touring ski. Though it became quite stiff (what I wanted) and isn't really lightweight with 1400g per Ski. Has a classic camber as you can see. Will be very nice to ride on piste - exactly what a touring ski is made fore ;)

The blue coat are 2 layers of thick epoxy (with thixotropic agent, nice stuff). Makes a very strong surface, and is easily redoable when the ski surface gets damaged.

Image


Image
pmg
Posts: 480
Joined: Sat Dec 01, 2012 8:59 am
Location: Sonthofen

Post by pmg »

First Ski Tour, and at least 2 better pictures.

Image

Image

And: They ski great ;) One ski resort here opens tomorrow, more chance to test them.
Post Reply