Page 3 of 3
Posted: Tue Mar 19, 2013 2:56 pm
by twizzstyle
It's no big deal that you have epoxy on your base, it will grind right off. But any epoxy on the base should be completely flat, almost immeasurable depth (because the base was pushed flat against the mold surface, right? ideally).
In your last picture, near the tip where there is some epoxy, you can see that the epoxy has some thickness to it. Probably not much, maybe 1mm?
You'll certainly be able to grind that epoxy off, but that means the base was 1mm (for the sake of discussion) off the mold surface, and is therefore not flat (assuming the mold surface was flat).
The epoxy probably IS bleeding through your base/edge seam, and I think you want that. I always have lots of epoxy on my ski bases, that has been squeezed through the base/edge, that lets you know that the edge teeth got nice and surrounded by epoxy. But its very very thin, much like how it looks around the waist of your board.
Posted: Tue Mar 19, 2013 3:09 pm
by JSquare
Got it! Because the base isn't flat, the epoxy is filling in. If the epoxy is very thick in some regions, it means the base is less flat there.
Question for you Twizz (and others): getting the base to sit flat in the mold takes more effort that I expected. The edges give the base some serious spring back. We've had to sort of pre-bend the base to fit into the mold, or at least try really hard to get it to sit flat (hence the double sticky tape all over the end). Is it supposed to be hard to get your base to sit flat? OR...is this one of those vacuum bag things that means we just don't have enough pressure to take care of this during pressing, so we have to do a bit more up front?
Posted: Tue Mar 19, 2013 3:38 pm
by ProbsMagobs
I didn't have too much trouble with keeping my base against my mold so here's a few things I did
-I covered my base with vinyl application tape. This should also help with some of the epoxy pooling. Not completely but will help
-I covered my mold with a wide sheet of painters plastic drop cloth and tacked it to the side of my mold tightly. This also removes the need for a release agent. I fold the overhanging plastic back over to keep my bag clean
-I glued my base with spray glue to the covered mold with 100% of the base glued. I clamped and weighed the tips down until the glue dried. It will still come up a little but keep the tips down sufficiently enough to press. I had no problems with this, it just took extra prep time
Posted: Wed Mar 20, 2013 6:37 am
by twizzstyle
I have a firehose press, so I've never had a problem getting things pushed down.
Pre-bending the tips, after the edges are glued on, will solve this for you. I do this with my press, but just to make the layup easier since I do the layup in the mold. Do a search for tip pre bender on here, you'll see a few very simple rigs some of us have built.
Posted: Thu Mar 28, 2013 6:50 pm
by JSquare
OK- Well had a fun week. Found a friendly local shop (literally 2 minutes from my work) and took my board in for its first base grind. On the upside, i found a shop that ground it for free! He said he was learning a lot from me, so it evens out. I'm stoked.
On the downside, he found my board not to be quite as flat as I hoped. No big surprises though. There was a lot of DST and our mold style might flex a tad. I'll look into it later. For now, we shred and celebrate our absence of bumps from our inserts!

First board we've made back from the shop awaiting wax
Posted: Thu Mar 28, 2013 6:57 pm
by JSquare
OK! so with some help from you guys on some other threads, we're going to go after the next big defect which is the base flatness on the ends. So we'll be shimming the tip spacer on the tip and tail outside of the base and giving the base a little prebend. While we are at it, we ordered up some veneer from veneer supplies and thought we'd give it a whirl!
The stuff seems to unroll and flatten okay. Seems like no big deal? Enh? It's an experiment anyways.. anyone got any last minute advice? We're laying up this weekend.

Veneer for next board (two sheets in the frame rolled together)
Posted: Thu Mar 28, 2013 7:15 pm
by knightsofnii
yea, save the nice veneer for when you get your base flatness issues ironed out!
But, if that stuff was cheap or easily available and you dont mind, go for it!
Posted: Thu Mar 28, 2013 8:03 pm
by ProbsMagobs
that looks a lot like my first board though yours is slightly better

if youre pressing with a bag rather than a plastic sheet with sealant tape, your setup is like mine. Ive found that ~14psi is a lot more than i originally thought and a solid mold would be wayyyy better than just a few mold ribs. It will be expensive and take a while to make but it will last a long time, give a flat base, and could eventually be used in a hose press if you upgrade
Posted: Fri Mar 29, 2013 8:26 am
by JSquare
Probs-
Not exactly the same...but there is a common them of non-rigidity. We got our design from boardcrafter. It's handy and i have no regrets, but i suspect the 1/8 polycarb sheet does flex just a touch. It is at least clamped down on the edges and the bag doesn't encapsulate the mold so the loading is a tad different. Photos to compare the two vac press designs are below. I think we'll be building a firehose press soon enough...
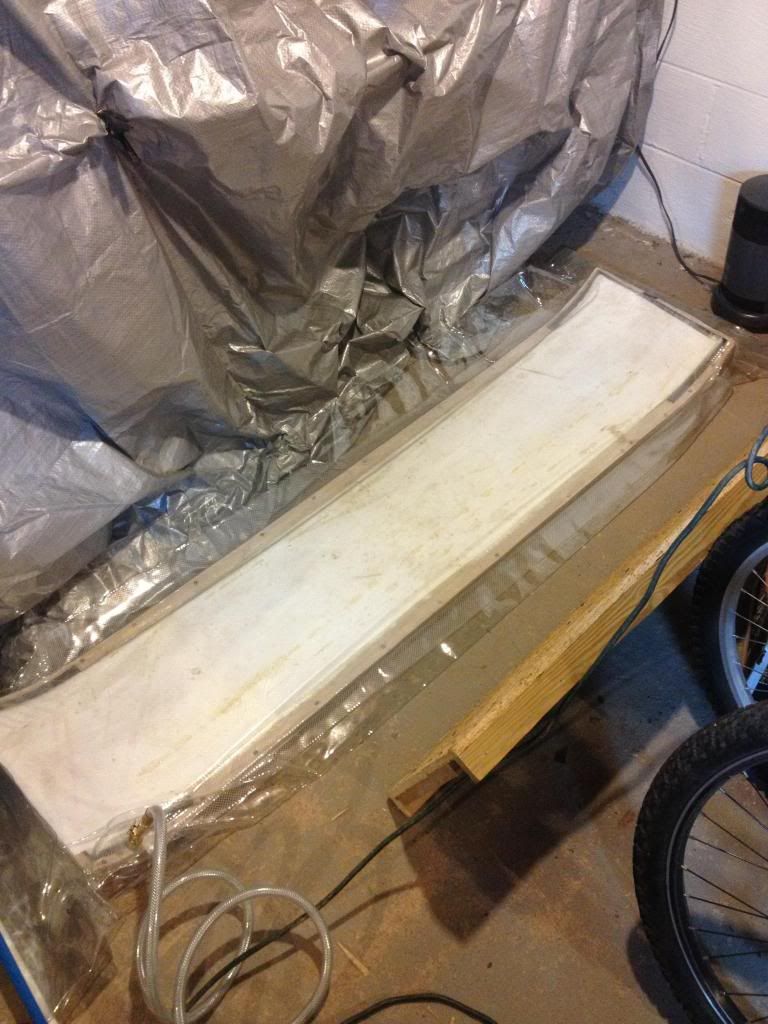
Probs' Press

Jsquare's press
Posted: Thu Apr 04, 2013 6:55 pm
by JSquare
And for attempt #4 we went a little bonkers and ended up in a very happy place. We stuck with all the good stuff we've learned so far... and then added a few things. We prebent the base, went with square tip spacer interface, and tossed on a veneer top sheet just for fun. We also placed some extra tip spacer around the base in the mold to act like a shim to keep the tip spacer from flexing and lifting off.
So far so good, its in the shop getting a basegrind. Hopefully all is well.
We also picked up a nice belt sander with a nice table that made finishing the tip and tail go much more smoothly and gave us a much nicer end product then previous hand tool methods.
We prebent the base by hand, with a 1.5" dowel. The trick was to lay the dowel on the floor, tuck the base under it, stand on the dowel, and slowly bend the base with the hands. Really goofy, and it took a few minutes, but it did the trick.
The good: flat base for most of the running length. Perfect core/tip spacer alignment, all in all a very good feeling and looking board.
The not quite there yet: our veneer came out a tad wrinkled in places. I used a dry squeegee ontop of the vac bag to smooth it out, but i would say we used too much epoxy, and i should have used a roller to do this. Also, we had a fair amount of epoxy bleed through. The next time we do this, i think i would add some epoxy to the tip and spread it out-- Head Monkey style, i believe. We also have some weird thing going on at the tip and tail where the base near the edge seems to lift off a little, but the edge lays flat. I am suspicious of the edges having a slight dish to them from the mandrel style bender we have. Sometimes the edges start to lean a little on the mandrel. I also suspect some limitations to our mold style where the 1/8 poly carb can flex a touch and cause weirdness. This is the most severe on the ends. Anyone have thoughts on this issue or getting rid if wrinkles in veneer?

Our 4th board, top sheet has some wrinkles that are hard to see. Otherwise, quite happy.
Posted: Fri Apr 05, 2013 4:25 am
by knightsofnii
the edge material likes to twist or curl wierd ways when you bend it, takes some precise tooling to keep it straight.
It even does this when i bend it by hand, or manipulate bent stuff that was previously not twisted.
so yes, your edge tines may no longer have been flat with respect to the rest of the edge, resulting in what looks like a normal edge shape but a base depression or bulge. "it'll press out", works about 80% of the time for us

Posted: Wed May 08, 2013 3:37 pm
by JSquare
OK, well after building and riding a few boards, this snowboard building thing has slowly started taking over my life. Guess it's time to kick it up a notch. We're going firehose press.
Got some box beams at sub scrap rates from work. Did a bunch of calcs, sims, etc. Should do the trick, and I've seen tricks many of you play to deal with excess deflection. Goal is to bolt this thing together so it can live in my condo basement.
Now I just gotta figure out how to hold the top mold in place, suspend the cat track, and key everything together...

Design

Material 6x3x.25" box steel. 9' lengths to start. Yeah..that truck is sitting on its springs.
Posted: Sat May 11, 2013 12:06 pm
by knightsofnii
should be beefy enough, just dont take it to 100psi LOL.