Page 1 of 1
Mart's ski building adventure
Posted: Fri Aug 18, 2006 6:46 am
by Mart
First, i've to say that this site is incredible. It has occupied my mind for several months now.
I have been looking at the content this forum for quite some time now without posting anything. I felt it was time to show a couple of pictures of what i've accomplished so far, before the final products gets done....

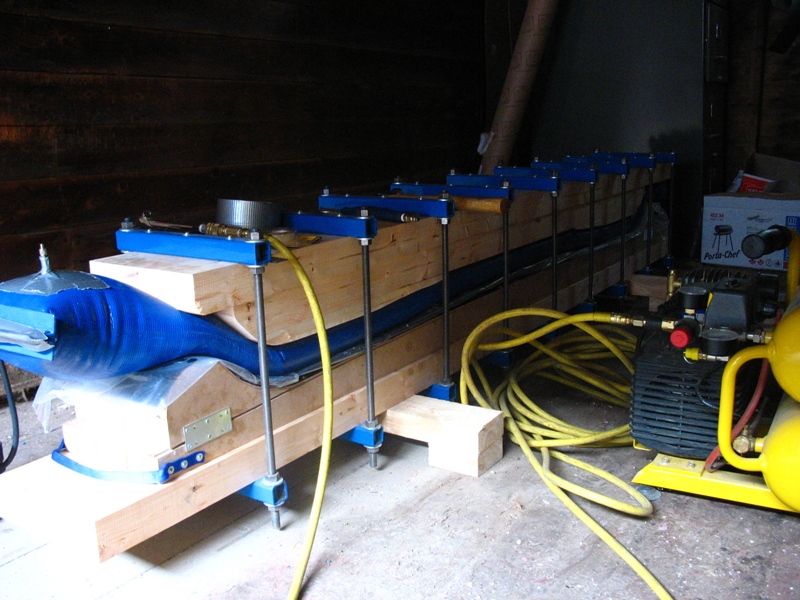
I've decided to go with a pneumatic press design very similar to Buuk's (My mind was set before seeing your post. Still, i hope you don't mind.

)
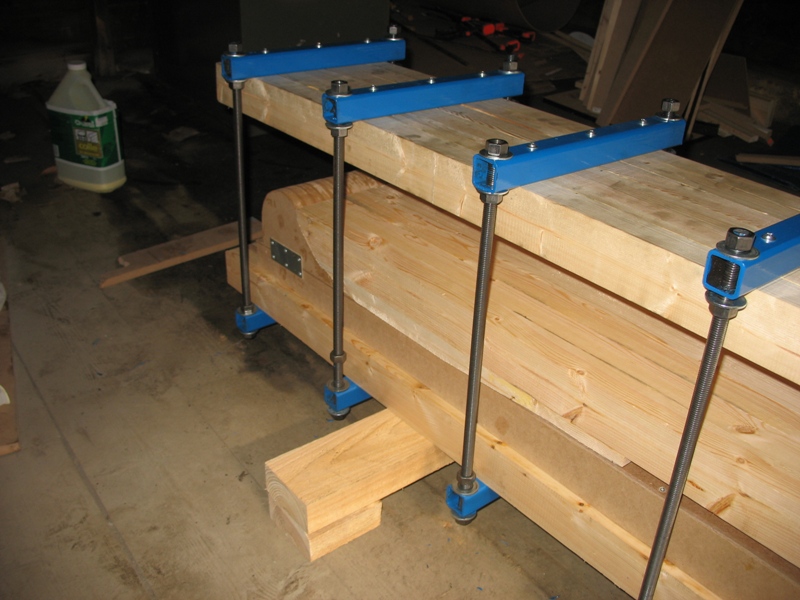
The mold is made out of 42 pieces mdf. 14 for the camber part and 2x14 for the adjusteble tips parts. The mold is design to press one ski at a time without heat.
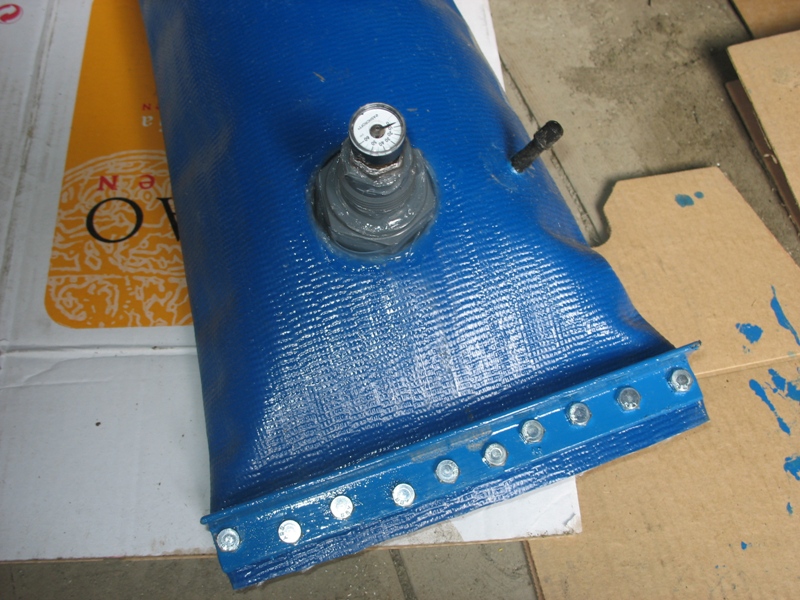
The balloon is made out of low pressure discharge hose ( rated to 60psi). I don't plan pressing to more than 30psi so low pressure hose was ok. Plus it was pretty cheap at McMaster ( 2.?? $ / foot ).
I think i might have a pair to show before the end of september. Will see how it goes.
Posted: Fri Aug 18, 2006 6:48 am
by Mart
Sorry for the spelling errors.
You'll have to forgive my poor Quebec's English ( French canadian ).
Good Work
Posted: Mon Aug 21, 2006 11:13 am
by Skivolkl
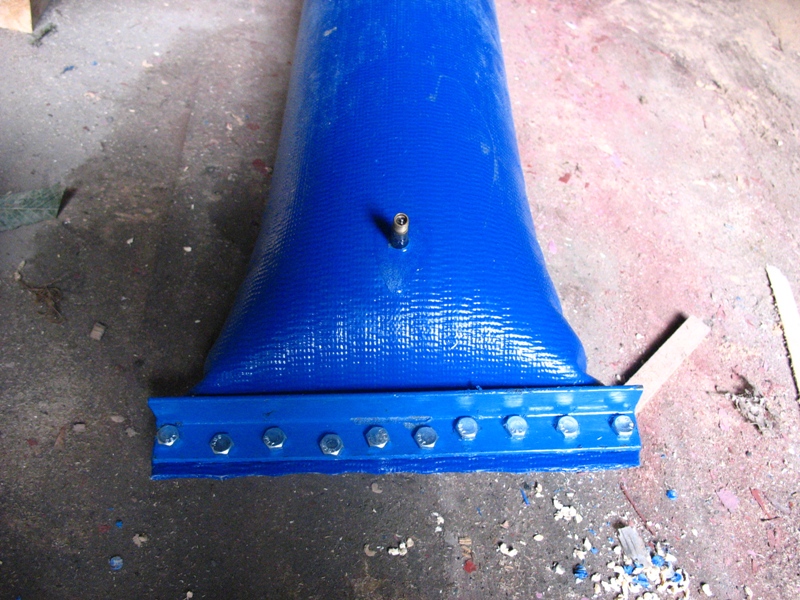
Everything looks good. I really like the blue cross pieces. What kind of material did you put on top of the MDF pieces on your base mold?
Posted: Mon Aug 21, 2006 1:40 pm
by Mutombo
Good work Mart. Didn´t you think about fixing the manometer after the air valve?
Posted: Tue Aug 22, 2006 5:52 am
by Mart
The material on top of the MDF pieces is Masonite. It's very cheap ( 7$ CAN for a 4'x8' sheet of 1/8'' thick), it's flat but it hates humidity..... I might have a problem with that.
About the manometer... It will have to go. The gray PVC fitting is to big and I have a hard time fixing all the leaks because the hose becomes "too round" under pressure and neither silicon nor polyurethane adhesive can make a good seal that resist deformation. So i'll recut the hose, install only the valve and close the hose again.
Posted: Wed Aug 23, 2006 6:49 am
by Mart
Things are going well.
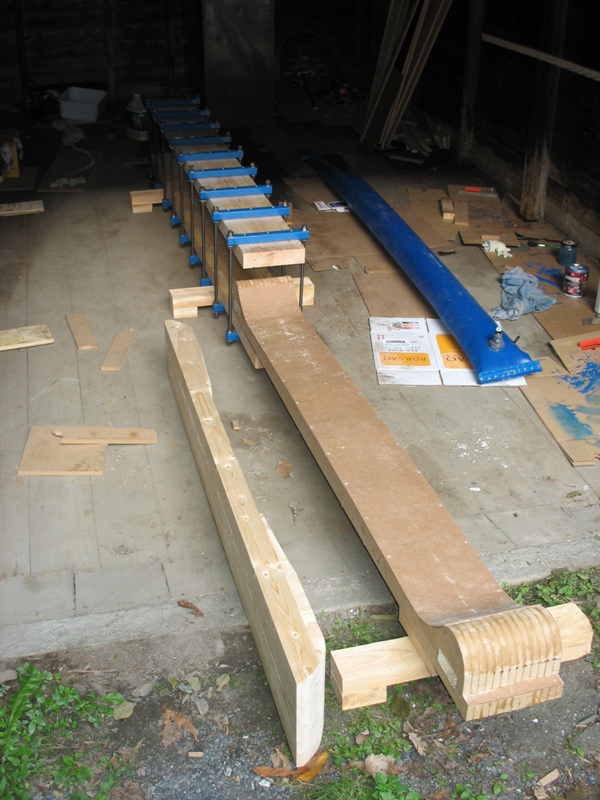
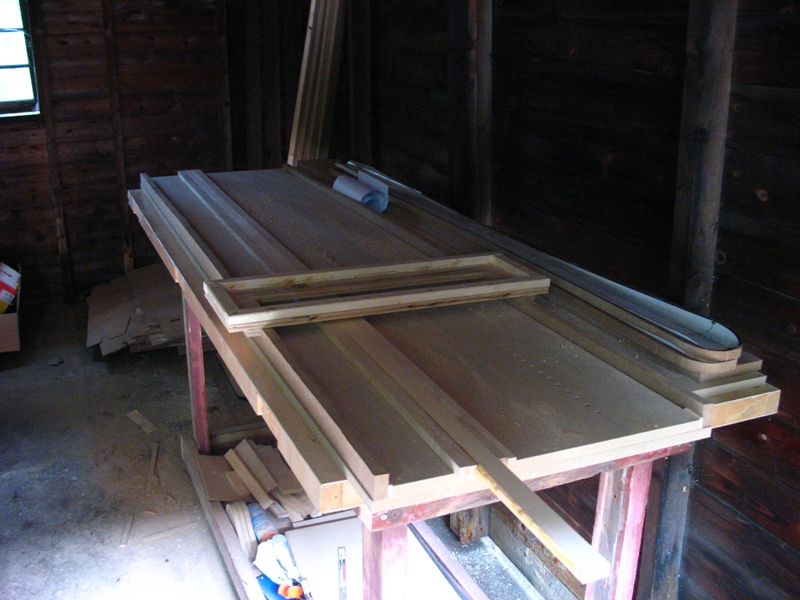
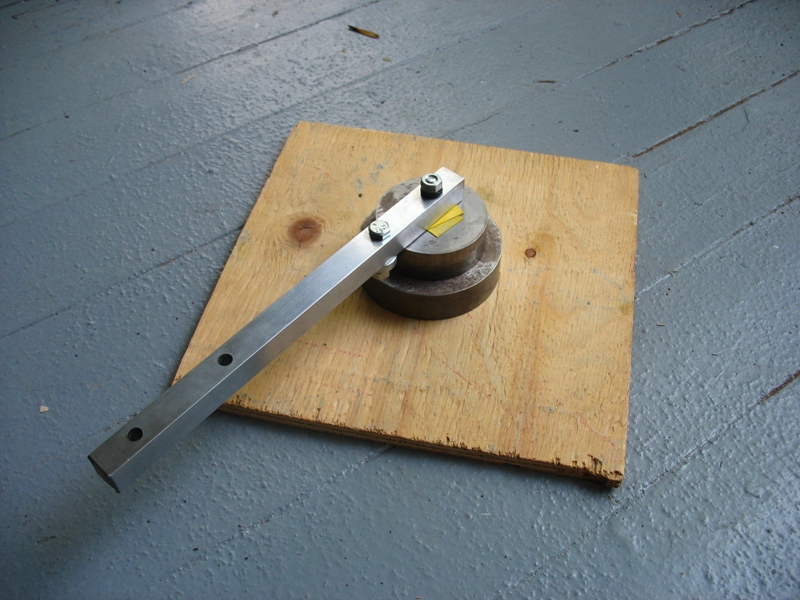
My jig for profiling the cores is ready.
I have remove the troublesome manometer and resealed the hose.
And the edge bender is ready to flex some edges.
Sweet!
Posted: Fri Aug 25, 2006 8:41 am
by Tore
Nice work that is.
Posted: Sat Aug 26, 2006 1:04 pm
by zachjowi
hi I am a nOOb and I was wondering how long your press machine is.
thanks
Posted: Mon Aug 28, 2006 6:58 am
by Mart
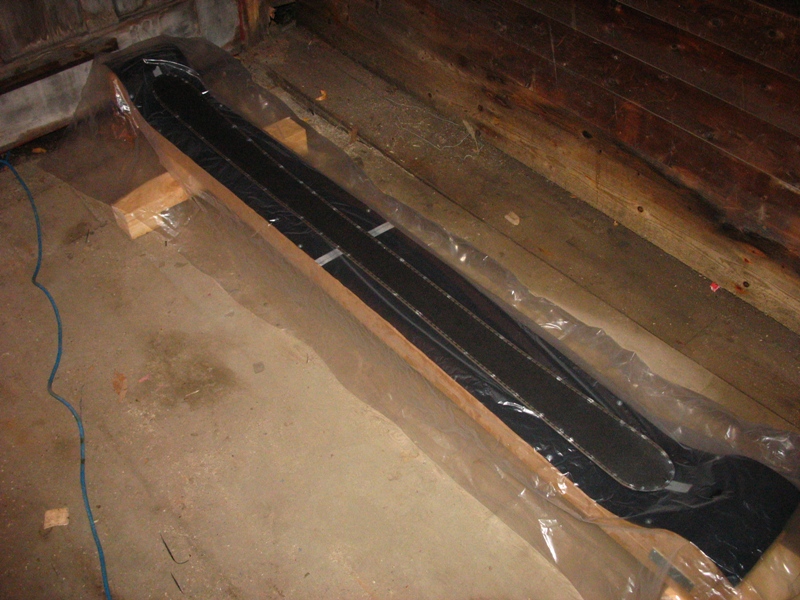
The lower piece is ±96'' long and the top is 6'' shorter. I use the small "lip" on the bottom to support the mold when it is outside the press.
Posted: Fri Sep 29, 2006 11:53 am
by Mart
I've finish my first pair of ski this week. They have a couple of problems but i'm mostly happy with the results for a first pair.
Getting ready for the first layup.
I took several minutes to fix the base to the mold but because of the low temperature, the epoxy was quite thick and the base shifted while I was spreading it ..... so i replaced it in 10 sec. Luckly for me it turn out well.
Like most of us, my bladder has a couple of leaks and this could be a problem with this first pair. I'm working outside and its getting colder every day. The epoxy might not have had the time to cure completly in 24 hours.
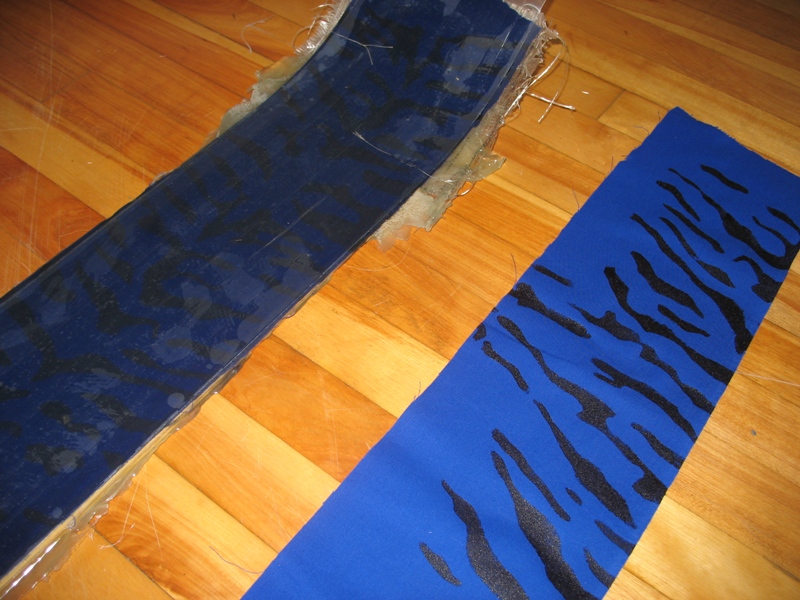
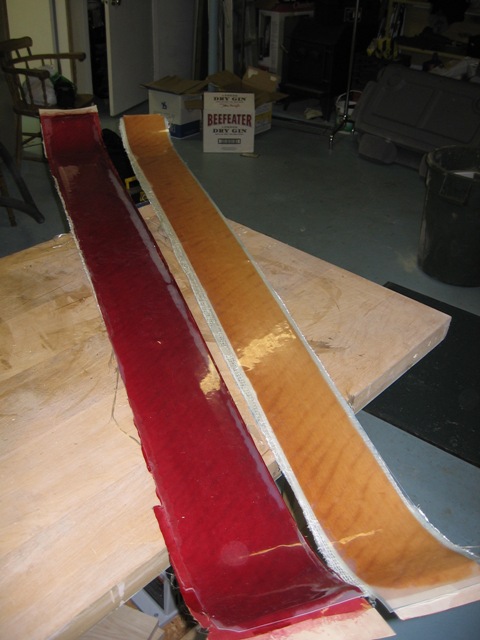
On the right, what i wanted my skis to look like. On the left, what they actualy look like. I hadn't thought the cloth would get dark from being "wet".
The skis are semi-fat 120-87-115. The core is white ash. Wood sidewall. Fiberglass tipspacers.
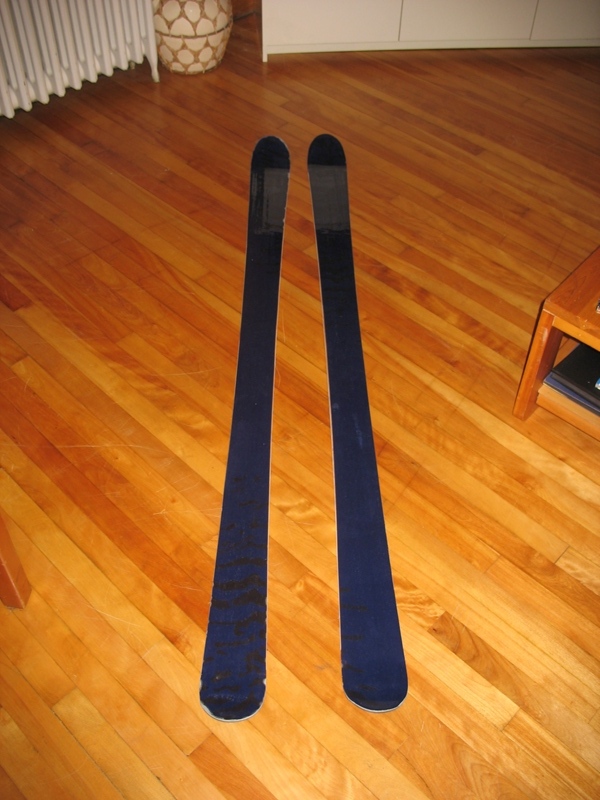
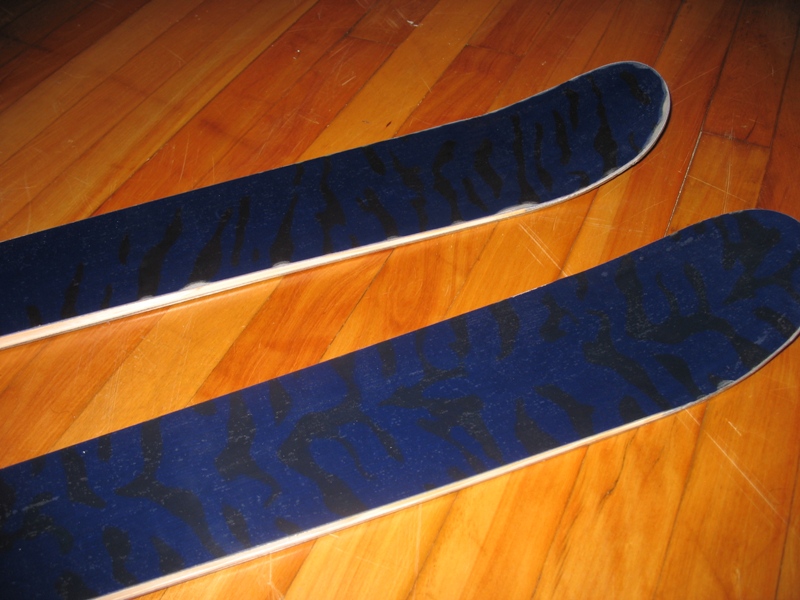
The white spots on the ski at the back are region where the top sheet is delaminating already. The cold outside temparature ( ±5C ) the night i pressed it slowed the curing of the epoxy leading to lost of camber and bad bonding of the top sheet. I should have waited more before flashing the excess material ans sanding the sidewall.
Posted: Thu Mar 01, 2007 6:56 am
by Mart
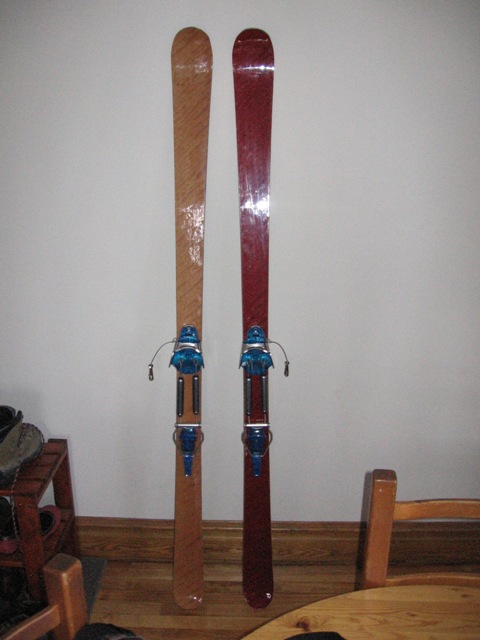
I've finished my second pair last week and had the chance to try them last night.
I have used 34 oz triaxial fiberglass instead of 22 oz. I was hoping that the skis might come out stiffer but the fiberglass did not "wet" so well and i might have been scanty on the epoxy. In the end, they aren't that stiff and they have something strange about their behavior on the slope.
Sidecut is 116/75/102 mm. The tail might be to skinny compared to the tip. 180 cm in length.
Among the numerous problems faced are : offset inserts (thanks anyway Bambi), delamination after flashing the skis, the bearing of the router slipped when bevelling the sidewall and a little bit of the wood sidewall chipped.
Still, i'm pretty happy with the results. Next time will be better.
Posted: Thu Mar 01, 2007 7:46 am
by plywood
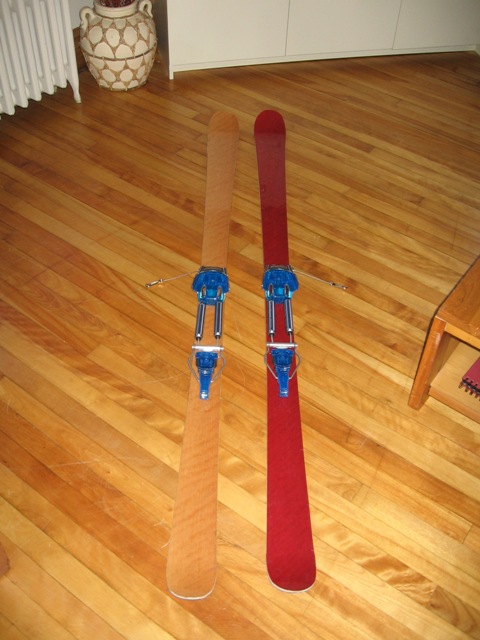
the look cool! i like the different colours. how did you create those darker "stripes"? is it some sort of veneer shining through or what?
Posted: Thu Mar 01, 2007 9:55 am
by Mart
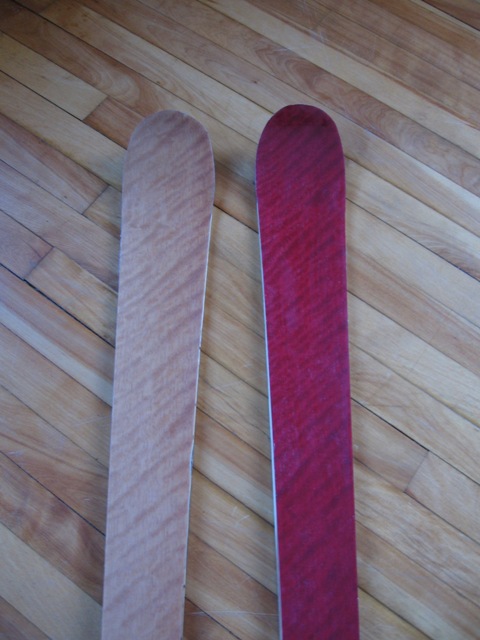
Yes, the stripes come from an exotic wood veneer (I've forgotten which).
The pale one has the original color and the red one was dyed with a water based dye.
Posted: Thu Mar 01, 2007 11:05 am
by RoboGeek
good idea with the discharge hose! I've already located some near me thats 8" ID and 150 psi
good price on some 6" 150psi here:
http://heartlandpump.thomasnet.com/item ... 8?&seo=110