I'm curious to find out how you all are routing your tip and tail molds. I searched the forum a bit and mostly what I found was hidden in journals. For those of you who don't CNC your molds, what have you found to be the best way to do it?
I started out using the router table but it was problematic due to difficulty in clamping. Especially at the start of the rocker where it is 3/4" wide and long. It was too easy to get deflection due to clamping so far from where the cutter hits the workpiece.
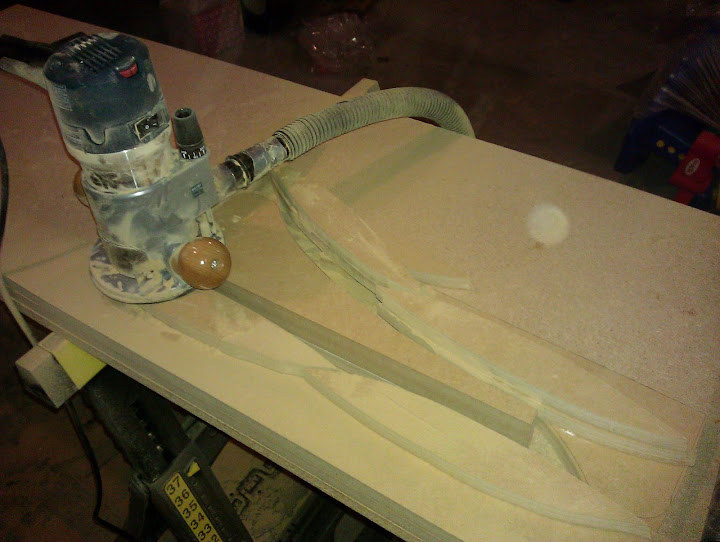
I abandoned that after destroying one of my roughed out tip sections and decided to use a tip that shopvac gave me. Some of you have probably seen his journal. He built a nest using double-sided foam tape between each layer of the nest. It worked very well for me but I went through quite a bit of the tape. At Home Depot it was about $15 for a roll of the 3M - 5lbf strength stuff. I did buy the strongest stuff they had because my garage was a nippy 27F and I figured the temperature would affect the tackiness of the tape. Anyway, I finished my tip mold using this method but after I finish the tail section this week I'll have used most of this roll.
We now make molds with our CNC router but in previous years I used a router table. I would have one rib cut out on a CNC at a machine shop. This rib would have holes in it where threaded rod would eventually go to hold all of the ribs together. I would then countersink those holes and use a nut and bolt to hold the two pieces together while I routed it out. It worked pretty well. And I like to use routers in a table rather than hand held. I feel like I have much more control over everything.
i also sure a router table and i agree that it gives more control
i free handed the template on 5mm hardboard and then screwed it to the mdf i had rough cut to shape. then hit the routere table easy as pie... 50 times in a row.
i agree with kylea i have always had one rib made by a cnc then cut the other ones off that using a 3 flute flush trim router from Home depot. i would strongly recomend finding a cnc shop...look for sign makers...and get templates made from them.
the in screw the template to a blank with 4 deck screws, i didnt have the cnc shop put them in but i might start getting pilot holes made from now on i like the idea. but then just copy the ribs and you have a mold. i also prefer a router in a table.
it saves SOOOO much time than trying to make them yourself.
novaskis wrote:i literally just came inside from doing this.
i also sure a router table and i agree that it gives more control
i free handed the template on 5mm hardboard and then screwed it to the mdf i had rough cut to shape. then hit the routere table easy as pie... 50 times in a row.
Yup this is the way.
I made a template out of plywood.
By the time I had screwed it to 25 or so boards the screws were almost through the plywood.
So I used some contact cement to glue a piece of puckboard to one side then ran that thru the router table.
Lasted for another 50+ pieces.
Works like a charm.
Then use a drill press to drill out your holes for a thru bolt.
The holes will be in the same spot on every piece.
If you hand drill the slight variation in angle will show up.
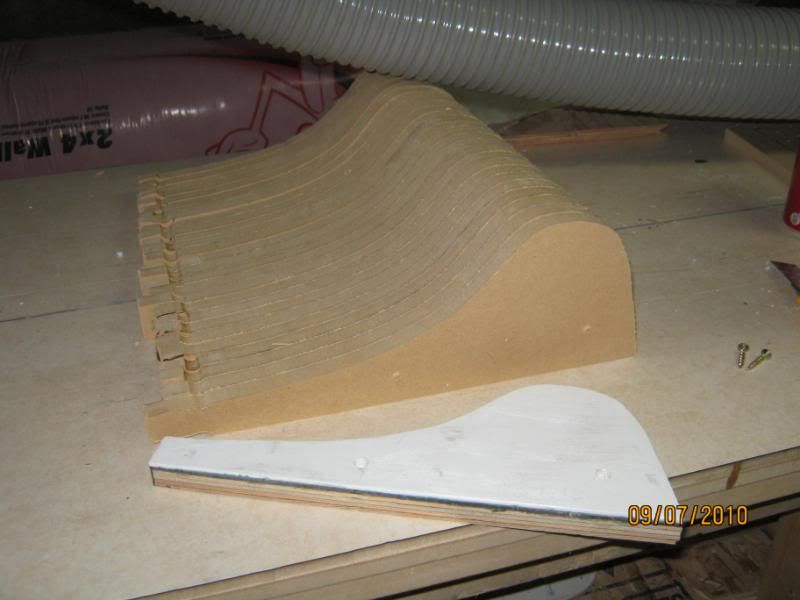
In the pics I left the tips long and once they were all together I cut it to length on the table saw.
Hope this helps
sam
You don't even have a legit signature, nothing to reveal who you are and what you do...
The template was by far the easy part. Print to 1 to 1 scale → attach to MDF with spray on adhesive → rough out with jigsaw → sand to perfection. That part only took about a half an hour.
I'll give the method you guys are using a shot on my tail molds this week. Hopefully it works out. The router table just sorta freaks me out. I prefer the workpiece to be clamped down. My buddy was making some cherry end tables and when he was routing the edges the bit caught the wood threw the workpiece into the garage door and left a huge dent. He's lucky it missed him.
I guess I just gotta man up and go for it. Maybe I'll find myself a nice push stick while wearing my hockey pads.
Wow, very timely. I just made a new tail mold the other night. I used 3/4 plywood this time instead of mdf, only because I had the plywood on hand from a previous project.
Did pretty much what the others did. Spent 95% of the time making the template perfect. Then built a jig out of scrap of wood to hold the template squarely and clamped to a work table. Then clamped the rough cut plywood piece to the template and routed the piece using a 1/2 straight router bit with a bearing on the bottom. They came out nearly perfect. One had a very minor divot. I could have left it but I filled it in w/ a tiny bit of epoxy, let it harden and sanded smooth.
As for cutting the holes, I made another small jig, nothing fancy, and used my plunge router w/ 1/2 inch straight bit and plunged through the material. All the holes lined up perfectly. The key is clamping everything firmly.
I can post some pics if it will help, once my camera charges
Well, I'm a believer. The router table worked awesome. So much quicker and no hockey pads were necessary. Only the narrow ends were a bit sketchy so I'll run the mold through the table saw as Sammer suggested to clean those up after glueing. Tail mold is just about done.
WhitePine wrote:The template was by far the easy part. Print to 1 to 1 scale → attach to MDF with spray on adhesive → rough out with jigsaw → sand to perfection. That part only took about a half an hour.
I'll give the method you guys are using a shot on my tail molds this week. Hopefully it works out. The router table just sorta freaks me out. I prefer the workpiece to be clamped down. My buddy was making some cherry end tables and when he was routing the edges the bit caught the wood threw the workpiece into the garage door and left a huge dent. He's lucky it missed him.
I guess I just gotta man up and go for it. Maybe I'll find myself a nice push stick while wearing my hockey pads.
Yea power tools can be a bit scary at times. I'm sure we've all had those moments.