
Before I start, I would like to say thank you to everyone who posts on this forum and those who helped with building the website. It has led me to start this addicting hobby that I will keep working on for a while.
I started reading here about 4 or 5 years ago, and have been working on building skis (or atleast thinking about it a lot) since then. I am a junior at Western Washington University studying Manufacturing Engineering, and am lucky enough to live 40 minutes from my parents who have an awesome shop with every tool in the book.
I bought Scott's (iggyskier) old ski press, and it took me a little bit more than a year to set up all the other jigs and molds.
I guess I have to wait a day and have a couple posts before I can post pictures, so you guys will have to wait until tomorrow or the day after to see pictures.
Ski building so far
Moderators: Head Monkey, kelvin, bigKam, skidesmond, chrismp
-
n.marshall
- Posts: 30
- Joined: Mon Aug 30, 2010 7:29 pm
-
n.marshall
- Posts: 30
- Joined: Mon Aug 30, 2010 7:29 pm
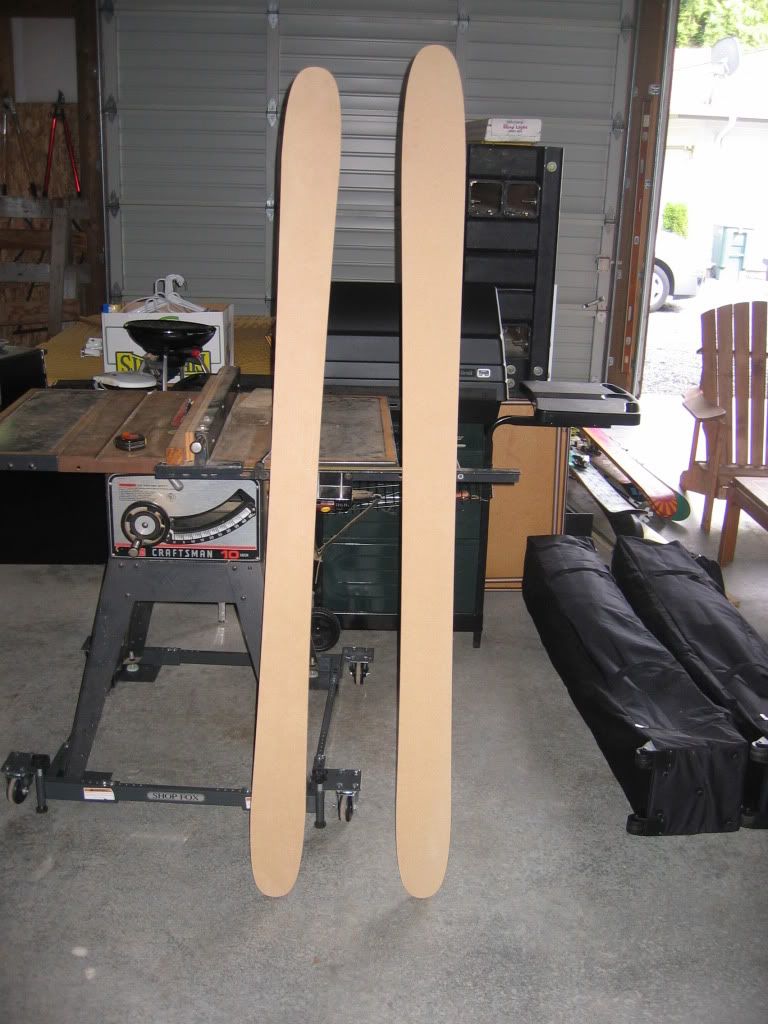
Here are the first ski templates I got cut out. One is a 185 that is 103 mm underfoot and the other is a 191 that is 120 mm underfoot.
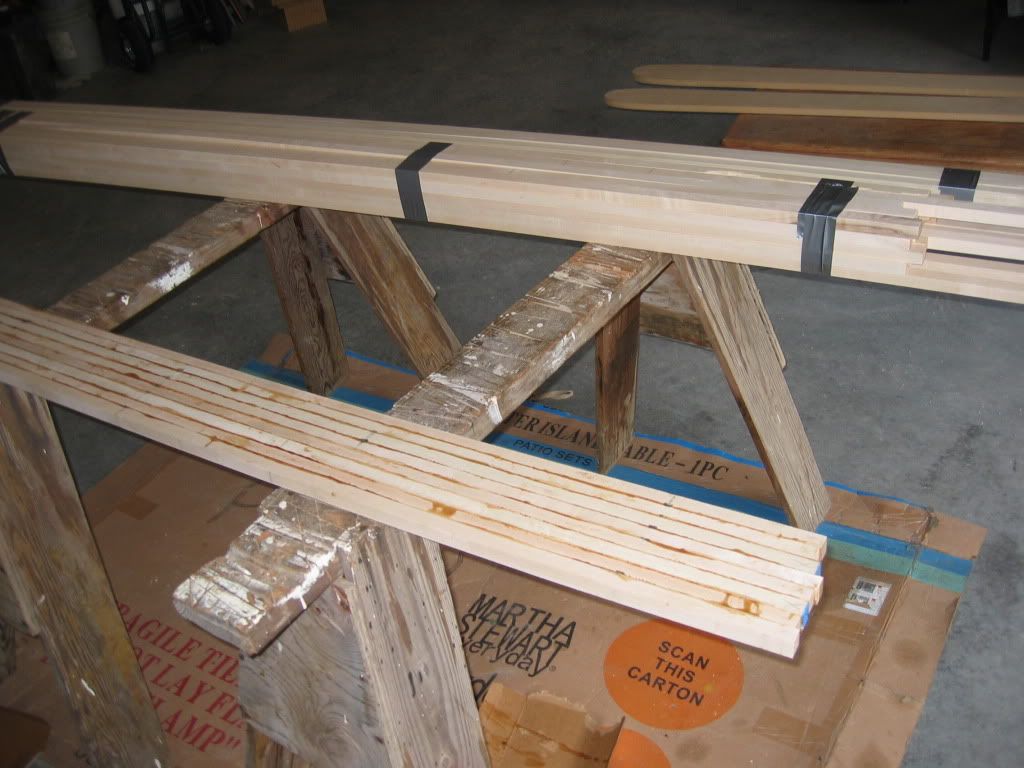
The first core I laminated next to some extra core materials. I used maple and poplar
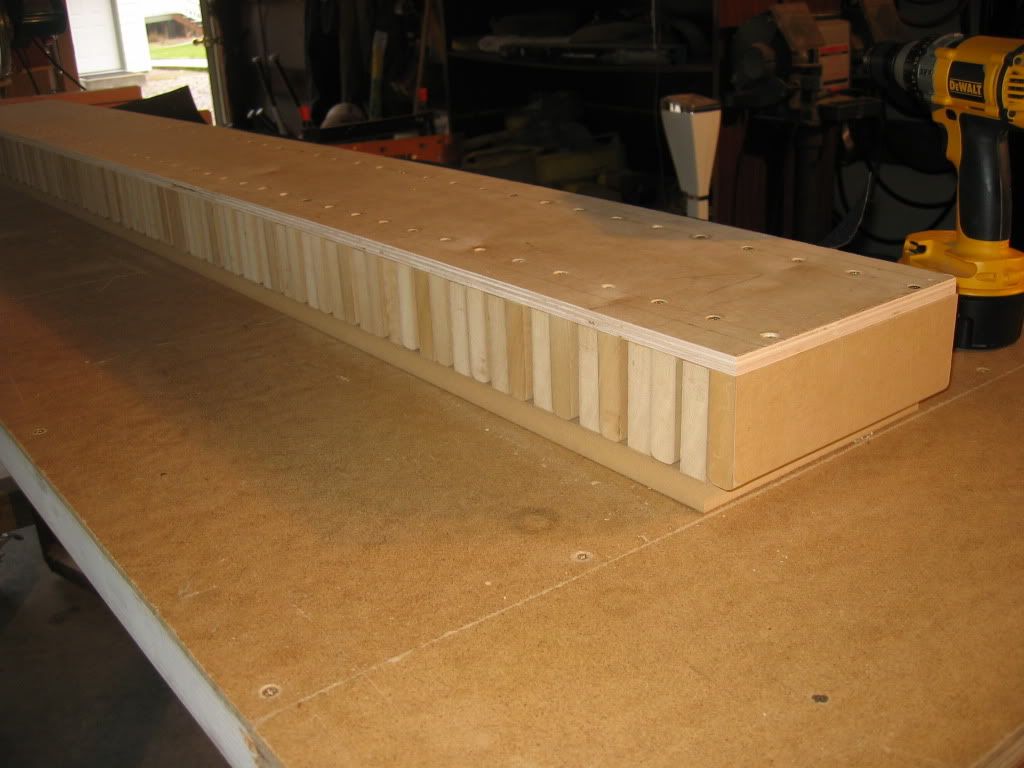
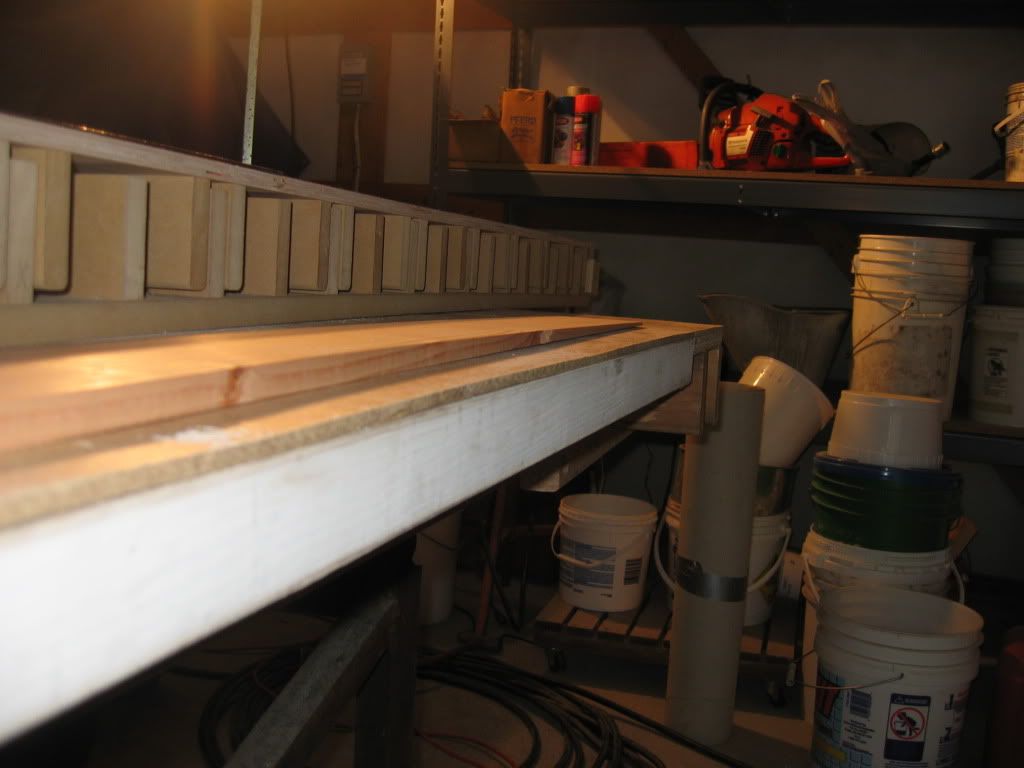
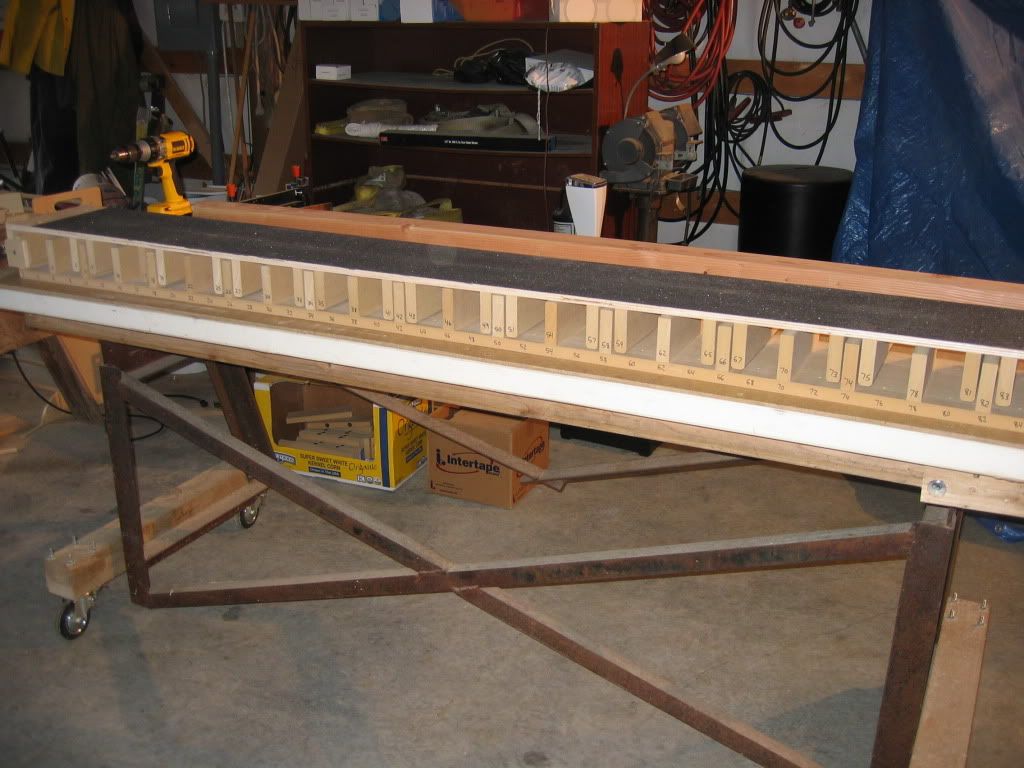
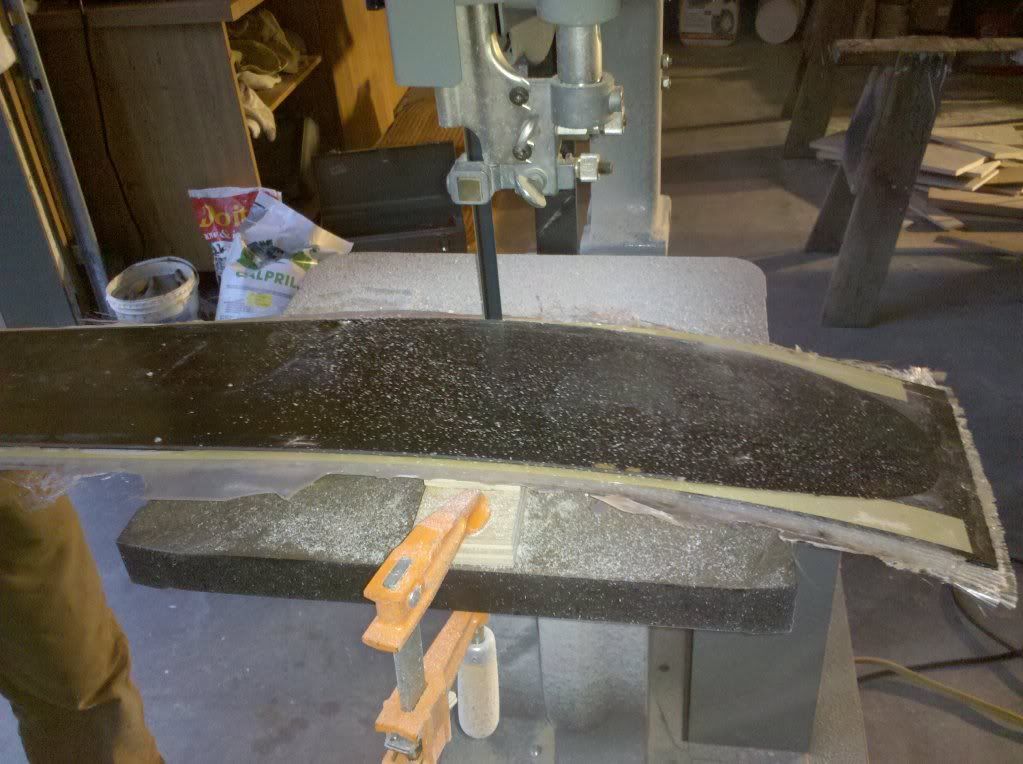
I built a core profiler out of mdf, here are some photos of it


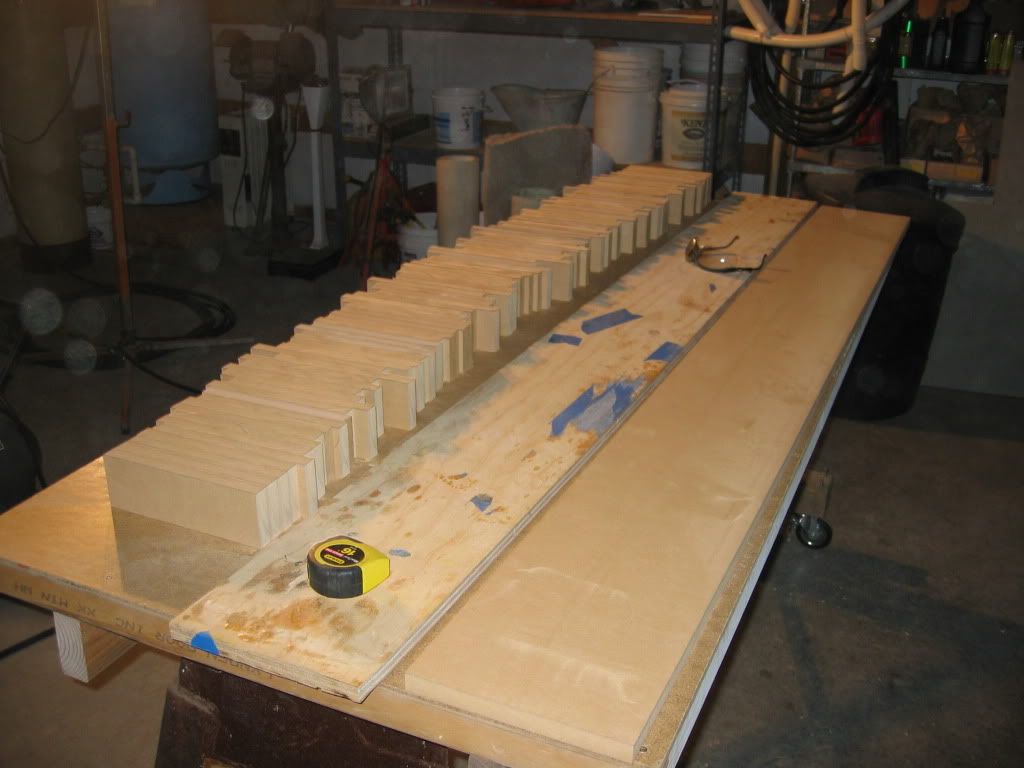
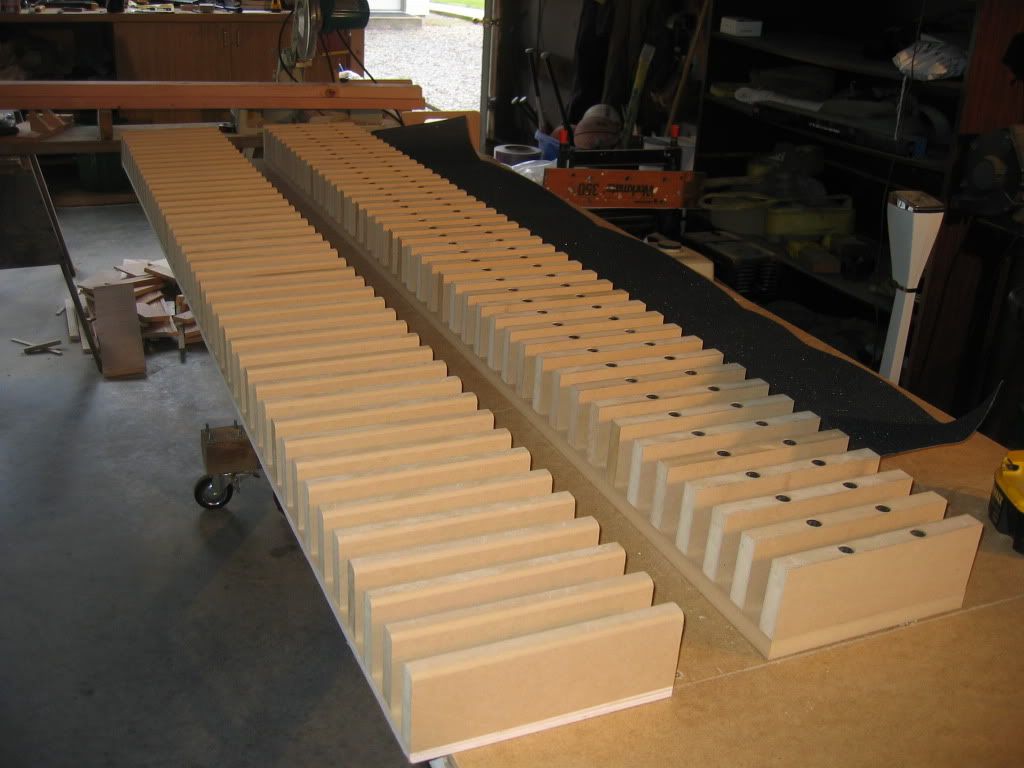
Here I profiled a fir 2x4 to test it, I also removed a lot of the mdf blocks to lighten the profiler so that it was easier on the planer
I ended up building some modified sawhorses to use as infeed and outfeed tables

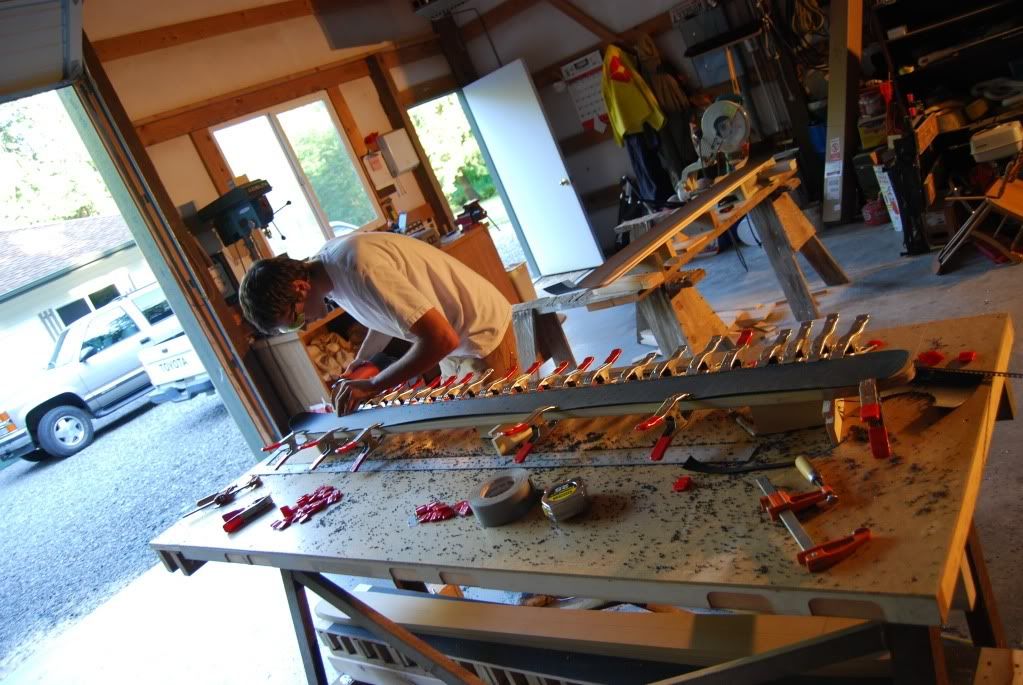
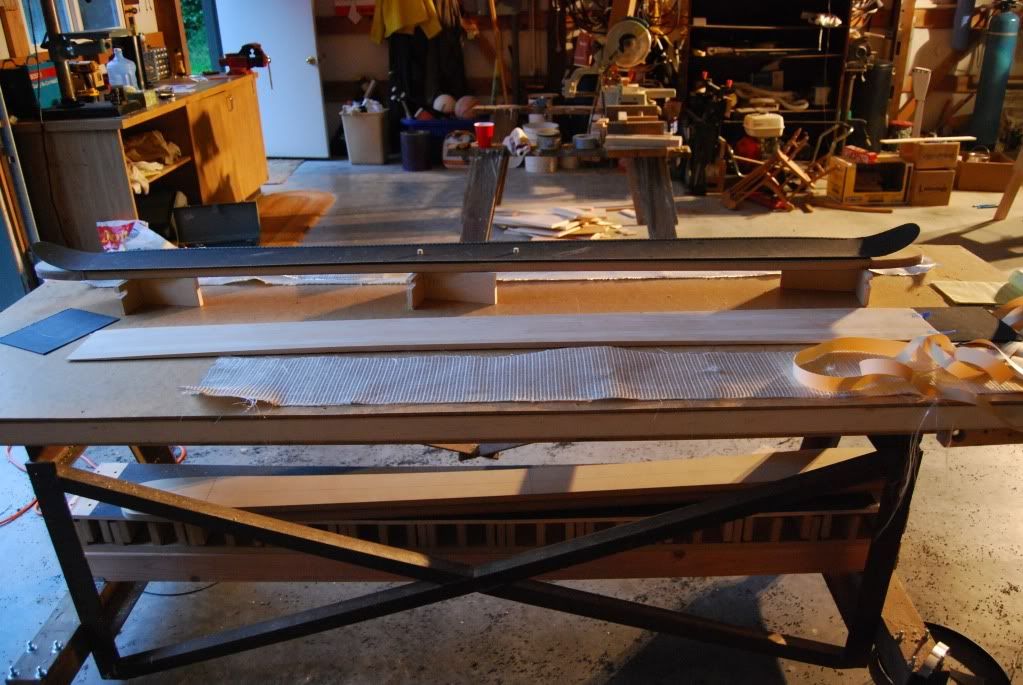
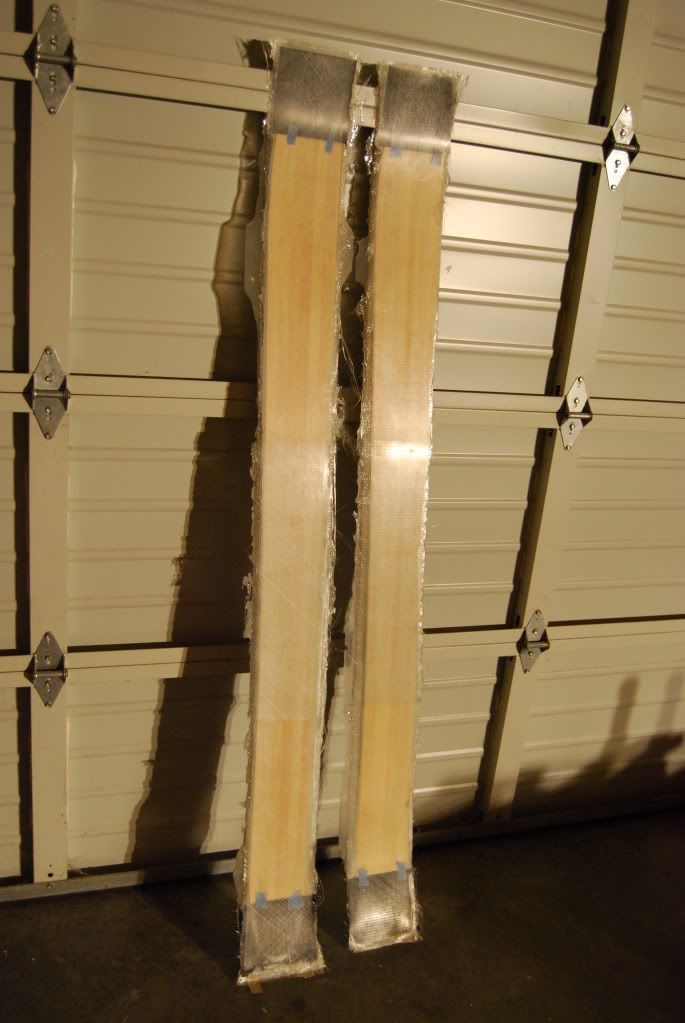
Gluing edges onto base material for my first pair of skis
Materials ready for layup
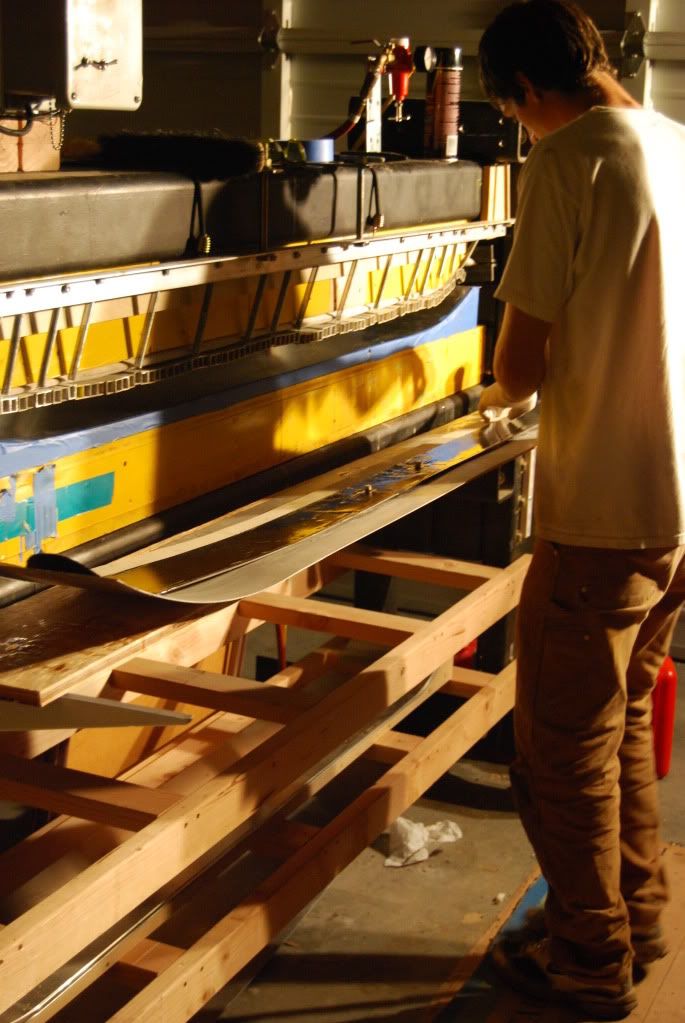
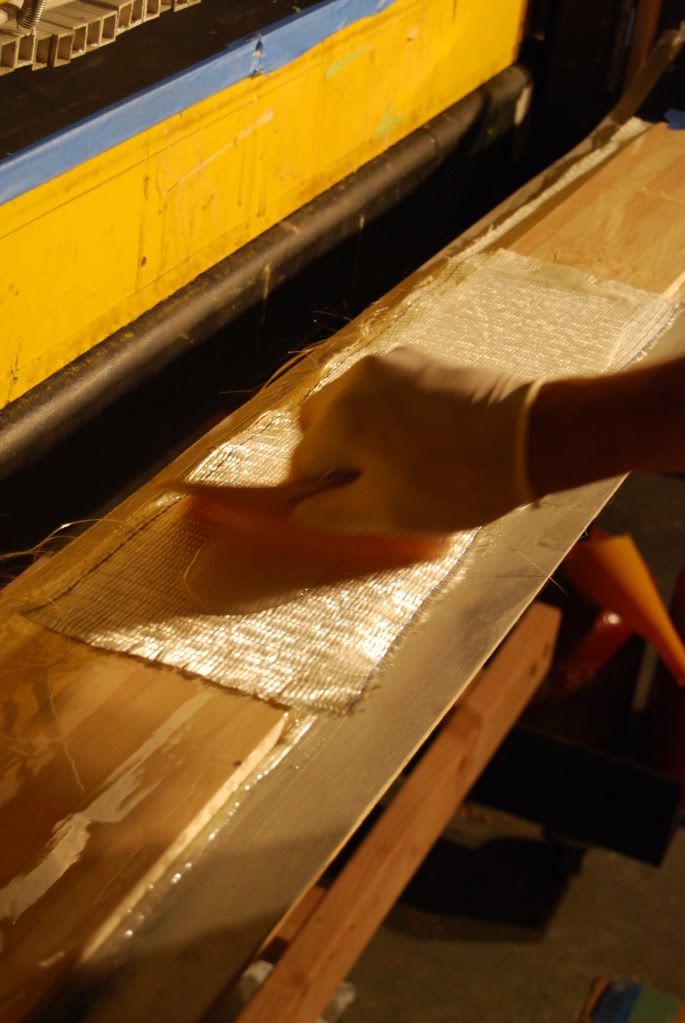
Layup
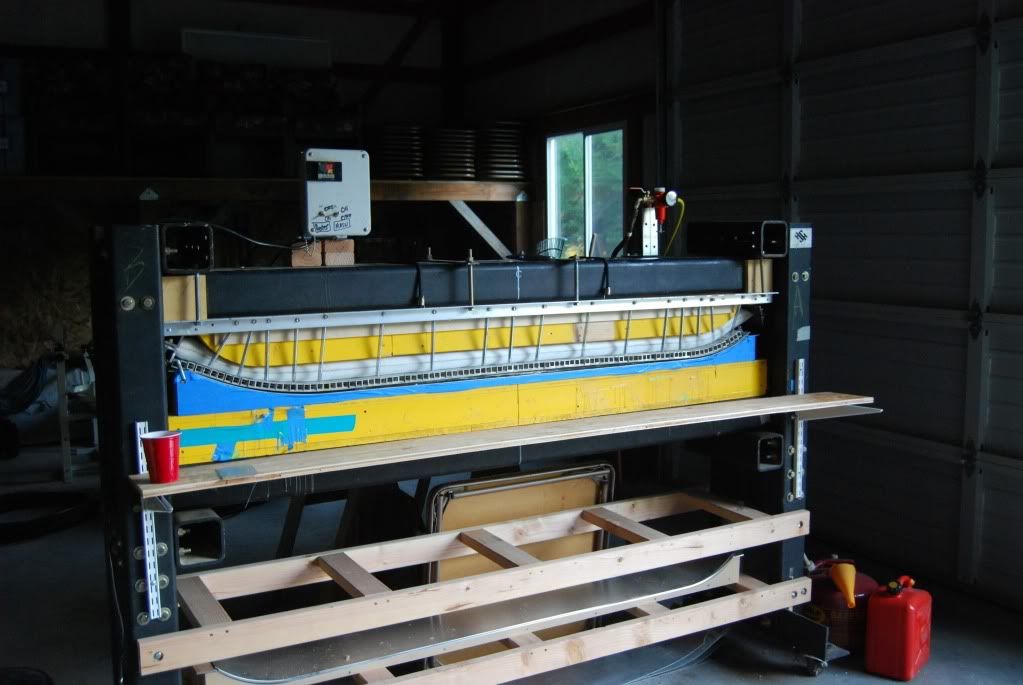
In the press

The first core I laminated next to some extra core materials. I used maple and poplar
I built a core profiler out of mdf, here are some photos of it
Here I profiled a fir 2x4 to test it, I also removed a lot of the mdf blocks to lighten the profiler so that it was easier on the planer
I ended up building some modified sawhorses to use as infeed and outfeed tables
Gluing edges onto base material for my first pair of skis
Materials ready for layup
Layup
In the press
-
skidesmond
- Posts: 2337
- Joined: Tue Apr 07, 2009 3:26 pm
- Location: Western Mass, USA
- Contact:
-
n.marshall
- Posts: 30
- Joined: Mon Aug 30, 2010 7:29 pm
The core profiler has been working ok, I am building a router bridge to replace it. At first I was having problems with the core not staying on the grip tape, but I think that was because my infeed table was a little bit too tall. The crib would stop moving but the rollers in the planer would pull the core through. I shimmed up the planer and now the core stays in place.OAC wrote:Well done! Nice work!
What a nasty core profiler!Did it run without difficulties through the planer? I know these DeWalt planers are strong bastards.
The planer was having some trouble pulling the whole crib through, and thats why I removed some blocks to lighten it. I still push with a little bit of pressure to make sure it doesn't get stuck. It worked pretty good for my skis with wood sidewalls, but the planer blades wrecked the plastic on the skis that I built for my friend Mitchell. Its kind of hard to see in this picture but if you look on the left sidewall the planer ripped out some chunks of plastic but left the core smooth. I am hoping that a router bit will leave a smoother finish.
-
n.marshall
- Posts: 30
- Joined: Mon Aug 30, 2010 7:29 pm
I didn't actually prebend the tip and tail sections, that's how they came off the roll from the skibuilders store. The base naturally wanted to curve that way. I didn't wrap the edge material all the way around the tips, and that is why it is still warped there.skidesmond wrote:Excellent work. I noticed you pre-bent the the tip/tail section. Was it difficult to get the core placed on the base? I see you also used dowels to keep the core from shifting. I guess you have been reading the forum
Way to go!
It was pretty difficult to get the core in place. I am leaving about 3 mm of excess sidewall over each edge, and on both pairs that I have built so far it shifted in enough on one section of sidewall so that the edge had nothing above it. I was trying to use dowel markers to line up the core, but I ended up having to drill out the holes in the core larger to make them fit easily into the dowels on the base. I didn't want to have to mess around during the layup to get everything lined up, I wanted it to fall into place.
For my next pair I plan on gluing dowels to the cassette or aluminum skin in order to line up the core.
-
n.marshall
- Posts: 30
- Joined: Mon Aug 30, 2010 7:29 pm
Like I was saying above, I am pretty satisfied with how my first pair of skis came out. They have
Black p-tex base from ski builders
Rubber foil over the edges
A layer of 22 oz fiberglass
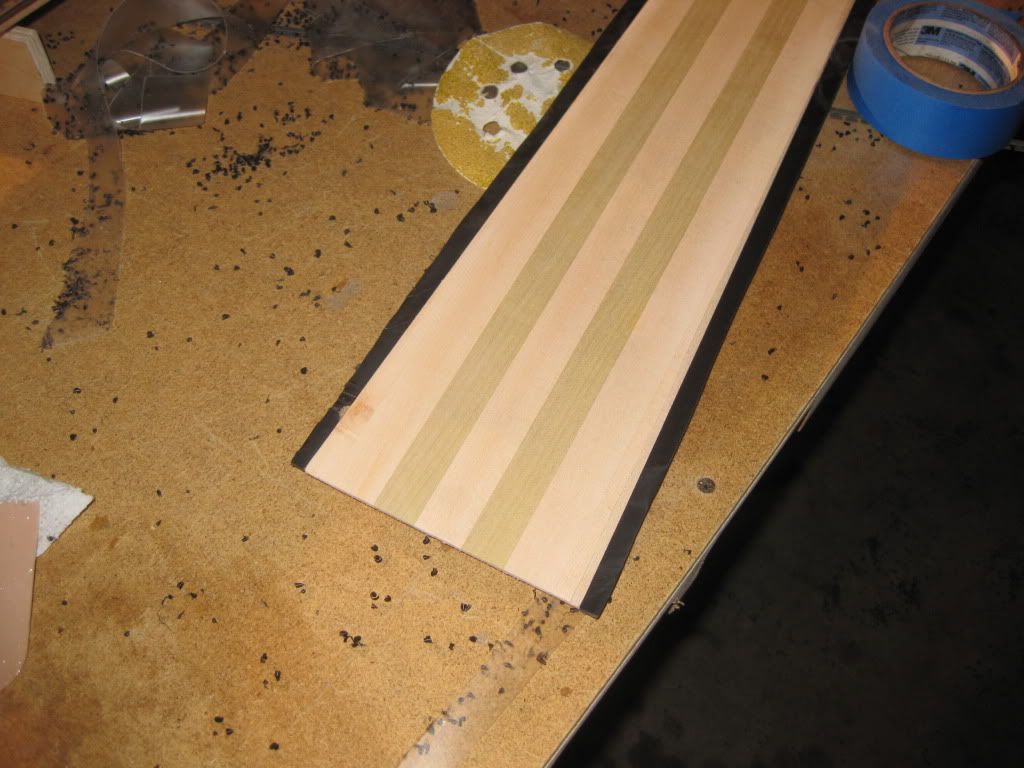
Maple/poplar core with 3/4" strips. The pattern was M-M-P-M-M-P-M-M. Like I said above, I left the core wide for the sidewall. The thickness in the middle was about 10 mm.
A two foot long piece of fiberglass used as a binding mat
Another layer of 22 oz fiberglass
I didn't put a top sheet on the skis, the top layer of glass seems to hold up alright after 1 day of skiing.
I used QCM epoxy and resin.
I pressed the skis at 80 degrees celsius at 50 psi for 45 minutes, and then shut the heat off. The first ski I left in the press for an additional 60 minutes, the second ski was more like 30 minutes. They seemed to come out the same, no camber or rocker changes. You can tell on the first ski I used more resin on top of the core, as the top layer of glass is less textured than the second ski.
I think the final shape is 145-120-135. I didn't use the template that I took a picture of above, I drew it up in snowcad and somehow ended up having the skinniest part of the ski 20 cm back from center. I drew up a new shape in catia (solidworks) at the lab at school and had a local cnc company cut it out. They are charging $80 per shape.


For the sidewalls, I used a laminate trimmer with a tilt base to angle them at about 23 degrees. I used a router bit that had a top mounted bearing, and I just ran the bearing along the edge. The first pass I made I didn't sand/grind the edge smooth, and every little bump showed up on the sidewall. I finished this sidewall with a marine varnish. You can see a small spot of fiberglass where I didn't get enough epoxy, I will probably just put some glue over that.
The other sidewalls came out much better. I cleaned up the edge first, then cut the sidewall at 15 degrees, then at 23 degrees. This was less taxing on the router bit and left a smoother finish. I coated this sidewall with epoxy mixed with acetone. I like this finish more, it is harder and probably more waterproof.
I really like the shape of these skis, I was trying to design something that would be an everyday fresh snow ski for skiing at Mt. Baker. I might even build another pair with more rocker, less stiffness, and less weight and put dukes on them.
I got to try them out in July, which was really fun even though I was skiing over small ponds and large partially frozen suncups. I think I will love these skis no matter what they feel like because I put so much work into them.
Black p-tex base from ski builders
Rubber foil over the edges
A layer of 22 oz fiberglass
Maple/poplar core with 3/4" strips. The pattern was M-M-P-M-M-P-M-M. Like I said above, I left the core wide for the sidewall. The thickness in the middle was about 10 mm.
A two foot long piece of fiberglass used as a binding mat
Another layer of 22 oz fiberglass
I didn't put a top sheet on the skis, the top layer of glass seems to hold up alright after 1 day of skiing.
I used QCM epoxy and resin.
I pressed the skis at 80 degrees celsius at 50 psi for 45 minutes, and then shut the heat off. The first ski I left in the press for an additional 60 minutes, the second ski was more like 30 minutes. They seemed to come out the same, no camber or rocker changes. You can tell on the first ski I used more resin on top of the core, as the top layer of glass is less textured than the second ski.
I think the final shape is 145-120-135. I didn't use the template that I took a picture of above, I drew it up in snowcad and somehow ended up having the skinniest part of the ski 20 cm back from center. I drew up a new shape in catia (solidworks) at the lab at school and had a local cnc company cut it out. They are charging $80 per shape.
For the sidewalls, I used a laminate trimmer with a tilt base to angle them at about 23 degrees. I used a router bit that had a top mounted bearing, and I just ran the bearing along the edge. The first pass I made I didn't sand/grind the edge smooth, and every little bump showed up on the sidewall. I finished this sidewall with a marine varnish. You can see a small spot of fiberglass where I didn't get enough epoxy, I will probably just put some glue over that.
The other sidewalls came out much better. I cleaned up the edge first, then cut the sidewall at 15 degrees, then at 23 degrees. This was less taxing on the router bit and left a smoother finish. I coated this sidewall with epoxy mixed with acetone. I like this finish more, it is harder and probably more waterproof.
I really like the shape of these skis, I was trying to design something that would be an everyday fresh snow ski for skiing at Mt. Baker. I might even build another pair with more rocker, less stiffness, and less weight and put dukes on them.
I got to try them out in July, which was really fun even though I was skiing over small ponds and large partially frozen suncups. I think I will love these skis no matter what they feel like because I put so much work into them.
-
ApeNatural
- Posts: 28
- Joined: Fri Aug 27, 2010 6:30 pm
Wow, great job man, those look great. I am thinking about setting up a flat camber with a similar rocker profile to what you have (maybe more tail rocker with more of a gradual rocker up front like the Moment Night Trains) and I have been reading about how much the ski relaxes after pressing. I was wondering if this means that for flat camber you should press with around 2-3 mm of camber in the press, or can I just use a flat mold? I guess if you have a pic of your mold that would be great. Thanks.
EDIT: after going back and looking at the picture during pressing, it looks like you do have some camber in your mold, so did your ski turn out flat? Or are they just pressed together in the rocker shot? It kind of looks like there is some camber in the shot of them sitting on the table.
EDIT: after going back and looking at the picture during pressing, it looks like you do have some camber in your mold, so did your ski turn out flat? Or are they just pressed together in the rocker shot? It kind of looks like there is some camber in the shot of them sitting on the table.
-
n.marshall
- Posts: 30
- Joined: Mon Aug 30, 2010 7:29 pm
Well, the first pair of skis that I built were pretty fun, but a little bit stiff.
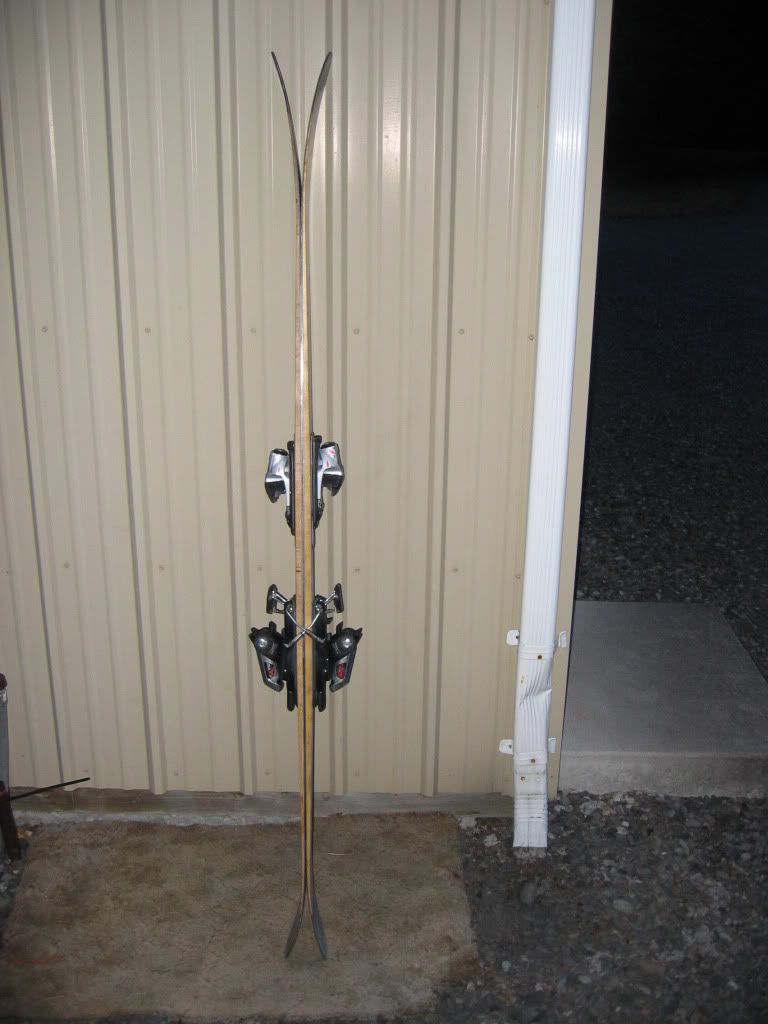
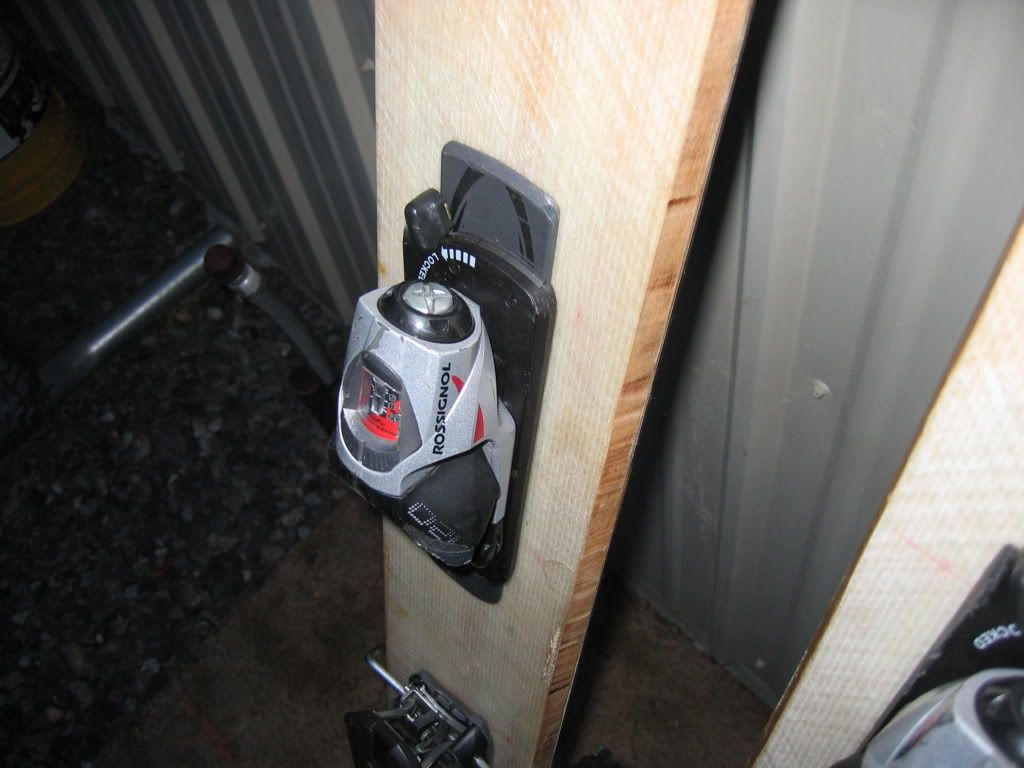
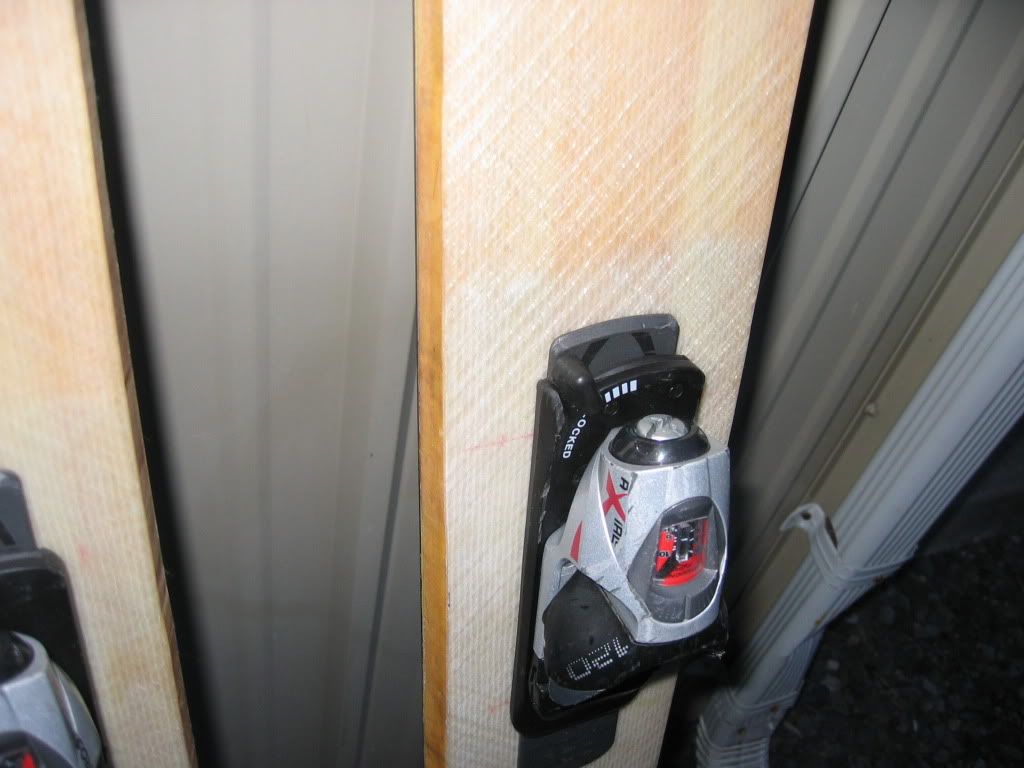
Since then I have built 8 more pairs of skis, 3 for myself and 5 for friends. I also built some skis with one stratight edge that can be locked together for downhill riding. I am told this is called splitboarding, but I keep telling my roomate that I built him skis.
I really like this forum, I was able to fix problems with my skis and build them better than before without ever asking for help.

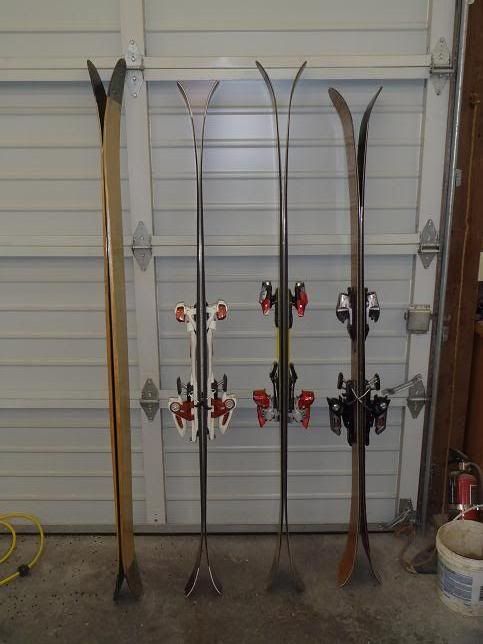
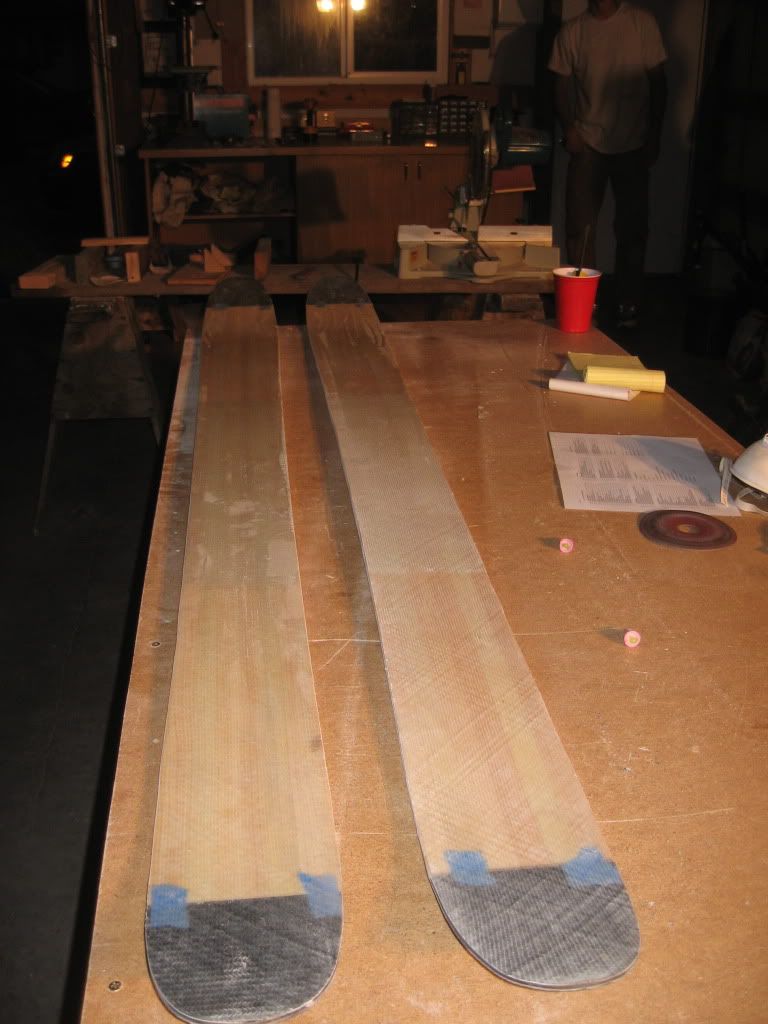
From left to right
These are the 1st pair of skis I built, explanation above
These are a rocker/camber ski that I built for touring. 187 cm long, 116 underfoot. They came out ok, the bases arent flat, not enough sidecut, and they are too short and tapered for what I was using them for. I will probably sell them this fall. There is also more uni carbon below the carbon fiber topsheet, and the tips are a bit too stiff, they sink and dont come back up in heavy snow. But they are pretty fun to ride is slush/soft resort conditions. They have a bamboo and poplar core.
These skis were really fun, skied them a bunch this year. Its the same ski shape as the 1st pair I built, but with more rocker. 191 cm long, 145-120-130. Pintail design is really fun on pow days. All poplar core made the tips softer, and the carbon fiber stiffened them underfoot. These skis like to go fast. Didn't put a topsheet on these, just triaxal glass. For other peoples skis I finished them with a spar urethane, but mine I left bare to see how they held up. They were pretty good, no delams or breaking down of epoxy, but I really only skied 1/2 a season on these.
I had a lot of fun on these this year also, and had pretty good reviews from other people that skied them also. They are 183 cm 155-124-144. They smash everything in their way with the big rocker and flatbase underfoot. Maple poplar core. Quilted maple topsheet that came out looking really good. These skis were really fun for when I was following around snowboarders through skinny chutes and weird billy goating situations.
I will try to get some more pictures of the other skis, there are a few other ski shapes out there that I have built that were liked.
I told too many people about ski building/too many people saw me up on the mountain, and it turns out I am building 20 pairs of skis before winter. I have 3 built but not cut out yet, I will post more pictures of the skis and shop rennovations later.
I have been tagging all of the new skis with a piece of paper like these
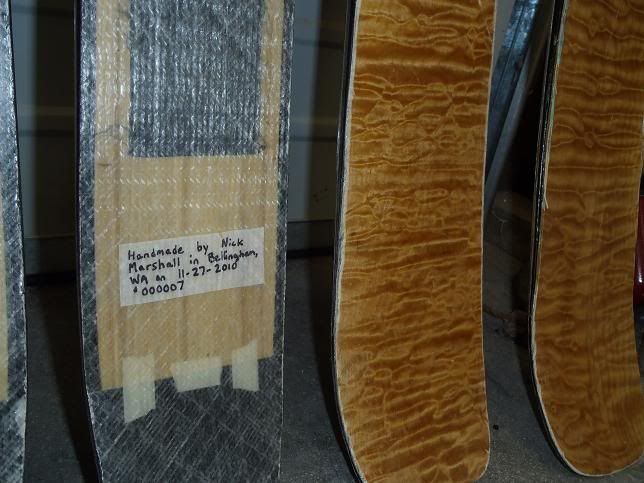
Usually it says "Handmade for (name) by Nick Marshall in Bellingham, WA #0000__"
If you see any of them in washington, montana, or british columbia let me know, I like to hear what people think about my skis.
I will post some pictures later of the other 3 pair that I built last week.
Since then I have built 8 more pairs of skis, 3 for myself and 5 for friends. I also built some skis with one stratight edge that can be locked together for downhill riding. I am told this is called splitboarding, but I keep telling my roomate that I built him skis.
I really like this forum, I was able to fix problems with my skis and build them better than before without ever asking for help.
From left to right
These are the 1st pair of skis I built, explanation above
These are a rocker/camber ski that I built for touring. 187 cm long, 116 underfoot. They came out ok, the bases arent flat, not enough sidecut, and they are too short and tapered for what I was using them for. I will probably sell them this fall. There is also more uni carbon below the carbon fiber topsheet, and the tips are a bit too stiff, they sink and dont come back up in heavy snow. But they are pretty fun to ride is slush/soft resort conditions. They have a bamboo and poplar core.
These skis were really fun, skied them a bunch this year. Its the same ski shape as the 1st pair I built, but with more rocker. 191 cm long, 145-120-130. Pintail design is really fun on pow days. All poplar core made the tips softer, and the carbon fiber stiffened them underfoot. These skis like to go fast. Didn't put a topsheet on these, just triaxal glass. For other peoples skis I finished them with a spar urethane, but mine I left bare to see how they held up. They were pretty good, no delams or breaking down of epoxy, but I really only skied 1/2 a season on these.
I had a lot of fun on these this year also, and had pretty good reviews from other people that skied them also. They are 183 cm 155-124-144. They smash everything in their way with the big rocker and flatbase underfoot. Maple poplar core. Quilted maple topsheet that came out looking really good. These skis were really fun for when I was following around snowboarders through skinny chutes and weird billy goating situations.
I will try to get some more pictures of the other skis, there are a few other ski shapes out there that I have built that were liked.
I told too many people about ski building/too many people saw me up on the mountain, and it turns out I am building 20 pairs of skis before winter. I have 3 built but not cut out yet, I will post more pictures of the skis and shop rennovations later.
I have been tagging all of the new skis with a piece of paper like these
Usually it says "Handmade for (name) by Nick Marshall in Bellingham, WA #0000__"
If you see any of them in washington, montana, or british columbia let me know, I like to hear what people think about my skis.
I will post some pictures later of the other 3 pair that I built last week.
-
n.marshall
- Posts: 30
- Joined: Mon Aug 30, 2010 7:29 pm

-
skidesmond
- Posts: 2337
- Joined: Tue Apr 07, 2009 3:26 pm
- Location: Western Mass, USA
- Contact: