
Unnamed
Moderators: Head Monkey, kelvin, bigKam, skidesmond, chrismp
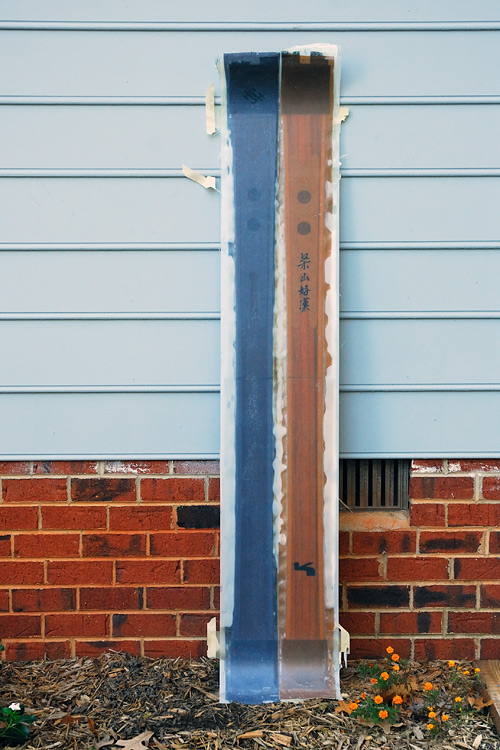
cleaned them up last night after work.
dimensions are the same as the Kaweah. core is made of random wood laying around, including wood from Project Pallet. max core thickness is approx. 10.5mm +/- 500 microns underfoot. i gave the sidewalls more bevel than usual, making them look Rossi Scratch-like. i'm using black base material this time -- ran out of colors from my personal stock. the layup is as follows:
bottom-to-top
======================================
- base material + edges (full-wrap around tip/tail)
- rubber on edges, and some on tip/tail, with a few patches halfway between the tip and waist, and tail and waist.
- glass layer (22 oz.)
- wood core w/ white sidewalls. i did not flame treat the sidewalls this time. i keep catching on fire when i flame treat, so this time i sanded sidewall bonding surfaces with very rough sandpaper. the surface had lots of hair-like fibers. cleaned everything with acetone. i've used this method before with OK success, hit or miss.
- used black tip/tail spacers. looks very nice and got really good bond this time.
- damping layer between the tip and waist is visible (black circles). put a shallow pocket in the wood core for rubber. treated the rubber with chemlok to improve bonding. over the rubber rides a thin sheet of AL with two holes punched to show the rubber. the AL was abraded with very rough sand paper. i cleaned the surface thoroughly just before i applied epoxy to minimize effect of oxidation. the AL sheet does not cover edge-to-edge on the surface, but rather it's smaller so that the glass layer can contact the wood core surrounding the AL sheet. also, i punched a few holes to help "lock" the AL in place. two holes reveal the rubber layer underneath the AL layer. from my tests and experiences, AL does not bond well unless it's specially prepped. need to do more work on this or search the forum for techniques by others.
- glass layer (22 oz.)
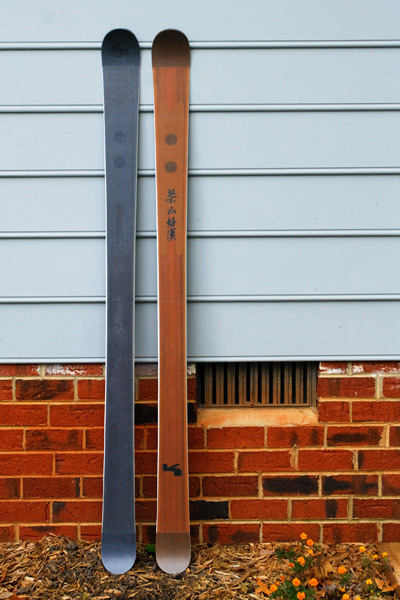
- finally, cloth with graphics, and natural top sheet.
used 75psi pressure. pressed at 140F for 30 minutes, then 190F for one hour, followed by cooling under pressure. final camber: 5mm. perfect. some air bubbles are visible on the darker ski.
i'm very happy with this ski, and it's the third generation of this design. the flex feels friendly to me. i'll ski it this weekend. let's hope i don't knock out my teeth.
dimensions are the same as the Kaweah. core is made of random wood laying around, including wood from Project Pallet. max core thickness is approx. 10.5mm +/- 500 microns underfoot. i gave the sidewalls more bevel than usual, making them look Rossi Scratch-like. i'm using black base material this time -- ran out of colors from my personal stock. the layup is as follows:
bottom-to-top
======================================
- base material + edges (full-wrap around tip/tail)
- rubber on edges, and some on tip/tail, with a few patches halfway between the tip and waist, and tail and waist.
- glass layer (22 oz.)
- wood core w/ white sidewalls. i did not flame treat the sidewalls this time. i keep catching on fire when i flame treat, so this time i sanded sidewall bonding surfaces with very rough sandpaper. the surface had lots of hair-like fibers. cleaned everything with acetone. i've used this method before with OK success, hit or miss.
- used black tip/tail spacers. looks very nice and got really good bond this time.
- damping layer between the tip and waist is visible (black circles). put a shallow pocket in the wood core for rubber. treated the rubber with chemlok to improve bonding. over the rubber rides a thin sheet of AL with two holes punched to show the rubber. the AL was abraded with very rough sand paper. i cleaned the surface thoroughly just before i applied epoxy to minimize effect of oxidation. the AL sheet does not cover edge-to-edge on the surface, but rather it's smaller so that the glass layer can contact the wood core surrounding the AL sheet. also, i punched a few holes to help "lock" the AL in place. two holes reveal the rubber layer underneath the AL layer. from my tests and experiences, AL does not bond well unless it's specially prepped. need to do more work on this or search the forum for techniques by others.
- glass layer (22 oz.)
- finally, cloth with graphics, and natural top sheet.
used 75psi pressure. pressed at 140F for 30 minutes, then 190F for one hour, followed by cooling under pressure. final camber: 5mm. perfect. some air bubbles are visible on the darker ski.
i'm very happy with this ski, and it's the third generation of this design. the flex feels friendly to me. i'll ski it this weekend. let's hope i don't knock out my teeth.
hi BK,
I think this ski is just great and might need a bit more of explanation, nop ?
- how did you choose the place of the 2 damping circles ? what do you expect from it ?
- Lots of ski manufacturers do machine their core to give them specific properties (the most impressive to me is the elans wave core). I am not sure I understand what youy did : a shallow pocket, put rubber in it, put aluminium over it ? can you post more detailed picture ?
Final question, I read something in another thread, but i'm still not quite sure : you use zero camber mold, and the camber comes naturally during the cooling ?
good luck for your teeth
-
Wren Akula
- Posts: 4
- Joined: Thu Jul 05, 2007 5:12 pm
-
thetradwoodboat
- Posts: 22
- Joined: Mon Mar 12, 2007 3:42 am
- Location: ports., nh
- Contact:
alright those skis look great! and i can say having used a couple pairs of my own new skis yesterday (we are off to a nice start here in the east) that damping is all important...and i have a long way to go.
i'm wondering what you used for aluminum. is simple flashing material worth using?
can't wait to hear about how those skis go.
i'm wondering what you used for aluminum. is simple flashing material worth using?
can't wait to hear about how those skis go.
bigKam,
Good looking skis!!
Have you had a chance to try these skis out? Does the rubber/alum. make a "huge" difference in the ride? Was it worth installing? Do you think installing rubber/alum. on the bottom of the core as opposed to the top as you did provide the same damping properties? Have you experienced any delam problems with this layup yet? For aluminum what do you think roof flashing would work?
Sorry for so many questions but that's what you get when you're leading the way.
Thanks
Bill
yes! i've skied them 6 times already, two inbounds, and the other days in the backcountry. the damper seems to work -- just like the other four pairs i've made using similar layup. i do notice a difference between the skis i make with and without rubber/metal mixture -- the ones with rubber/metal mixtures feel more damp to me.breid19 wrote:Have you had a chance to try these skis out? Does the rubber/alum. make a "huge" difference in the ride? Was it worth installing? Do you think installing rubber/alum. on the bottom of the core as opposed to the top as you did provide the same damping properties? Have you experienced any delam problems with this layup yet? For aluminum what do you think roof flashing would work?
but the only problem with this ski is the sidewalls have delamed, even before i skied them. but despite this, they feel very, very solid. then again i'm not a good enough skier to notice the delam, to be honest.
i would recommend playing with the rubber/metal mix to improve damping. i haven't tried just adding the materials to the bottom of the core -- that may work. give it a try and let us know. the key of course is to make sure the AL is well abraded for bonding. don't be surprised that it may cause some delamination -- try not cover the ski from edge-to-edge with AL, but just where you need it.
...now back to the drawing board. i have a couple more ideas...