Page 4 of 5
Posted: Sun Nov 20, 2011 8:16 pm
by sammer
Nice! Kids' skis are hard to get right!
Who's the guy on the skis and socks?
sam
Posted: Mon Nov 21, 2011 8:22 am
by vinman
My kid is a Mario junky. Skiing Super Mario is on the ski tip and tail.
Posted: Mon Nov 21, 2011 1:27 pm
by skidesmond
MontuckyMadman wrote:haha I could never convince my freind to use PU glue for anything. He considers it the scourge of everything wood working.
I dunno just him.
haha
I would use aspen but he made a polar/maple one.
Polyu-glue?, really? In general I don't like how it expands for wood working. When it expands in a 90 degree joint it's a pain to clean the joint. Can be a bit messy and is a PITA to get off your skin. I prefer exterior wood glue. Actually I've used it mostly for ski building in place of epoxy

Posted: Sun Dec 04, 2011 10:49 am
by vinman
I just got my first 1/2 dozen runs or so on the the BOSS 318 model. It was basic white ribbon of death skiing today on all manmade snow.
Considering these skis are not exactly a groomer type of ski they did fine as long I was on top of them and keeping them on edge. These are not a ski that you want to let wander at least not on groomers. I found that I had to keep my weight centered over the camber portion of the ski, which is only 108 cm. Too far forward or to far back and thing got dicey.
I put a 1 deg base edge bevel and 2 deg side bevel on these and detuned the rocker but I had to stop and do some extra detuning to the tips about 3-4 inches beyond the end of the rocker/reverse side cut portions of the ski. Once I did that it was like someone flipped a switch on these skis, they went from hooky and almost unmanageable to carving well at moderately fast speeds. The turn shape is initially long if just placed on edge and allowed to carve but will shorten up with addition bend in the ski.
All in all a success I think. I cant wait to get them in soft snow. I think they will shine there. I may do a bit more edge bevel work especially up in the rocker portions of the ski to smooth out the transition from running a flat ski to being up on edge.
Posted: Sat Jan 14, 2012 5:53 pm
by vinman
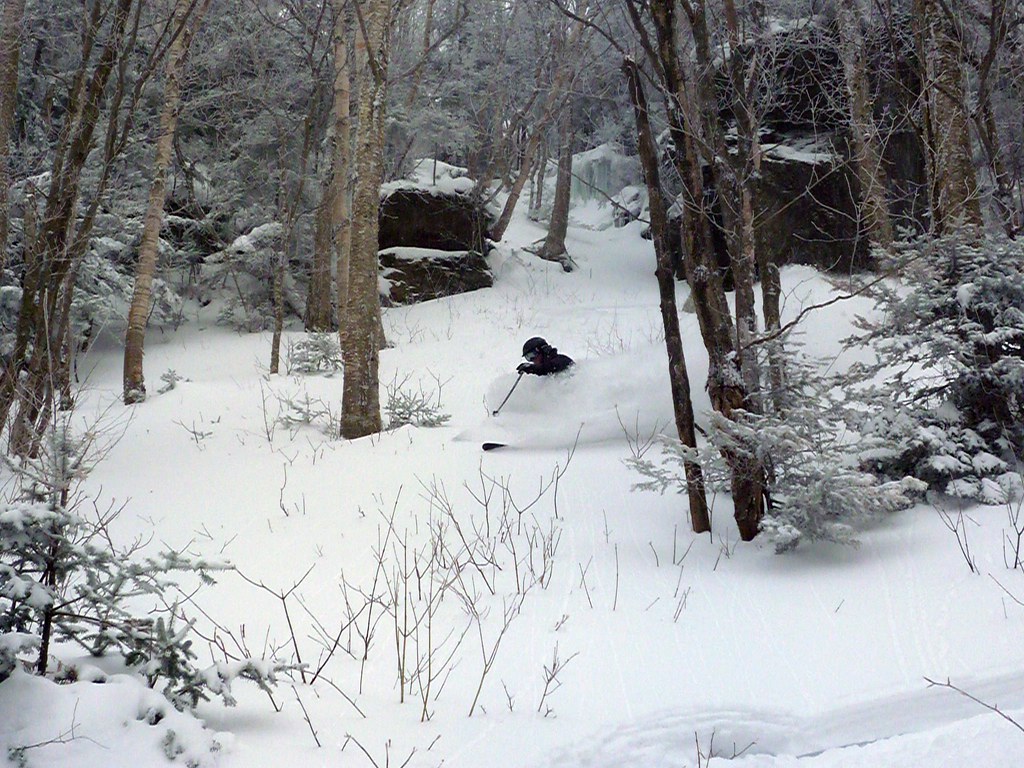
Vin and WhiteRoom skis in action today at Smuggs, VT.
Posted: Sat Jan 14, 2012 7:01 pm
by skidesmond
Nice! So it has snowed in New England.
Posted: Sun Jan 15, 2012 12:12 am
by Dr. Delam
What a sweet shot with a great composition of the ice, rocks, trees, and pow! Looks like fun.
Posted: Sun Jan 15, 2012 10:21 am
by artski
Great shot! looks like you had fun
Posted: Tue Jan 17, 2012 6:46 pm
by ILOVE2SKI
Great stuff!
Posted: Sun Mar 04, 2012 12:10 pm
by TahoePowder
Vinman wrote:some pics of the finished product

Saw the right most (full size, non mario) pair in person at Squaw on Wednesday and they looked even better in person! Good work!
Posted: Sun Mar 04, 2012 2:08 pm
by vinman
Yeah that was my buddy who is out there with his family on vacation. Thanks.
He's even skiing one ski with a bad sidewall that I was sure would blow out.
Posted: Mon Mar 26, 2012 12:31 pm
by vinman
Started cutting some new tip and tail molds to account for different lengths and rises. Cut a 8.5 cm rise over 35 cm length mold today. I'll also be cutting a 8 cm/ 30 cm tip. Tails will be 3.5cm rise over 25 cm length.
Posted: Mon Apr 02, 2012 4:37 pm
by vinman
Just added six 4 way equal pressure clamps for core and sidewall construction. Woot. Can't wait to use them.
Posted: Tue Apr 03, 2012 12:59 pm
by PTTR
really nice looking skis!
I have done my first pair with veneer tops and they look beautiful but I would like to add one or more stringers like you do in yours. I have no experience with veneers and was wonderng if you would like to share the process?
I had planned on taping them togheter on the top side and remove the tape after pressing but the epoxy soaked trough the veneer on the pair I just finnished and I am worried that the tape will be really hard to get of.
Posted: Tue Apr 03, 2012 1:50 pm
by vinman
PTTR if you google veneer jointing you'll find lots of info.
I clamp my veneers between 2 strips of MDF with one strip overlapping the other to be used as a cutting surface. Google veneer jointing jig. I use a veneer saw to cut the veneersinto strips. Once I have the strips cut I then clamp them between the MDF strips so that the MDF strips are flush and the veneer is overhanging by 1-2 mm. I use either my belt sander or my router with a bearing to trim everything to smooth edges for jointing.
I assemble e panel by taping my strips using paper first aid tape. This is the same tape i use to attch my tip and tail spacers. This is just placed on the back of the panel and is hidden in the final lay up, nothing to see, nothing to remove. Not much more to it that that.
Definitely do the research, there are some good videos out there to show you how to do this. Based on my success with this batch of skis I'm planning some more intricate jointing designs for this seasons builds.