Page 3 of 15
Posted: Mon Nov 02, 2015 2:33 am
by Akiwi
I then shaped the edges and superglued them onto my base.
First the rough shape using the press tool, then the fine tuning with the plyers.
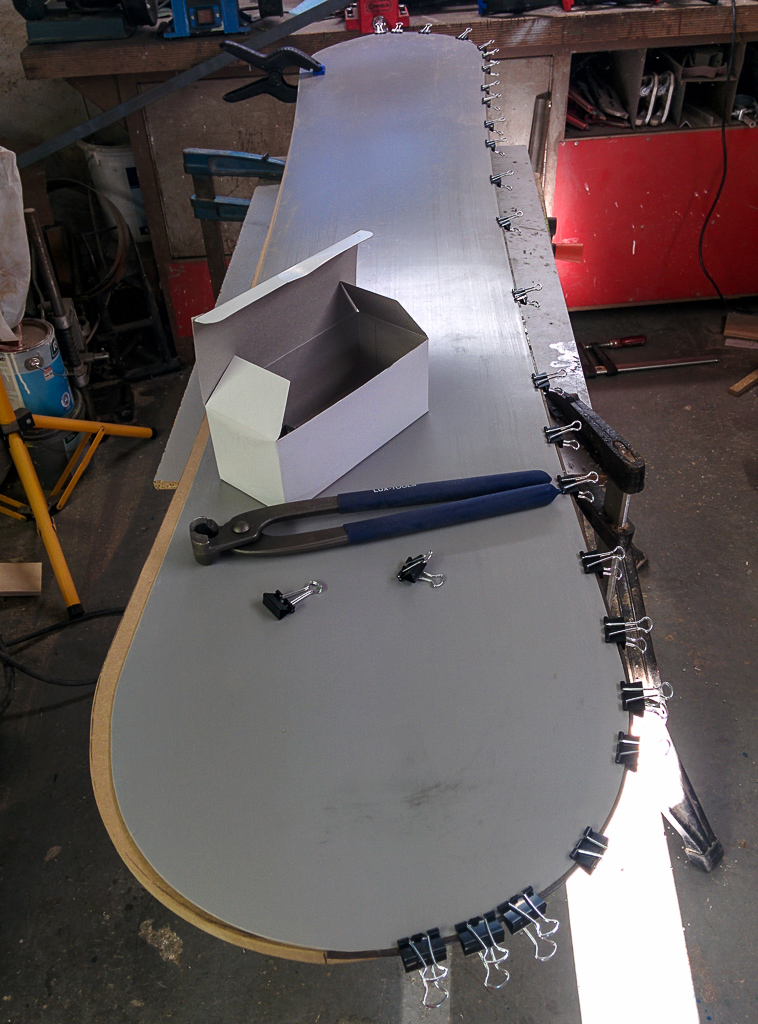
I was pretty happy with my work.
So I then stuck the edges on.
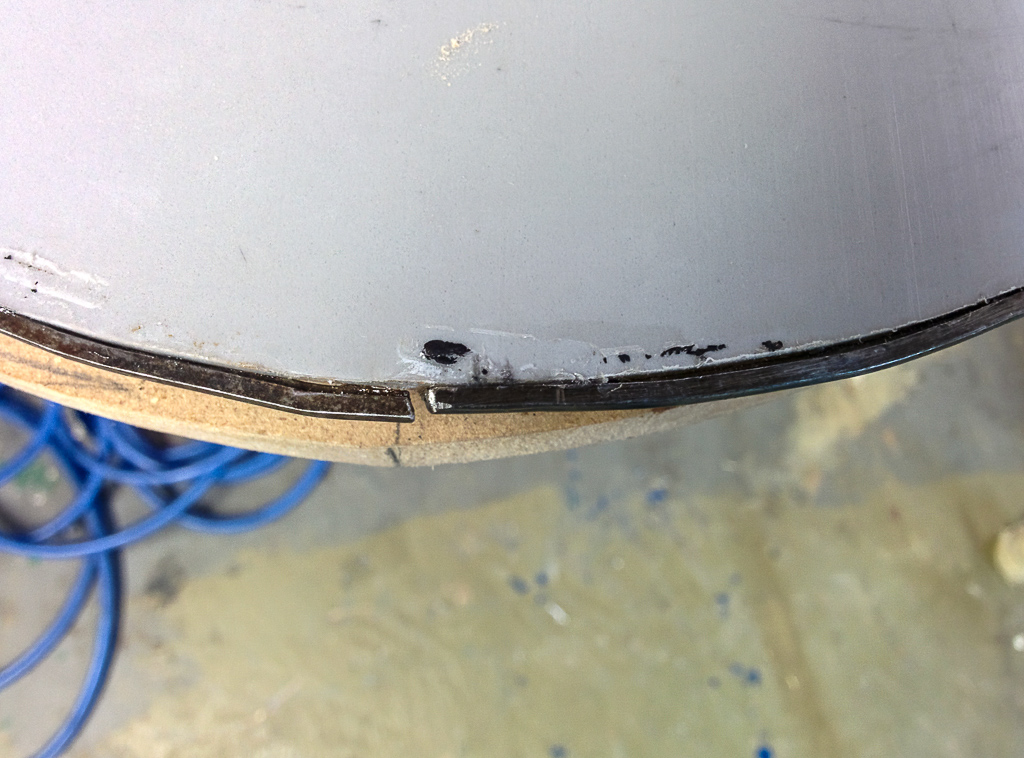
About an hour later I took off the clips and turned the board over.. and CRAP! I am not happy with the results.
Looks like something the cat threw up !!
I see I will need more practise at getting the edges on beter.
Any tips and tricks would be greatly appreciated.

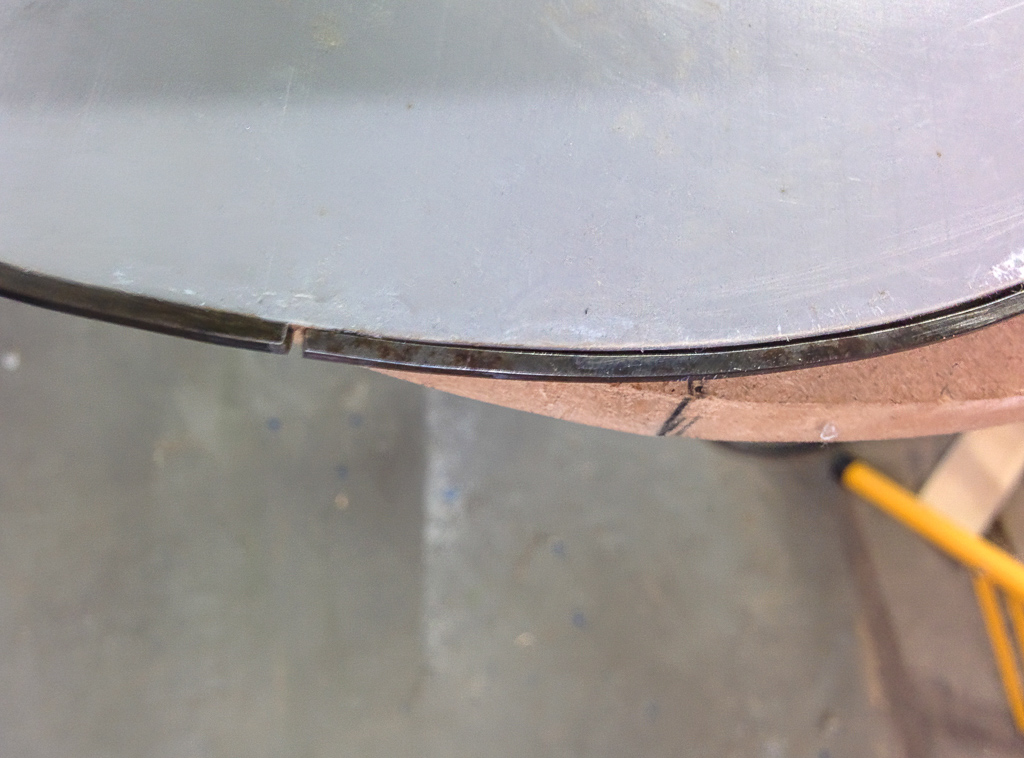
On the end, I did some fine tuning at the last second and completely screwed it up.
Grrrr.
The black is just paint from the clips that stuck to the ski, it will clean off.
Question: Can I / should I tear them off and do them again?
If yes, what do you use to clean off the superglue.
Posted: Mon Nov 02, 2015 3:41 am
by gozaimaas
Your bending skills are up to shit haha, no offense

and it will get better with time.
A super accurate bend is critical to getting a super tight fit, its all practice. Also keep your superglue usage down to a small dot every 50-100mm, using too much.is asking for delamination.
Posted: Mon Nov 02, 2015 3:54 am
by Akiwi
gozaimaas wrote:Your bending skills are up to shit haha, no offense
and it will get better with time.
A super accurate bend is critical to getting a super tight fit, its all practice. Also keep your superglue usage down to a small dot every 50-100mm, using too much.is asking for delamination.
I'm never talking to you again !! ;-)
When I test laid the edges, they seemed to fit pretty well. It was after the glue that they looked like shit.
Do you know if I can take them off and do it again.
I read that acetone removes super glue. If I use this, will it mess up my base?
It is not a huge problem as this is just a test prototype with ugly grey base material, and some older rusty edges I got from a friend for minimal cost. But I wouldn't mind getting it to look a bit better than it is.
Posted: Mon Nov 02, 2015 4:24 am
by gozaimaas
Haha one day you will look back and laugh. The urge to press a board is strong but each step requires respect. You are far better off pulling those off and having another go, gain more experience and get a better board in the end.
In fact forget pressing for lets say a week. Bend those edges, then straighten them and bend them again, keep doing it till you are the Mr Miyagi of edge bending. Then move on to the next step.
I actually do a lot of my subtle bending by hand FWIW.
Posted: Mon Nov 02, 2015 4:36 am
by mammuth
Pretty well fitting is not enough
Use a dot of glue every 4th teeth or so.
If both sides of the base have same structure, just flip it. The old superglue will get off when you grind the base. Just sand it down before you glue on the edges again so that you have no high spots during pressing.
Or sand down the superglue and use the same side again. Wouldnt use acetone.
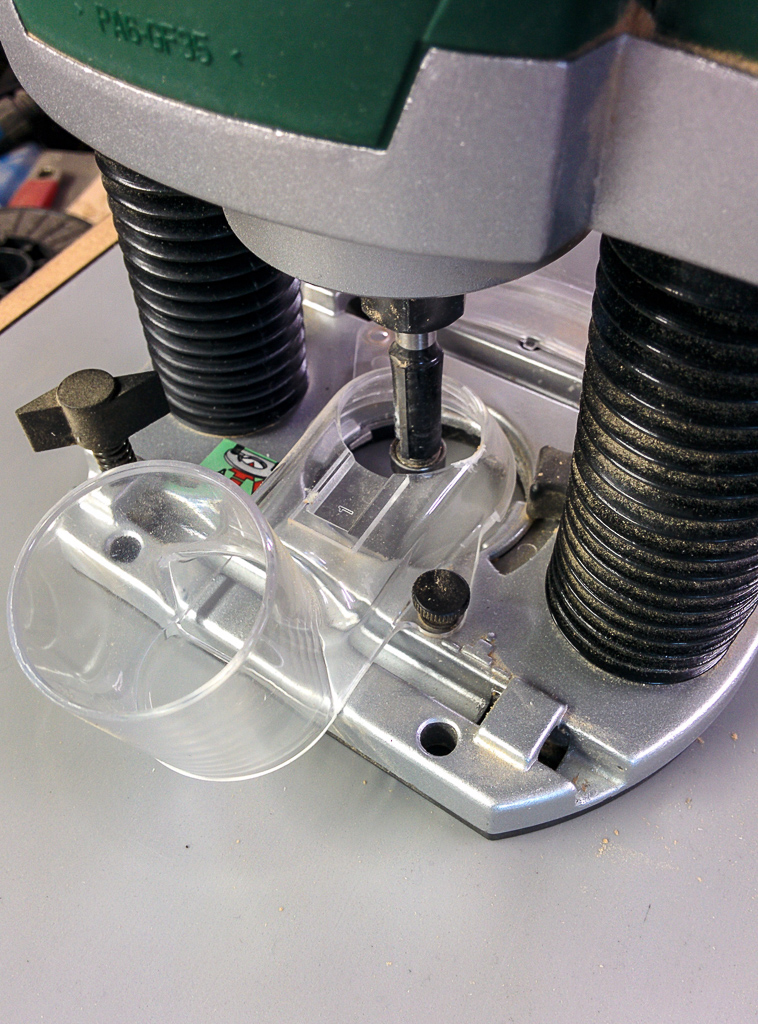
P.S. pls can you post a closeup pic of your router dust duct. Looks better then my old one (which goes out in front instead of top like yours)
Posted: Mon Nov 02, 2015 6:00 am
by Akiwi
mammuth wrote:Pretty well fitting is not enough
Use a dot of glue every 4th teeth or so.
If both sides of the base have same structure, just flip it. The old superglue will get off when you grind the base. Just sand it down before you glue on the edges again so that you have no high spots during pressing.
Or sand down the superglue and use the same side again. Wouldnt use acetone.
P.S. pls can you post a closeup pic of your router dust duct. Looks better then my old one (which goes out in front instead of top like yours)
The base is smooth on one side, so I'll tear them off, and sand the glue off.
Clean the metal using acetone & try again.
Here is the router dust extracter.
Damn, I lost one of the little screws that hold it in place already. It is somewhere in my workshop... who knows where.
Posted: Mon Nov 02, 2015 8:26 am
by mammuth
Thanks for the pic.
If you sand it dont forget to reflame
Posted: Mon Nov 02, 2015 10:27 am
by motoman
Clamps play very big role here. The big amount of small clamps decrease the stress of the edge per unit of length. But the other thing is that this you use paper clamps and they do not have enough interaction with the base. When you use that one you have on one of you pictures but smaller size it will be much better.
I can say in from my own experience.
Posted: Mon Nov 02, 2015 10:46 am
by sammer
Try flipping your base over so you can see the gap. There are a few on here doing it this way. (edge tangs underneath)
I'm still a tang on top guy.
And ya bending edges takes a fair bit of practice to get right, that's why the majority of us only do 3/4 wrap.
I try to get my edges so they will sit in place without clamps.
sam
Posted: Mon Nov 02, 2015 11:39 am
by mammuth
Hornbach has nice little plastic clamps. They work good and are cheap. If u need i make a pic
Posted: Mon Nov 02, 2015 12:05 pm
by Akiwi
mammuth wrote:Hornbach has nice little plastic clamps. They work good and are cheap. If u need i make a pic
I was at hornbach the other day, and looked at them.. they were not that cheap. particularly if you want large numbers of the things.
This one??
https://www.hornbach.de/shop/Federklemm ... tikel.html
I will try again, and probably in future doe a 3/4 wrap
Posted: Mon Nov 02, 2015 1:04 pm
by pmg
Hi,
the thing you are looking for is called Leimklemmen in Germany. You usually can buy them in bigger packs, just look around a bit and you will find cheaper ones.
And do a full wrap, its a good practice. Snowboards are much easier than skis, as the radiuses are much wider.
Posted: Mon Nov 02, 2015 1:51 pm
by mammuth
Akiwi wrote:mammuth wrote:Hornbach has nice little plastic clamps. They work good and are cheap. If u need i make a pic
I was at hornbach the other day, and looked at them.. they were not that cheap. particularly if you want large numbers of the things.
This one??
https://www.hornbach.de/shop/Federklemm ... tikel.html
I will try again, and probably in future doe a 3/4 wrap
yeah this one. you will be totally fine with 20-30 of them, you dont need to fix the complete edge. when you do 30 the first ones are already dried up well. and you need one just every 4 teethm where you put your superglue
If 40-50 euros sound expensive you didnt dive in into ski building too much ... it costs a lot of money long term
Posted: Wed Nov 04, 2015 1:28 pm
by Akiwi
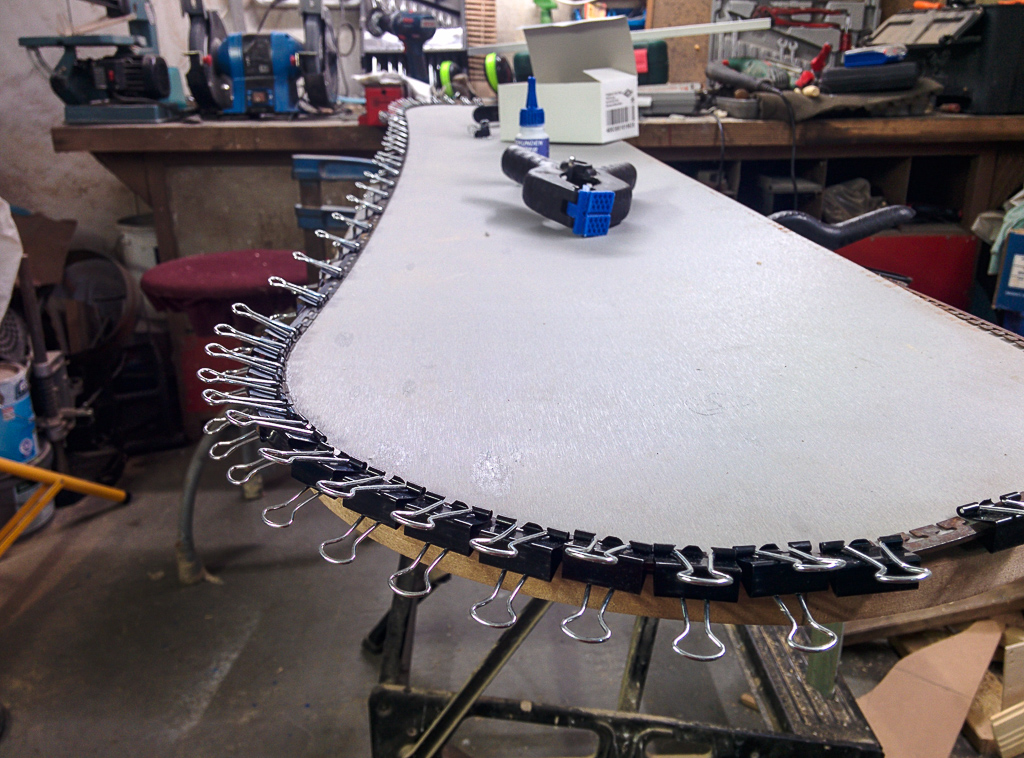
I tore the edges off, and re-bent them.
I was surprised at how much super glue there was. On the straight edge I put a drop every 5 tabs or so, but they were stuck along the entire length. The capillary action works well.
This is what they look like just sitting on the board. (Not glued or held in place)
It is definitely better but is it good enough?
I will re-flame the bases, and need to get some acetone to clean the bits of glue off the metal edges.

Posted: Wed Nov 04, 2015 1:46 pm
by pmg
Good enough for the first build definitely! Glue the edge on the way the picture is taken (dont flip it), then you can always see if you put everything in place correctly. If you put the edges on with the template below, make sure to have a layer of Frischhaltefolie or something similar on top of your template, otherwise you will glue your edges to the template :)


