
just getting a journal going on my first build. thanks to all here that i have gleaned info/technique from.
gonna keep the first build pretty simple. just copying another ski i like and using vacuum bagging. just going to do the ski design like community skis. some differences in the process though.
basically gonna so an atomic vantage 184. all mountain ski 137/103/124. 15% tail rocker (1.63” rise), 65% camber (3/8”), 20% tip rocker (2.38” rise). about 18m radius.
hope to post some pics and drawings soon.
MNjoe
Giddy up! First build.
Moderators: Head Monkey, kelvin, bigKam, skidesmond, chrismp
drawings
drawing of ski:
https://drive.google.com/open?id=0B-b0u ... EJWMFdmaUE
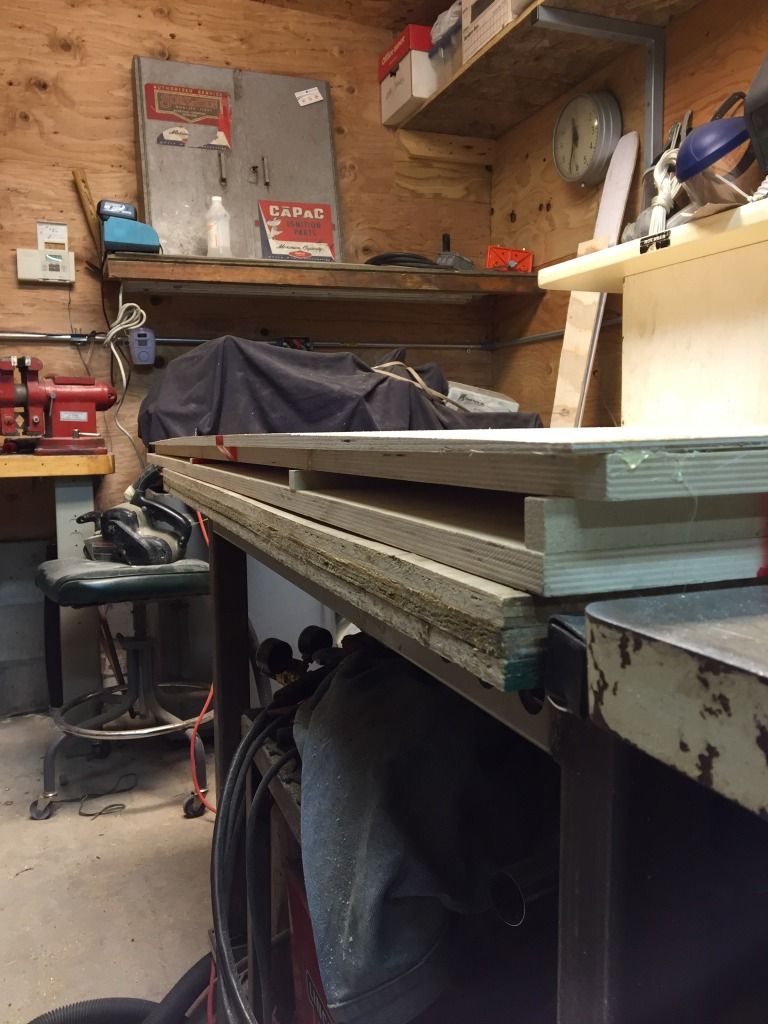
lame early stage template work. not much exciting to see for y'all. just getting the basics documented.
https://drive.google.com/open?id=0B-b0u ... EJWMFdmaUE
lame early stage template work. not much exciting to see for y'all. just getting the basics documented.
-
Hayden.Cameron
- Posts: 7
- Joined: Sun Oct 05, 2014 10:46 am
Are you using Solidworks? I have been working through a build using it as my CAD package too. It doesn't seam that many people here use 3D CAD. I'm lucky enough to have access to MasterCAM and a router table so have been using the ski as a chance to advance those skills.
What style of side wall are you doing? Initially I was all about an ABS side wall, thinking of doing a cap now as I don't expect to skill for more then a season on my first build. Also figure your doing a vac bag?
What style of side wall are you doing? Initially I was all about an ABS side wall, thinking of doing a cap now as I don't expect to skill for more then a season on my first build. Also figure your doing a vac bag?
yeah, using solidworks. i made a few solid models different ways and then even used the sheetmetal feature to make a flat pattern. weird thing with the sheet metal flat was that when flattened i lost some of the smooth curve geometry for the top view profile. bummer.
using CAD was pretty helpful in getting familiar with and tweaking the various ski ski characteristics e.g. camber, rocker, sidecut, etc. i learned a lot.
just doing capped walls. pretty straight forward.
using CAD was pretty helpful in getting familiar with and tweaking the various ski ski characteristics e.g. camber, rocker, sidecut, etc. i learned a lot.
just doing capped walls. pretty straight forward.
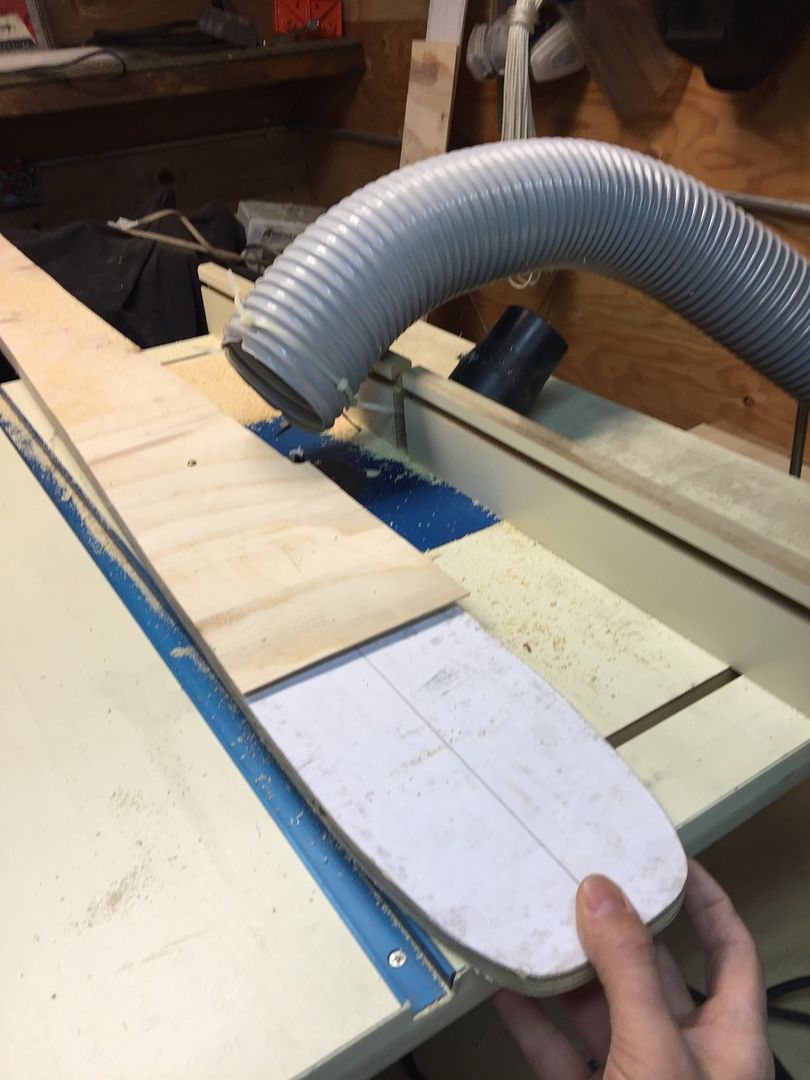
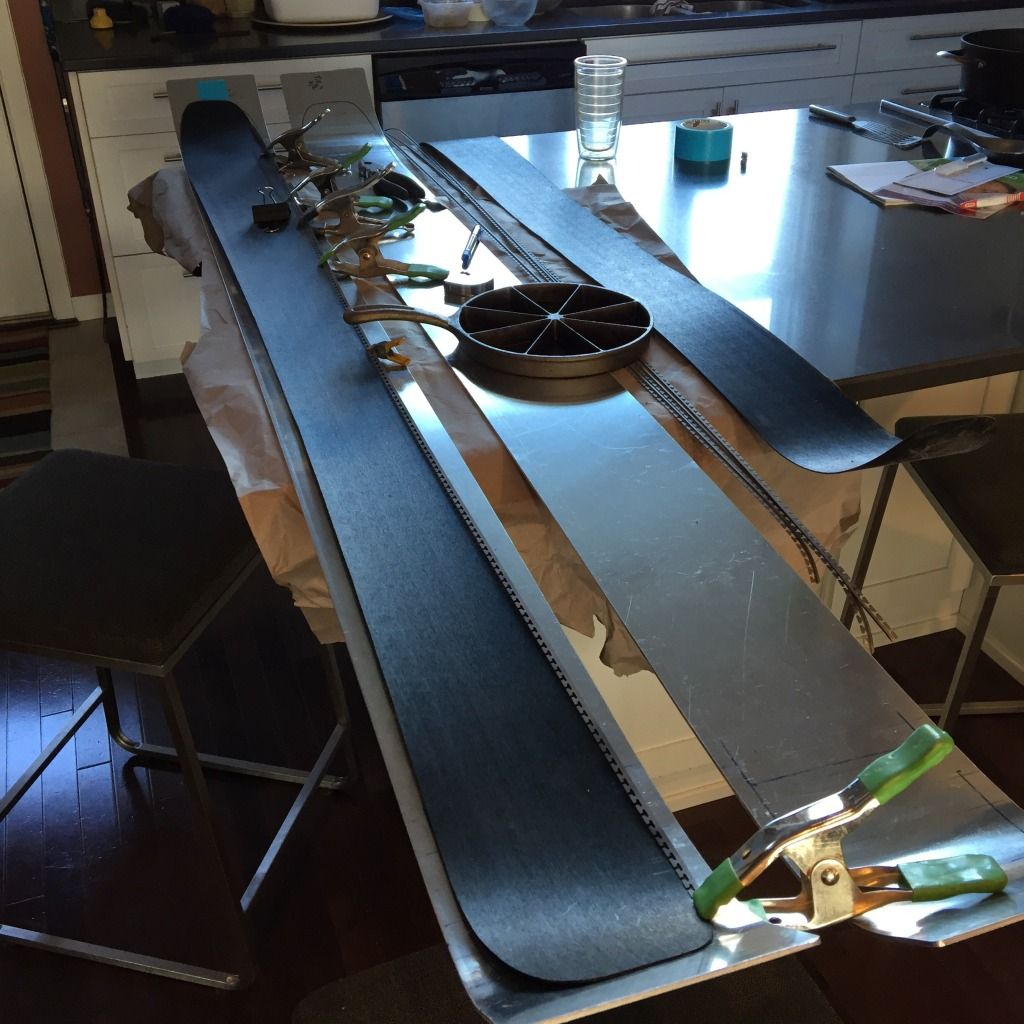
progress
got some time to do some building.
taper jig for planer
routing core profile
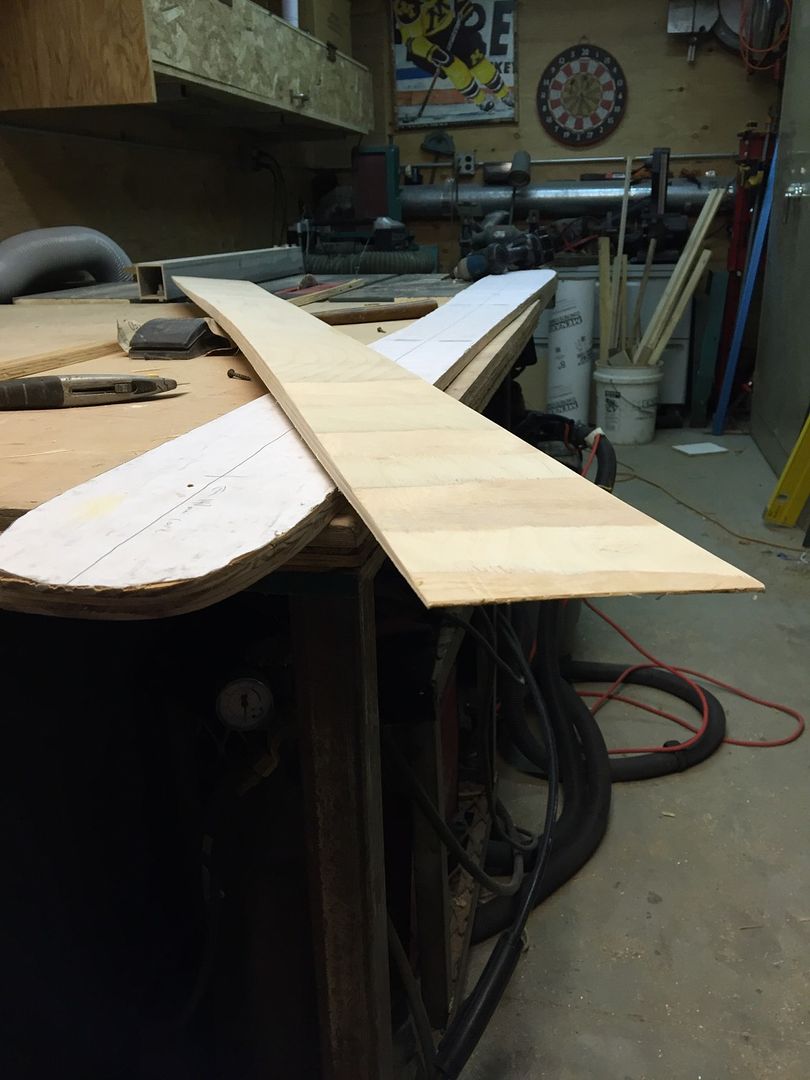
tapered core
fitting/bonding edges
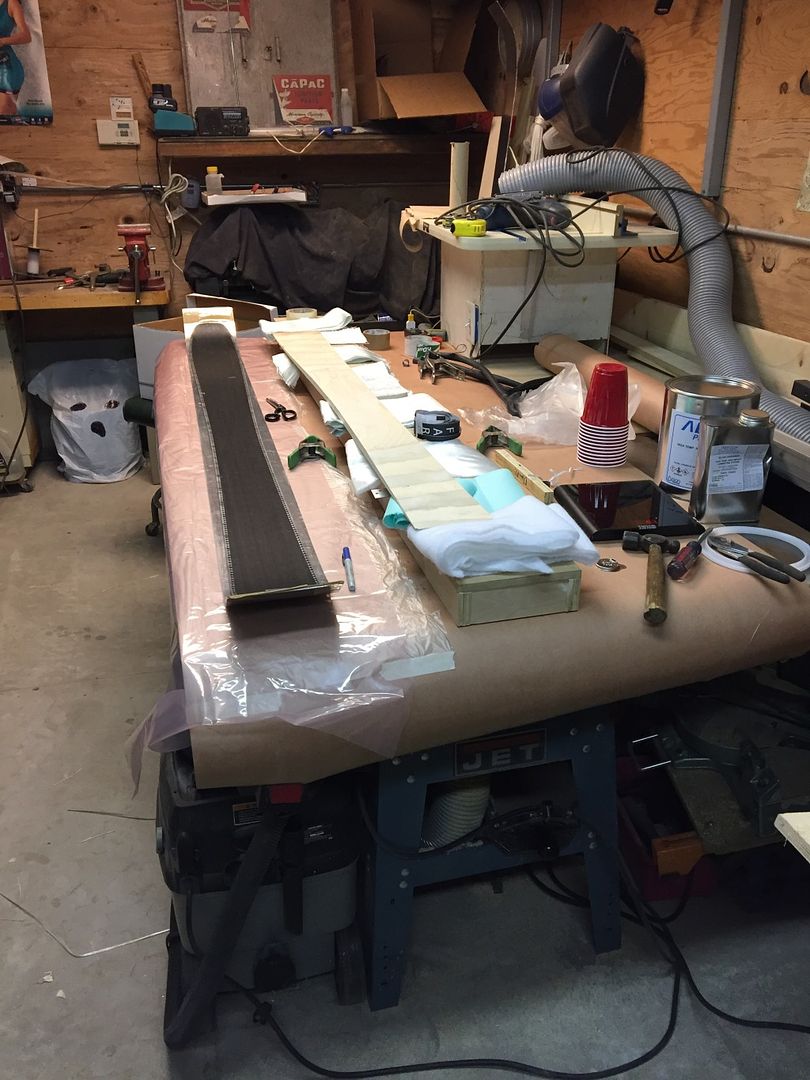
material all setup for lay up
post lay up. just doing one ski at a time whilst learning. feeling a bit relieved it's over. fwew!i
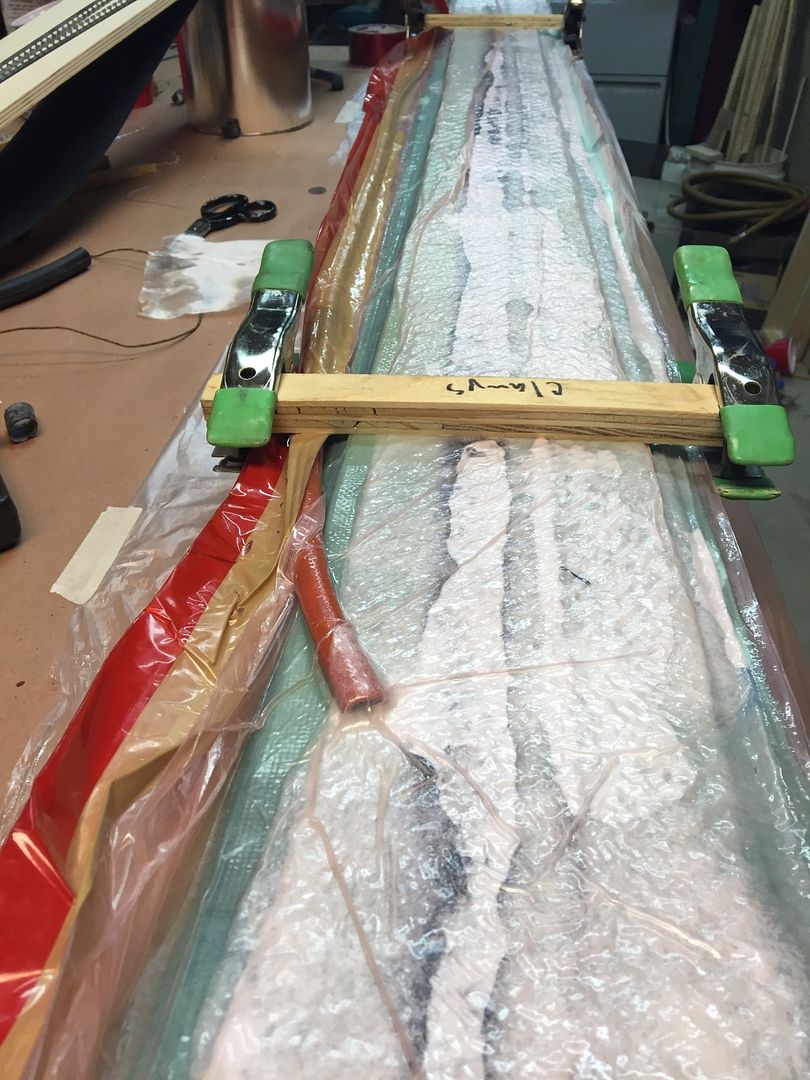
i had to slip a tube (red thing left side) in the bag along side the ski in order for the vacuum to get both ends efficiently.
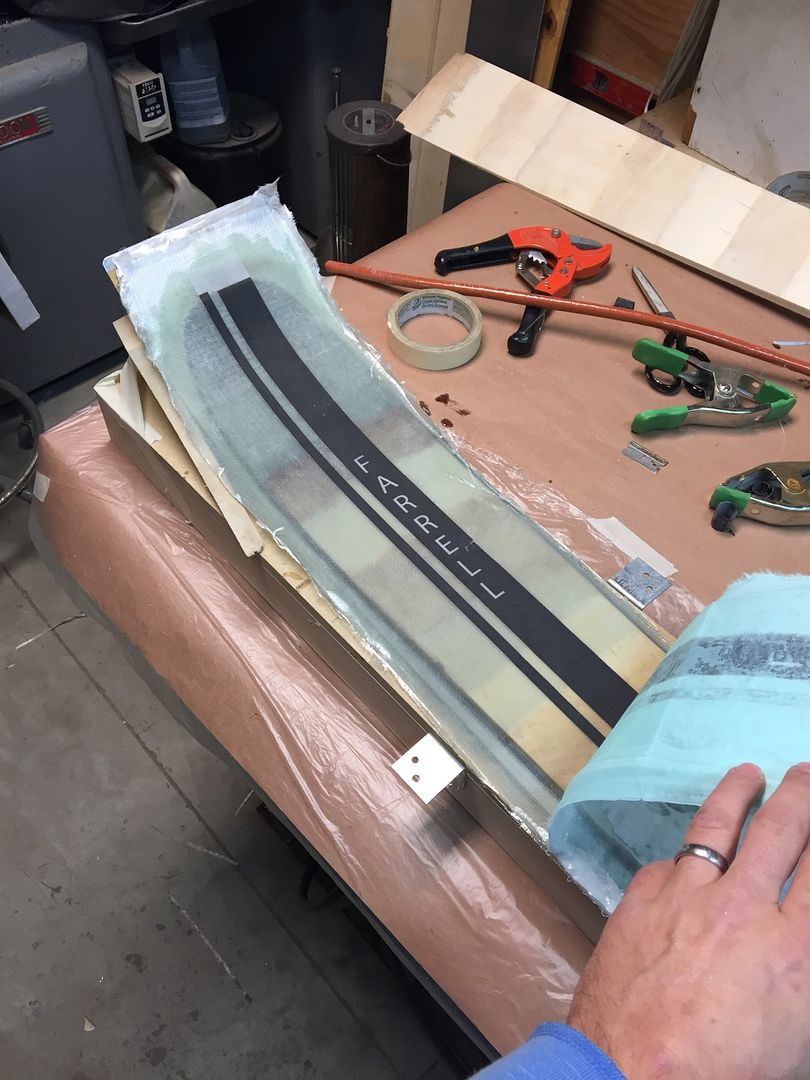
peel ply removal.
i have to wait till final cure to fully evaluate teh ski (flex/stress). so far they look pretty good. a few minor cosmetic blems but acceptable.
taper jig for planer
routing core profile
tapered core
fitting/bonding edges
material all setup for lay up
post lay up. just doing one ski at a time whilst learning. feeling a bit relieved it's over. fwew!i
i had to slip a tube (red thing left side) in the bag along side the ski in order for the vacuum to get both ends efficiently.
peel ply removal.
i have to wait till final cure to fully evaluate teh ski (flex/stress). so far they look pretty good. a few minor cosmetic blems but acceptable.
Last edited by MNjoe on Thu Jan 21, 2016 5:40 pm, edited 10 times in total.
embedding pictures
anyone see these pics embedded in post? they dont show up to me as embedded.
how to get them embedded in the post?
how to get them embedded in the post?
Have you read this SolidWorks message thread:MNjoe wrote:yeah, using solidworks. i made a few solid models different ways and then even used the sheetmetal feature to make a flat pattern. weird thing with the sheet metal flat was that when flattened i lost some of the smooth curve geometry for the top view profile. bummer.
using CAD was pretty helpful in getting familiar with and tweaking the various ski ski characteristics e.g. camber, rocker, sidecut, etc. i learned a lot.
just doing capped walls. pretty straight forward.
http://www.skibuilders.com/phpBB2/viewt ... solidworks
I disabled the www link in my signature line so no more public access to my photo album.
-S
-
twizzstyle
- Posts: 2207
- Joined: Tue Mar 07, 2006 8:25 pm
- Location: Kenmore, Wa USA

Nice looking skis.
I see you are using the same technique as me.
Your hose thing is a good idea. I had that problem on a snowbiard I made that the vacuunm wasn't as good at the end as it should be.
Yesterday I ordered some spiral hose to put in the bag to get the vacuum the full length.
I agree, you need to update your image links.
As twizz said, if the link starts with http.. and ends with .jpg or some other image format, then the /img tag will embedd it correctly.
Your peel ply removal link doesn't work at all.
I am nobody. Nobody's perfect, so I must be perfect.
pic embed issues solved
thanks for the picture embedding input. i got it figured now. turns out google doesn't want to "host" permanent links anymore. they've made it hard/impossible to do anymore. photobucket it is.
i got the second ski done. the second time around it is a bit less stressful and easier. ha!
i got the second ski done. the second time around it is a bit less stressful and easier. ha!
solidworks stuff
great solidworks thread. my method is similar but not as thorough. i just used spline with several points to sketch the side profile then in another sketch i trace it with arcs and use relations. i like using arc cuz they are simpler to manipulate/dimension. the arc sketch is used for the feature construction.SHIF wrote:Have you read this SolidWorks message thread:MNjoe wrote:yeah, using solidworks. i made a few solid models different ways and then even used the sheetmetal feature to make a flat pattern. weird thing with the sheet metal flat was that when flattened i lost some of the smooth curve geometry for the top view profile. bummer.
using CAD was pretty helpful in getting familiar with and tweaking the various ski ski characteristics e.g. camber, rocker, sidecut, etc. i learned a lot.
just doing capped walls. pretty straight forward.
http://www.skibuilders.com/phpBB2/viewt ... solidworks
I disabled the www link in my signature line so no more public access to my photo album.
-S
for the top profile i just use a spline again for one side then mirror it.
i didn't get to the SW graphics end point for this ski. just stopped at getting a model to generate a flat pattern for top profile. KISS method for now.
-
Hayden.Cameron
- Posts: 7
- Joined: Sun Oct 05, 2014 10:46 am
core type
for this first build i'm just using 9 ply (1/2") baltic birch. this is the good stuff thats comes in 5'x5' sheets. not the knock off stuff that is 4'x8' from big box places. there is a real difference. you'll know it's real baltic birch if it's 5'x5'.Hayden.Cameron wrote:Is your core laminated or just one piece of wood? I have run a few successful trail using a non laminated core, wondering if I should just build the first set.
I also ran a plywood core but was not happy with how it flexed. I think I need to just do it and commit to a laminated core....
here's a link for more info.
http://www.woodworkerssource.com/blog/t ... to-use-it/
more progress
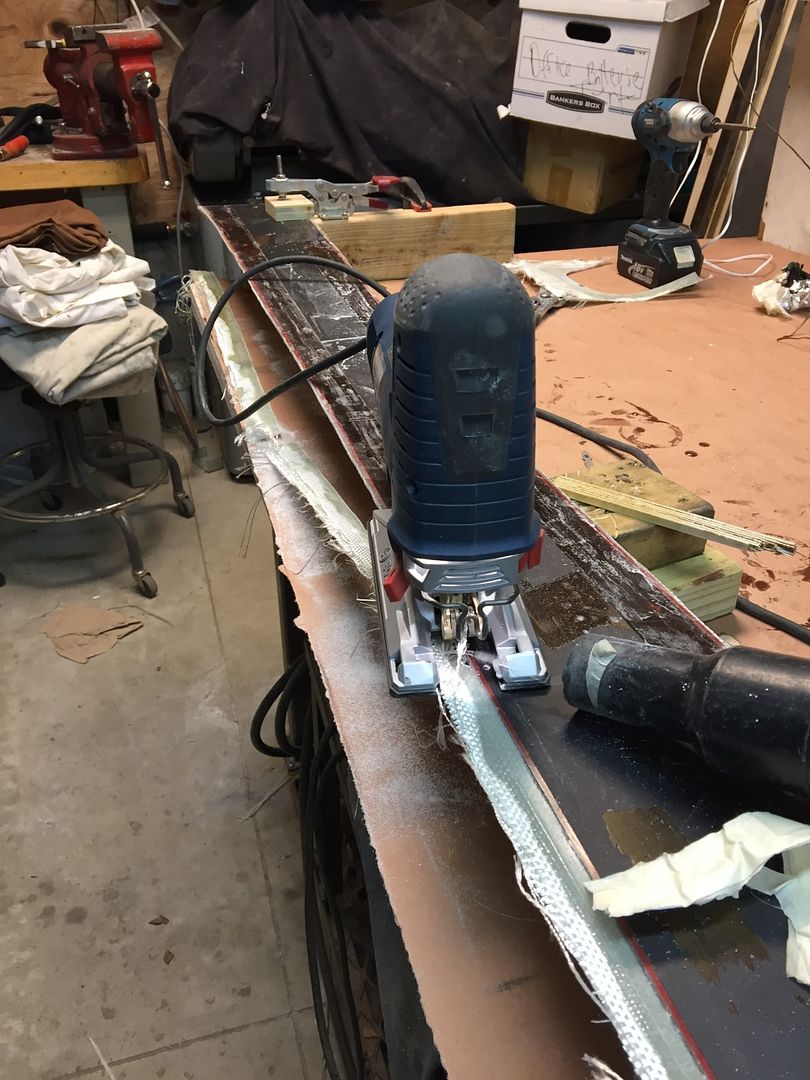
trimming
learned the hard way regular jigsaw blades don't last 4 inches through fiberglass. used a ceramic blade then moved on to a carbide tipped jigsaw blade made for fiberglass. funny.
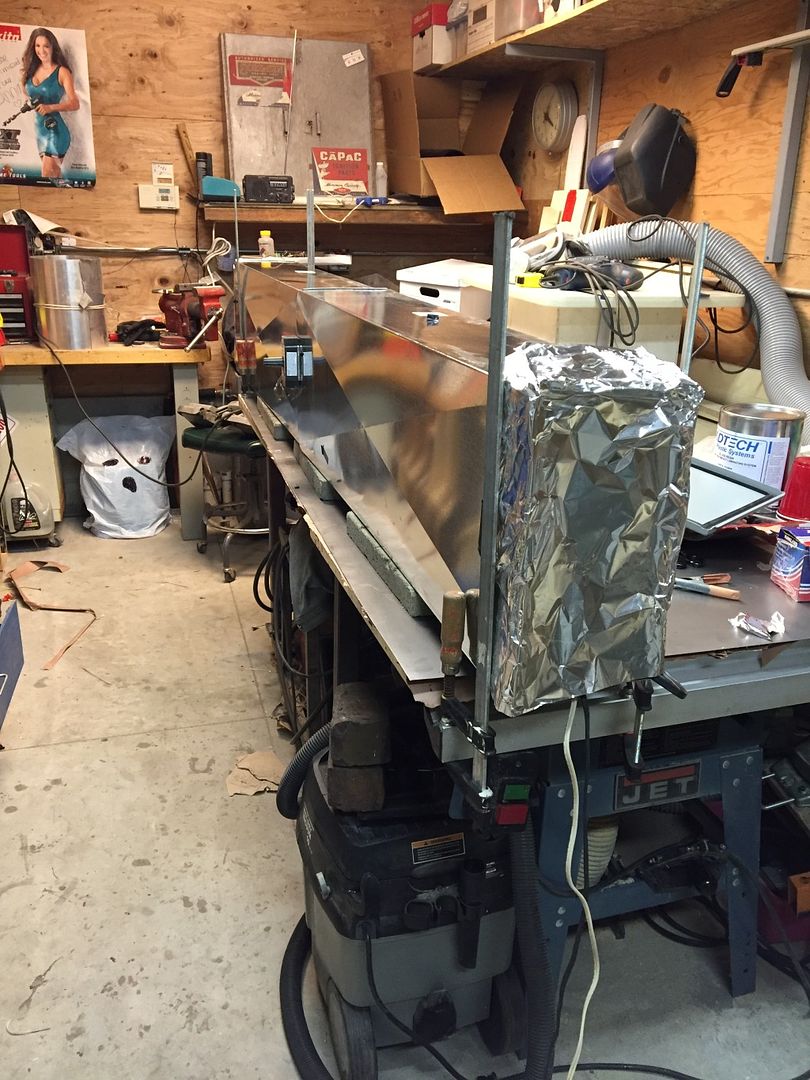
hillbilly heat cure. HVAC ducting with some modified space heaters. got 'er up to 200'F. just almost started the shop on fire.
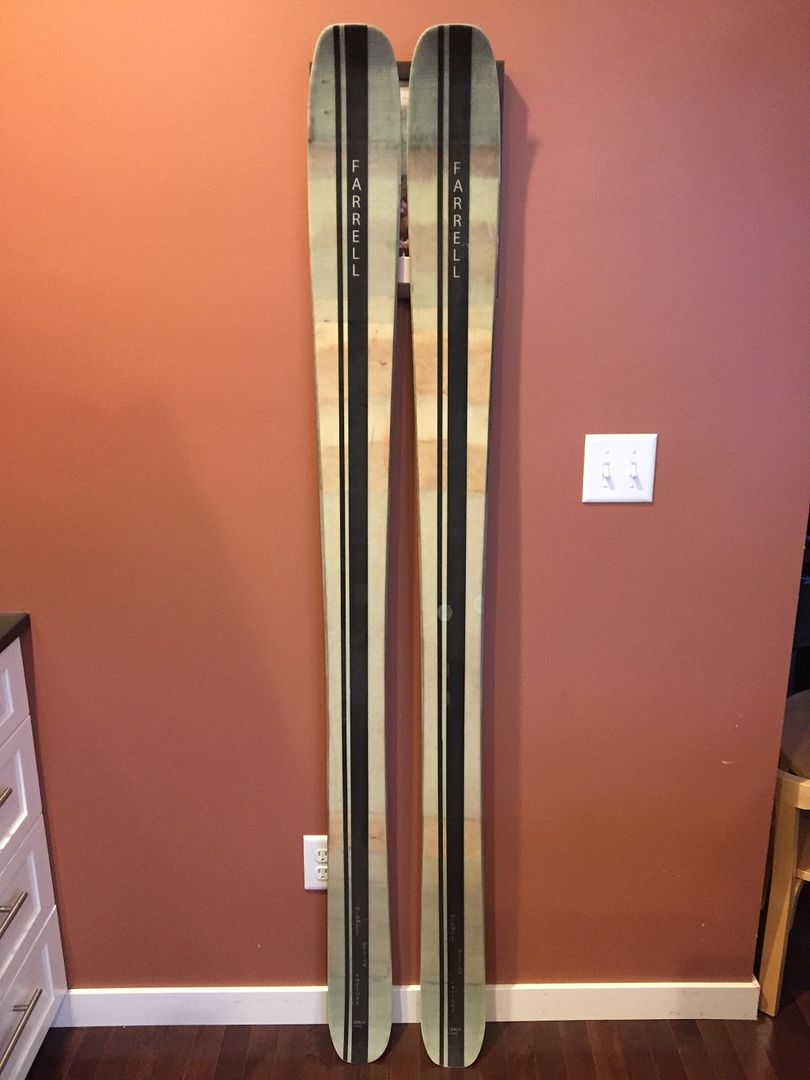
Finished product.
had a few issues. overall the skis look good. the biggest bummer was during heat the cure the ski closest to the heat in the hillbilly oven lost some of it's camber. got a little too hot i think.
live and learn. off to get them ground. hopefully ski 'em this weekend.