
WhiteRooom 11/12
Moderators: Head Monkey, kelvin, bigKam, skidesmond, chrismp
-
twizzstyle
- Posts: 2204
- Joined: Tue Mar 07, 2006 8:25 pm
- Location: Kenmore, Wa USA
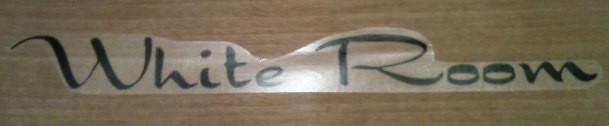
I was surprised that it was that visible also. I used tracing paper for this batch and though it would be nearly clear but I guess not.
Fighting gravity on a daily basis
www.Whiteroomcustomskis.com
www.Whiteroomcustomskis.com
-
skidesmond
- Posts: 2337
- Joined: Tue Apr 07, 2009 3:26 pm
- Location: Western Mass, USA
- Contact:
I know right tool for the right job.... but I was super impressed with the new Bosch 7.0 amp jig saw I just bought. I burnt up the 10+yr old 3.5amp craftsman jig saw I had on this last pair of skis.
Th Bosch way out performs that old wimpy saw. The blade oscillation feature really made a different when cutting though the P-tex sidewalls. At the middle level for this feature it really does cut faster. It is a more rough cut so near the tip and tail I turn it off. At the highest level the saw becomes too unstable and it is tough to see what you are cutting.
I'll fall short on my goal of 3 pair in 3 weeks but I should be back on track to do the third pair the following week. Once that third pair is done I'll have a couple more weeks before I can press again. All in all I expect to make 6 pair this summer/fall. The last one will be a pair of skis for my 5 year old.
Fighting gravity on a daily basis
www.Whiteroomcustomskis.com
www.Whiteroomcustomskis.com
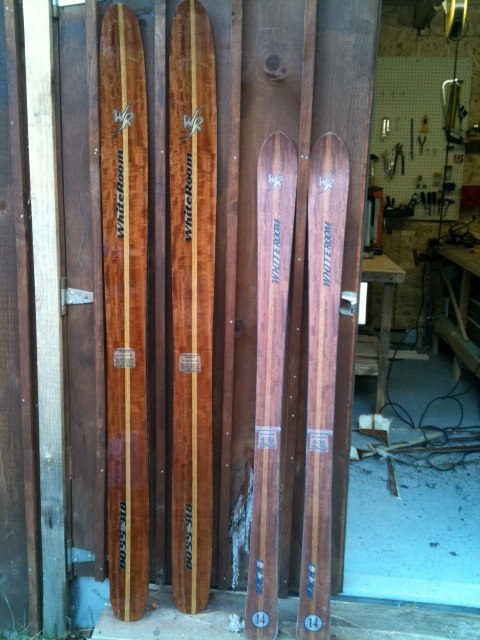
Mach 1
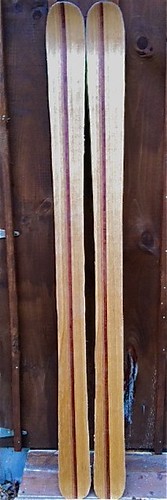
my latest pair, built for my nephew.
Maple and poplar core with p-tex sidewalls 2.2-10.8-2.2
22oz triax
Makore and Ash veneer topsheets
154cm 118-78-102 mm with a 14 M radius
My nephew will use these for his high school race team. This is my 4th pair and again I'm improving with each layup and experience. I took 3/8 inch off my top mold to make loading easier and prevent the shifting I had experienced in the last 2 pair. This worked nicely as I had just enough room to load things.
I used my 8mm camber mold for these but wanted a bit more than that for a race ski so I used a temp differential of 15 deg with the bottom hotter to create a bit more camber. The net camber after things cooled came out to be +7 for a total of 15mm of camber.
The only errors I can find so far is in one sidewall. When I was profiling them I used a 10 deg bevel. But the more must have shifted just a little as I ended up cutting though the top edge of the sidewall by maybe .5-.75 mm leaving some exposed PU glue. It did not cut through to the wood.
I think I'll abrade and lightly flame this and use some JD weld or something similar to seal it. Any ideas for this type of fix are welcome.
The other thing I spotted was a small gap between the edge and the glass layer at the vert tip of one ski. I'll inject 5 min epoxy in there and clamp it.
For contrast the ski I make for myself a couple weeks ago is on the left
Fighting gravity on a daily basis
www.Whiteroomcustomskis.com
www.Whiteroomcustomskis.com

http://www.amazon.com/gp/aw/d/B000WZKCR ... mdp_mobile
I'm going to test out this type of decal on my next pair. It is a rub on decal that you can print on an inkjet. If this works it would solve most of my graphics issues and give a nice clean graphic without any paper show through.
Basically design, print, trim and rub with the transfer sheet. I think it would need to be done post press and then sealed in with spray acrylic and or poly urethane.
I'll test and report hopefully in 2 weeks after my next pair.
Fighting gravity on a daily basis
www.Whiteroomcustomskis.com
www.Whiteroomcustomskis.com
-
skidesmond
- Posts: 2337
- Joined: Tue Apr 07, 2009 3:26 pm
- Location: Western Mass, USA
- Contact:
Yes I will definitely test it out beforehand. If the ink runs I'll have to print on a laser. But if the inkjet paper graphics don't run maybe this will work ok.
Fighting gravity on a daily basis
www.Whiteroomcustomskis.com
www.Whiteroomcustomskis.com
tested out the rub on graphics tonight. It works nicely but will definitely need to be done post lay up. The process uses a plastic transparency sheet that gets printed on. The you apply a clear adhesive sheet to the printed transparency. The adhesive picks up the ink. Then you trim out your graphic and rub it on to what ever material you are using.
The adhesive is like a clear plastic or rubber. I think it would shrink with the high heat of curing the epoxy. Anyway If you trim closely there is no much that shows. The directions say that it can be sealed with poly.
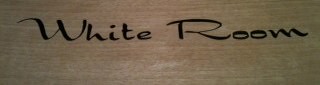
I'll seal the veneer I used tomorrow and see how visible the film is. I think it will show when looking at it from an angle.
looking straight down
looking at an angle
The adhesive is like a clear plastic or rubber. I think it would shrink with the high heat of curing the epoxy. Anyway If you trim closely there is no much that shows. The directions say that it can be sealed with poly.
I'll seal the veneer I used tomorrow and see how visible the film is. I think it will show when looking at it from an angle.
looking straight down
looking at an angle
Fighting gravity on a daily basis
www.Whiteroomcustomskis.com
www.Whiteroomcustomskis.com
-
threeninethree

- Posts: 172
- Joined: Fri Feb 23, 2007 8:11 pm
- Location: Massachusetts
I'm using a 1/8 inch nylon lined rubber mat that was being thrown out. It decreased the wavy pattern from my cat track by about 1/2. If I have room I might try 2 layers of this.
I applied some poly to the rub on decal. It will definitely work but it will need to be trimmed very close to the ink. I found that I can also trim it post rub on also. I'll need to apply it after the first poly coat. The poly I'm using has a slight amber color and the wood under the graphic doesn't change color like the rest.
I think I'll give this graphic option a go on my next pair which should be this week.
Fighting gravity on a daily basis
www.Whiteroomcustomskis.com
www.Whiteroomcustomskis.com
amped
Just pressed a traditional camber fat-ish ski for my brother.
Dimms
136/102/125
185 cm
8 mm camber mold pressed with a 5 deg temp differential to shoot for ~10mm net camber.
22oz triax glass, VDS, 4001 base.
top sheet is alder veneer with stripes of makore and oak.
supersap CPM at 180 for 45 min, pressed at 55psi.
Out of the press these look great. no shifting of the top sheet, good mold conformity everywhere.
I'll let them cool overnight and cut them out tomorrow afternoon. More to come.
Fighting gravity on a daily basis
www.Whiteroomcustomskis.com
www.Whiteroomcustomskis.com
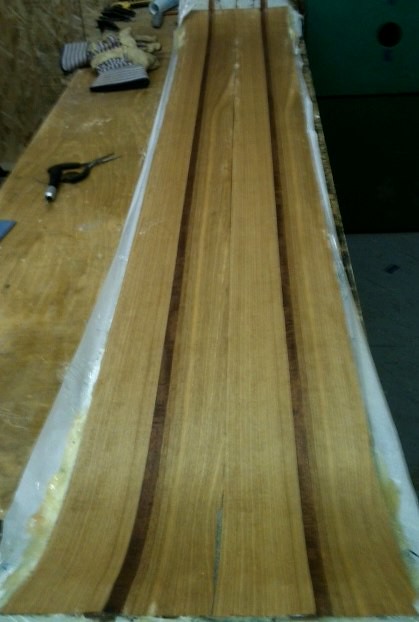
rough cut out of the flash
so far everything looks good. i need more of a temp differential to increase the camber from heat only though. 5 deg was not enough to change it at all. After being cut out and laid back into the mold they still conform to the tip/tail and camber perfectly.
I'll finish these off this weekend with an 5 deg sidewall profile and then some light sanding to the tops before placing the graphics.
Fighting gravity on a daily basis
www.Whiteroomcustomskis.com
www.Whiteroomcustomskis.com