cheers, one thing i always forgot to mention is that you need to keep the core level when you pour in the resin so it doesn't build up in one place. i do this by simply shimming the core blank and checking with an air level.
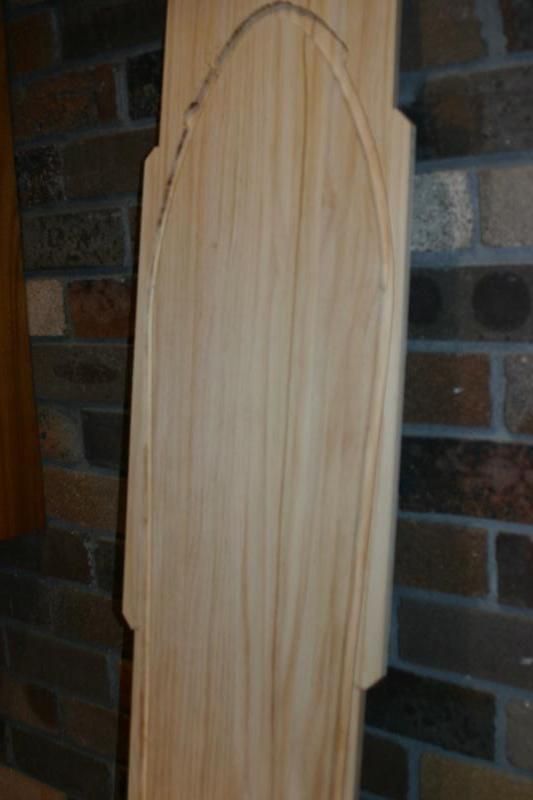
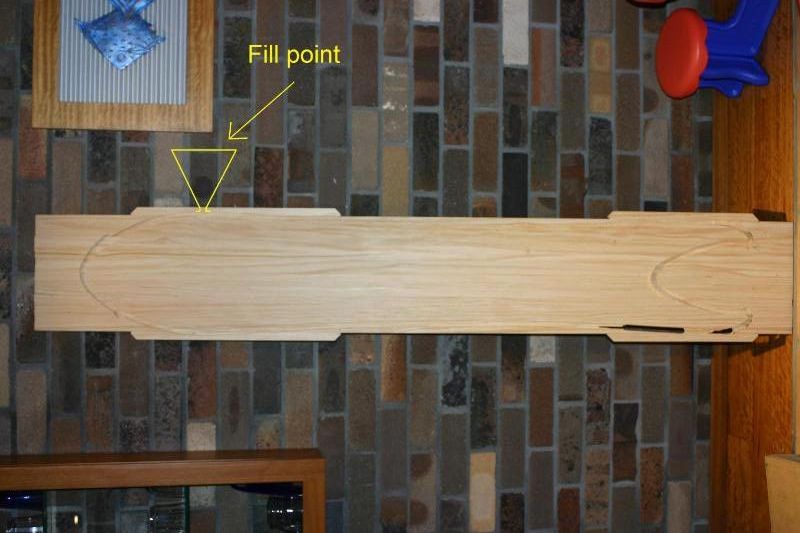
This is the unprofiled core routed for mote method urethane filling. I will make sure it is level before filling
Yes it will take more urethane to fill but the result will be worth it im sure. Trough filling looks like a PITA
I have a fair bit of casting experience making various parts for projects where I work. I like the trough concept and I think it can be streamlined to make quick and easy sidewalls. Perhaps look into TADCO urethanes, I've used 11D54 and 11D80 with good success. They can be dyed any number of colors, although I have only used black. They kick off fairly fast so you need to keep moving once they are mixed. A thick (1/2") silicone mat, cast from Silicones Inc. GI-1000 silicone can be spring clamped around the outside perimeter of the core forming a flexible and tight seal against the wood (you could use a sheet of aluminum with Stoner mold release, but you need to make sure the perimeter is sealed well, the urethane pours like water...) After a quick degas in a vacuum chamber I would stand the core vertically and fill the urethane from one sidewall until the urethane comes up the other side (should work because of the low viscosity of the urethane and since you cut the channel around the tip of the ski, just like a liquid column manometer). Wait for it to cure and peal off the silicone mat and you should have two real nice sidewalls.
I've dealt with Bryce Norelius from Sterling Supply Inc. in Minneapolis, (612) 331-5125, on several projects. He is very knowledgeable and can get you product at reasonable prices. Last time I ordered the 11D54 it was $35 for a 2qt kit, or $340 for 10 gal of 80331 (shore 75D urethane)
That would work well but in my case the swallow tail design would become an air trap if i were to pour it standing vertically. I could lay them down on the side and fill from the high point of the edge to avoid trapping air I guess. Your idea of the rubber is excellent, I could use 2 of my routed cores face to face with the rubber in between them, by clamping the 2 cores together the rubber is held firmly in place and would not leak.
Damn I think this could be a winner.
Please ignore where I routed right through the core. My tolerance was 0.5mm due to the fact I had already sanded the boards down to close to finished size before I decided to go mote style.
He will use a piece of silicone rubber between the two cores so one face of the sidewall is in contact with the non stick silicone surface. The silicone mat provides a good seal around the wood so the urethane doesn't leak out of the channel.
i see! and what's the advantage of filling the channel this way vs filling it with the core blank lying flat on the ground? i never had problems with the resin leaking from the core blank.
Chrismp, I'm loving you're approach to PU. I was wondering whether you'd tried setting your recess at an angle - using some kind of V-Groove router cutter?
chrismp wrote:i see! and what's the advantage of filling the channel this way vs filling it with the core blank lying flat on the ground? i never had problems with the resin leaking from the core blank.
In that case there is probably nothing to gain. I guess I will try it sitting level like you have done. I just found a local supplier for the smoothcast 380 so its all go at my end.
like i said before, make sure the resin you choose can take the cold temperatures! some urethanes get brittle when they're exposed to cold temps. a quick call to smooth-on should solve this mystery.