With all of the info on making skis on this forum there is very little about using a real CAD program to draw skis. Since SnoCAD has been down, I've been playing with TurboCAD a little and have 2D ski design pretty well figured out. Since it took me quite a while to figure out I figured that others might be able to benefit from this and maybe contribute their knowledge as well.
I did a picture tutorial. It is very basic but I think it gets the basics across.
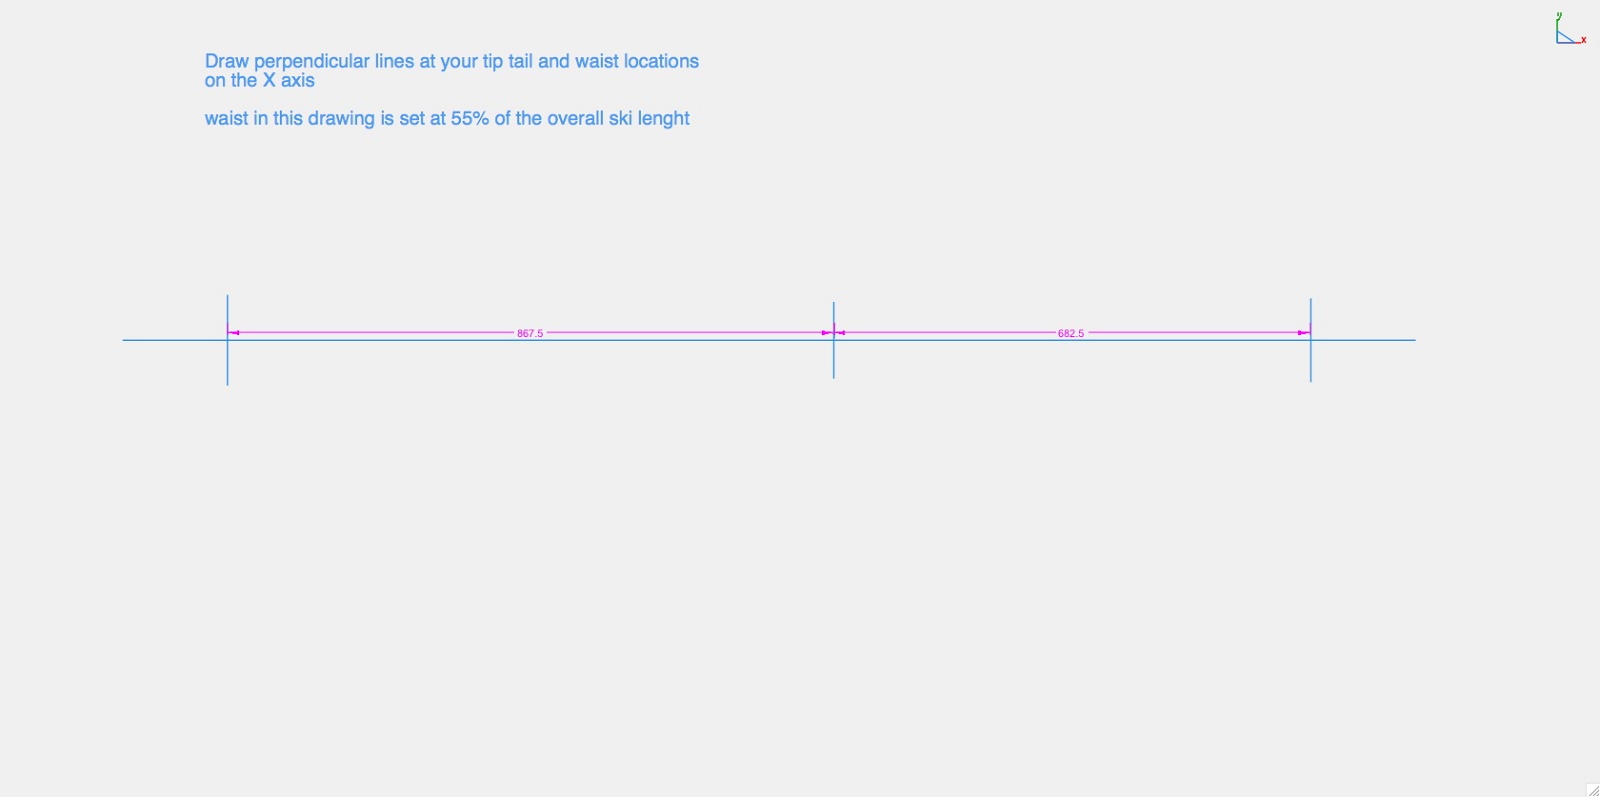
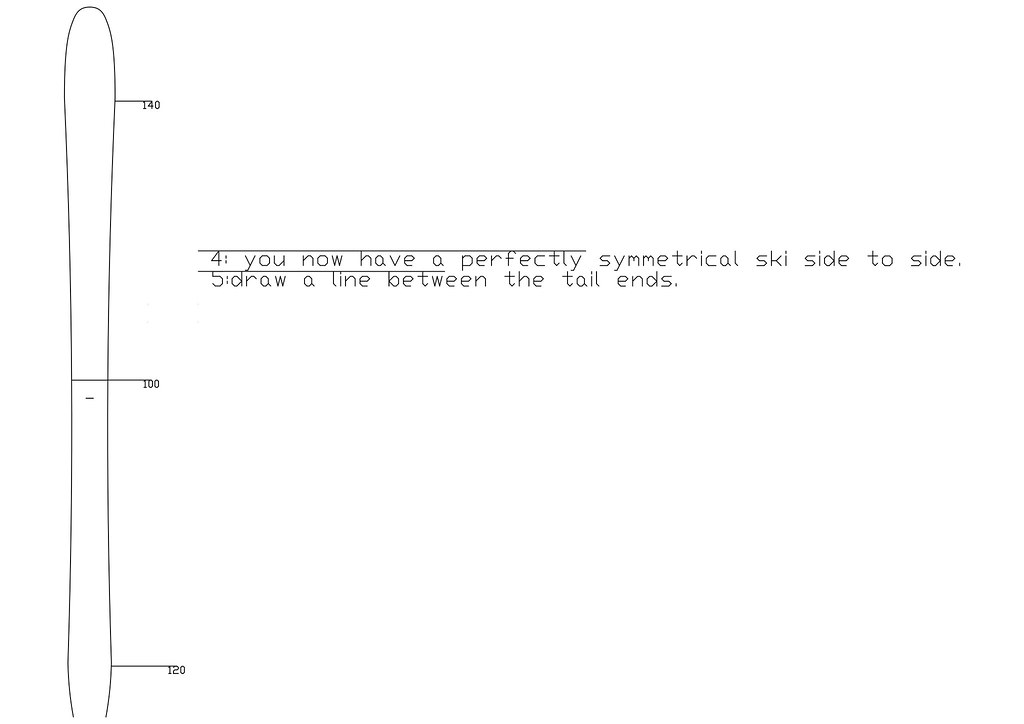
This is for a traditionally shaped ski
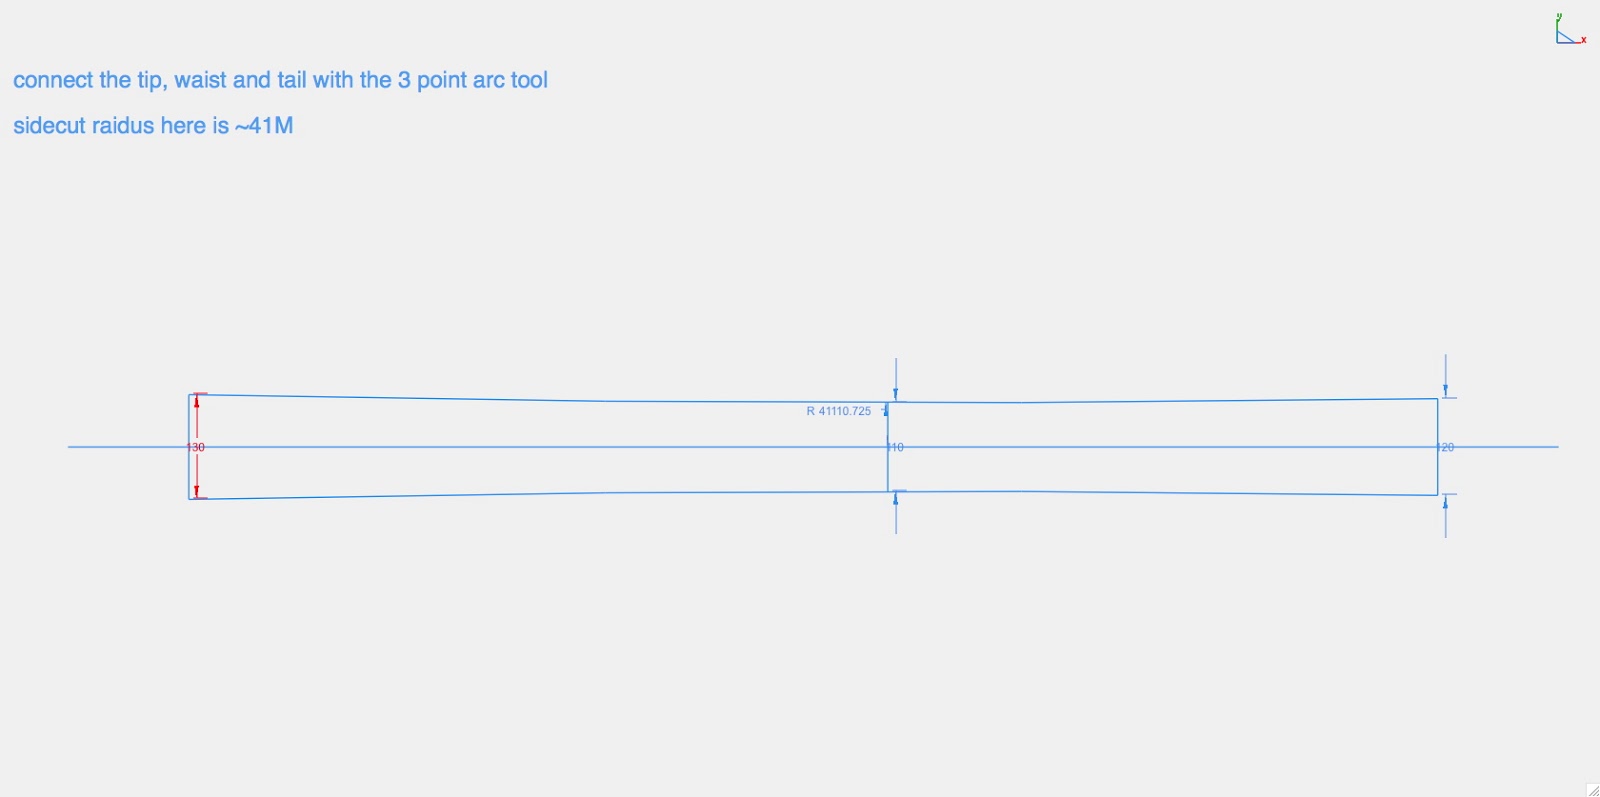
for something with mixed sidecut just add more lines at the appropriate places and use the 3 point arc tool again.
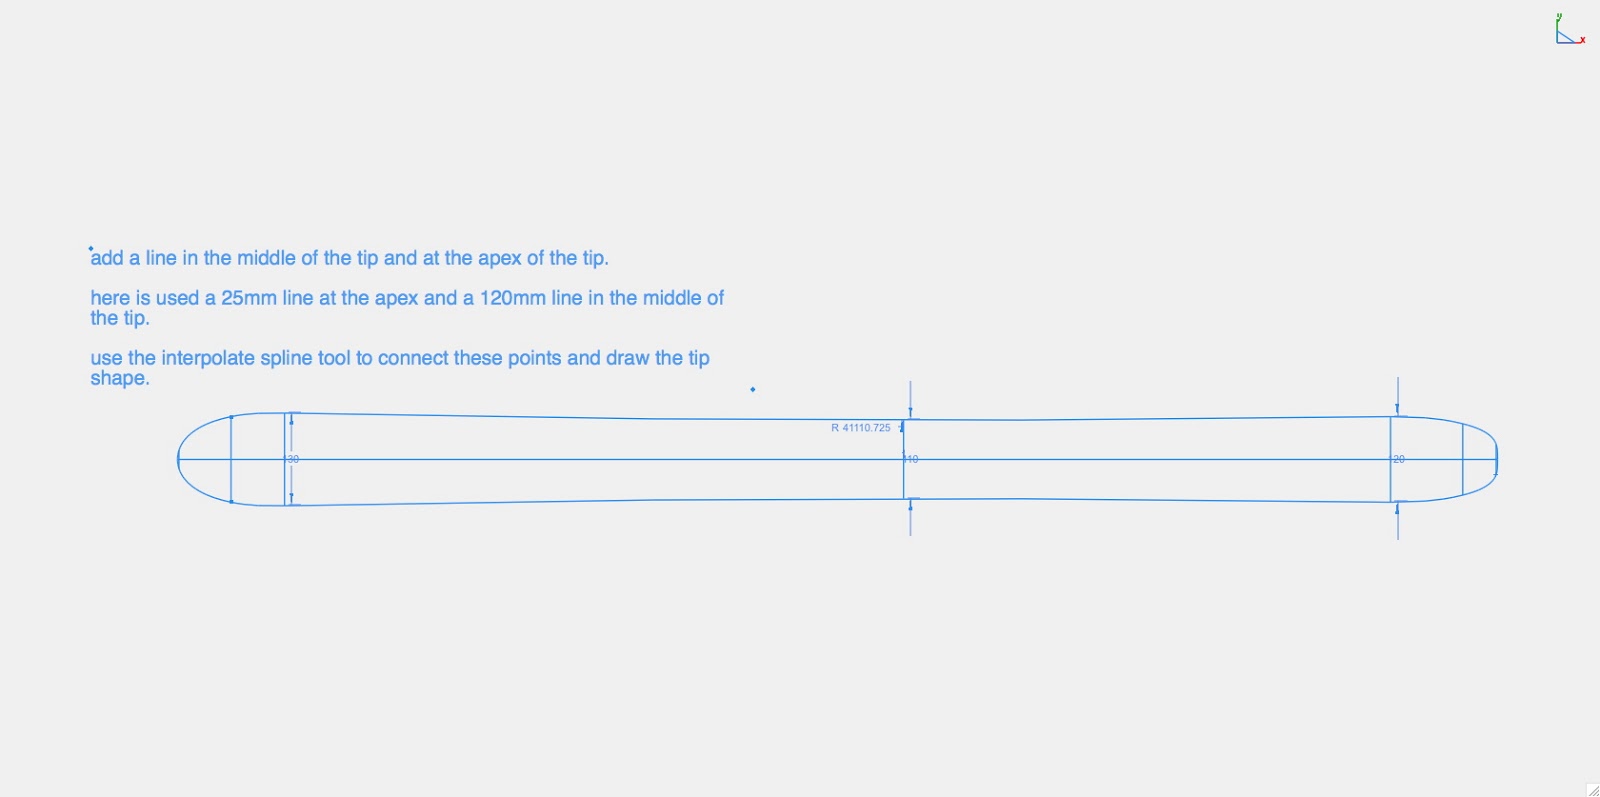
For the spline tool I find that having 4 points to connect makes a nice shape. For the line at the apex set it back by 1-2mm from the very ends to make sure the arc is smooth. If you place the line at the very end there will be a little indentation at the apex of the tip/tail.
Please add any other tips you have learned along the way. This could be a sweet resource if others contribute their drawing knowledge.
The only trouble with your 3 point arc tool for the sidecut is that it doesn't actually put the waist where you want the waist to be. The vertex/apex of your arc is generally behind this point fpr anything other than a symmetrical ski (so the narrowest part of the ski is slightly behind your perceived "waist"). It isn't that big a deal usually and most of my original templates are like this. If you use the snap to quadrant tool you should be able to see that your real waist is not where you wanted it to be.
The trouble is all the dimensions are interrelated and it is impossible to set a tip, "waist" and tail width that doesn't fit with the realities of geometry.
The latest ski design I did I set the tip, waist and tail locations and desired dimensions. I then did the 3 point arc to get an idea of the sidecut that would work. I then used the circle tool and set the vertex of the circle (with same radius as the arc) on the waist point. Then use the break line command at the tip and tail locations. This gives you the narrowest point exactly where you want it, but the tip and tail dimensions will be slightly different to what you set.
The reality you see in CAD is that skis don't actually have an excatly 120-85-115 and 22m radius. You can set one or the other and let the other dimensions be governed by your original choices.
I think a lot of people get hung up trying to specify all three width dimensions, AND their waist location, not realizing that it's geometrically impossible.
When I design my skis I set the tip and waist widths to what I want, and put the waist where I want lengthwise (I don't follow any 55% rule of thumb necessarily, but it usually ends up generally around there), and the tail width just falls out of it.
Twizz great info. This stuff is what is missing in this forum. Many of us relied on snocad exclusively Nd do not bother figuring this stuff out. I'll modify my tutorial tonight after the kids are in bed to reflect this info.
CAD experts please add more info.
What about the arc for reverse sidecut? Those seem a bit less reliant on "proper" geometry if there is such a thing. I.e. look at the flat sections some companies are putting I their side cuts. It doesn't really seem to matter as long as it generally fits some sort of arc.
Race skis might be different but freeride skis seem to only be restricted by the designers creativity.
I see what you are saying now. I did some playing with my designs and see now that the waist does indeed sit a bit back from my intended point.
I don't have a quadrant snap tool. The interpolate spline tool seems to fix this problem. It definitely lets me set the waist where i want it.
Are there any issues with this type of tool to set the sidecut? Will this tool give me a smooth arc or is it a little off?
What issues are there with an elliptical arc instead of a true circle
What if I just create my 3 point arc at true 50%, it should then be set back by a few cm and would be right in range for ~55% set back.
Well now I can place the waist at exactly 50% with a smooth arc tool but getting that 53-55% offset is killing me. maybe if I add a control point in and drag it back to the right spot....
I think your 3 point arc is a circular arc defined by 3 points. Since its circular, you're running into the same old problem. A spline is going to be your only option if you want to explicitly define every dimension. How that effects the skis turning characteristics, I have no idea.
Thanks Twizz. My feeling is that this will not matter a huge amount, these drawing are very close. Given that these are generally powder skis, I doubt anyone will notice that these arcs are not 100% circular. Considering that I'm to cutting anything on a CNC.....they wll never be perfect to begin with. It's all mostly driver bearing anyway. That doesn't mean I don't want to learn how to do it right though.
Drawing tips with the spline tool has become somewhat of an obsession of mine, and for this, i like to use five points. The trick for me is to taper the tip so gently that you don´t see an abrupt transition from the tip sidecut to the tip itself. Very fun!
I usually start with the tip and tail shapes, decide from there how long I want the ski to be. The waist is decided by two things; how much sidecut I want and how much float I want. The latter usually wins over the former, thus me ending up with a ton of 40m+ designs. I have a ton of ski designs (literally, if they were to physically manifest at some point), but no builds apart from customs yet..
for tip/tail lengths, I usually try to make the tail, on a unidirectional ski, about 55% or so of the tip length. So, with a 25cm tip, I mostly end up with a 13cm tail, sometimes 14. Makes it theoretically more balanced, in my head.
Anyone else dreading odd numbers of the sidecut length? Ie making a half centimeter connecting point for the waist line, for a 161cm effective sidecut length? It´s not hard work, it just looks unseemly, especially with grid turned on.
Maybe a mundane and boring question, but how do you others draw rocker/camber profiles? I use spline for the tip, usually five points, arc in the middle for either positive or negative camber, then a second arc in the tail, or a spline, if it requires more upturn.
My software is Draftsight, and I love it. Much faster and less of a resource hog than Autocad on my iMac.
Edit: Oh, and for an offset waist line, I don´t really see any other way around it than multiple radii. Either biradial or triradial sidecuts then. I struggle to see the point in doing those on very short sidecut lengths, like 140cm or so, but open to ideas.
You shouldn't need a quadrant snap. Just draw a vertical line. In autocad if you hover at the top of the line with the circle tool it then lets you draw a polar line upwards to where you place the centre of your circle. In the command line when you bring up this polar line you can specify the distance upwards you want to go (what will be your radius). Then start your circle and drag back down to the top of your line. This puts the apex of the circle of x radius at the top of your line. You then add the other lines in after.
I like the multi-radius approach especially for mixed camber and sidecut skis. This give a longer radius in the tail for more smearability.
I just tried this. I made some control points for each 1/2 of the ski that would overlap where I want my waist to sit. With the ones right at the waist very close together. The arcs just blend together.
Since I'm doing these templates by hand I'll just fudge a little and it will be all good.
Keep the info rolling info so we can help more builders figure this stuff out.
I've not made mold parts with this yet. But if I were to do it I'd probably start out with drawing a frame for the base and ends. Then connect the points with a 2 point arc tool or maybe an ellipse tool? This is for just a tip or tail block not a solid mold.