
And some more reply from the distributor:
They advised me to take Smooth On Task 12. Its not cheap, but the data seems perfect:
Hardness 60D and an elongation break of 300%! If you manage to break a sidewall made with this stuff you'll be in the hospital afterwards :)
The pouring urethane sidewall thread
Moderators: Head Monkey, kelvin, bigKam, skidesmond, chrismp
-
MontuckyMadman

- Posts: 2395
- Joined: Fri Jun 20, 2008 9:41 pm
yeah I tried that stuff, oh now they are recommending it after I asked them like 12 times. Its way too expensive. I fu cked up and mixed it with a water based pigment so my experiment failed and I wsated like 100 bucks. The trial size is not enough for 188 fat skis btw.
sammer wrote: I'm still a tang on top guy.
Well, water based color in PU, must have been some nice foam :)
But: 1.36kg not enough for a pair of skis? The way I plan it I should get 2 pairs from that amount...
Will give the Task 12 a try when I figured all the tiny things you need to know when working with PU. Building a vacuum degas thingy first...
btw: I asked the german distributor. Their answer regarding usage in cold conditions was task 12. They called it the "highest quality PU they have".
Hi,
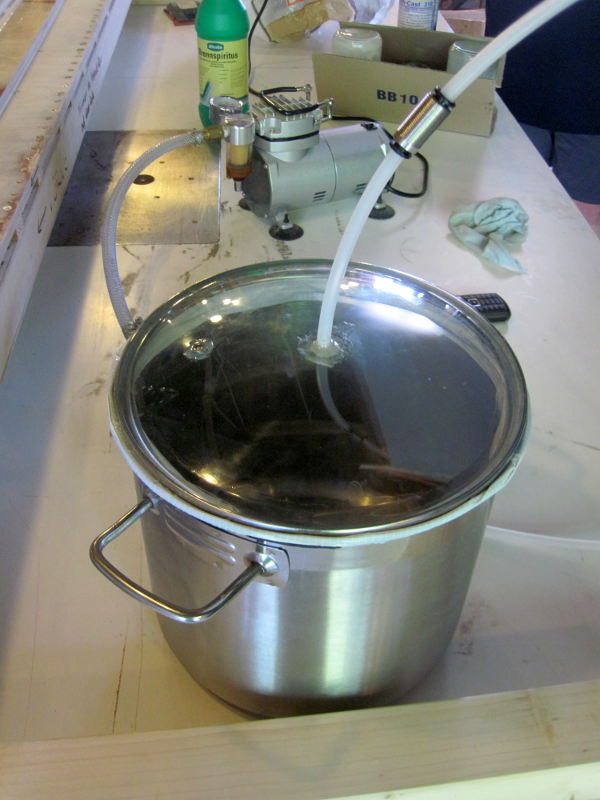
built a vacuum pot for degasing the PU (used the cheapest big cooking pot I could find - 18 Euros for an 11 liter pot).
It really improves the results a lot, hardly any bubbles in the pured testpiece at all. The only complicated part is knowing when the resin is ready to pour - take it out too early and it has more time to form bubbles, too late and...
With a slower curing resin than the 305 it will be easier for sure. Can't wait to continue trying :)
Hi,
first experience with a bigger pot of smooth on 310. Had in mind that the pot life was 20mins and was quite surprised that the pot turned into bright white after just 15 - of course before I poured it ;)
Well, there is a german saying "wer lesen kann ist klar im vorteil" - who can read has a big advantage. Absolutely true. The data sheet clearly states that the pot life is 15-20mins.
Well, will try again the next days.
-
backyardskier

- Posts: 139
- Joined: Sat Nov 05, 2011 10:26 am
Question for all you pu experts, I just bought the trail size of smooth on 790. Just wondering if it is enough to fill the void for a ski that is 180 in length, 120 tip 90 mid foot and 115 tail? Going to be using a 3/4 size router bit down to a depth about 18mm. Will I need more than the trail size or will it be enough to get the job done?
-
knightsofnii
- Posts: 1148
- Joined: Tue Jan 08, 2008 6:02 am
- Location: NJ USA
- Contact:
-
knightsofnii
- Posts: 1148
- Joined: Tue Jan 08, 2008 6:02 am
- Location: NJ USA
- Contact:
Do the math lol.backyardskier wrote:Question for all you pu experts, I just bought the trail size of smooth on 790. Just wondering if it is enough to fill the void for a ski that is 180 in length, 120 tip 90 mid foot and 115 tail? Going to be using a 3/4 size router bit down to a depth about 18mm. Will I need more than the trail size or will it be enough to get the job done?
Hi,
made my first successful cast :)
What I did is a bit different than what most of you do:
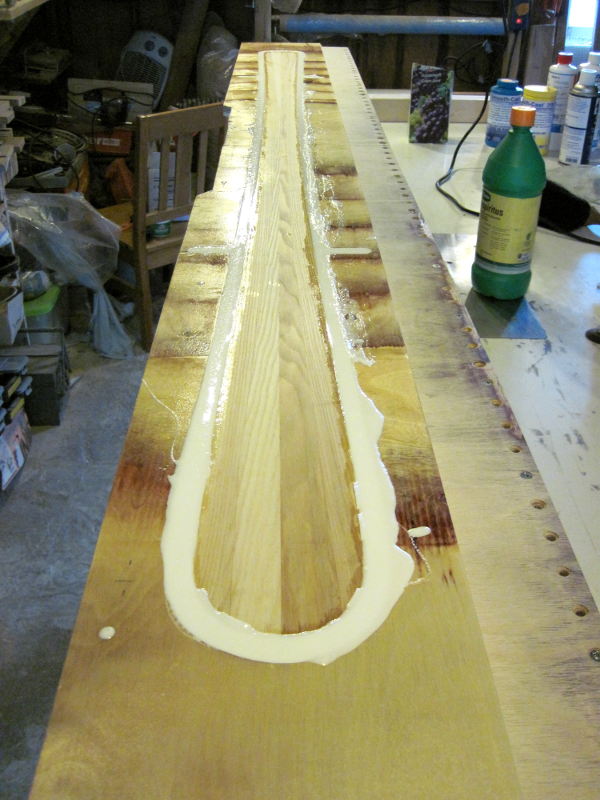
I finished the woodcore (shape and thickness), built a pouring mould and poured the sidewall in its end shape (well, some excess on top which is machined easily).
Also have the 0.8mm rabbet for the edges poured, used some 0.8mm thick polystyrol which I got cheap from modulor.de for the rabbet.
Will go to the workshop later again and make some more photos of the mold and the poured sidewall.
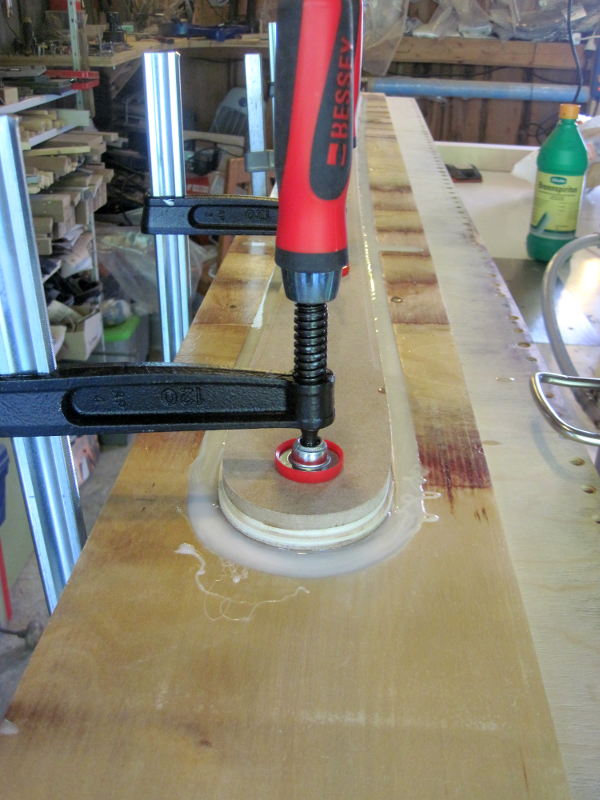
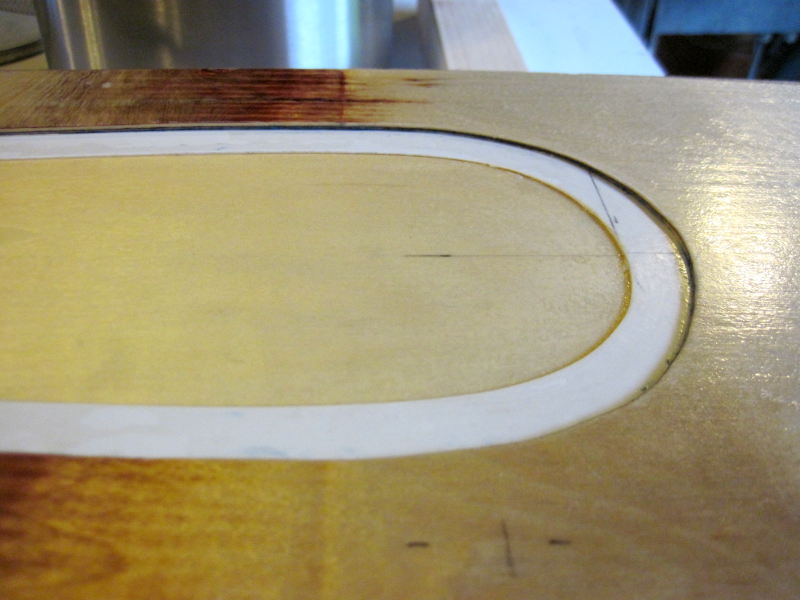
Here's the mold with the wood core and the poured sidewall and my 17.99 € vacuum pot for degasing:
made my first successful cast :)
What I did is a bit different than what most of you do:
I finished the woodcore (shape and thickness), built a pouring mould and poured the sidewall in its end shape (well, some excess on top which is machined easily).
Also have the 0.8mm rabbet for the edges poured, used some 0.8mm thick polystyrol which I got cheap from modulor.de for the rabbet.
Will go to the workshop later again and make some more photos of the mold and the poured sidewall.
Here's the mold with the wood core and the poured sidewall and my 17.99 € vacuum pot for degasing:

Hi,
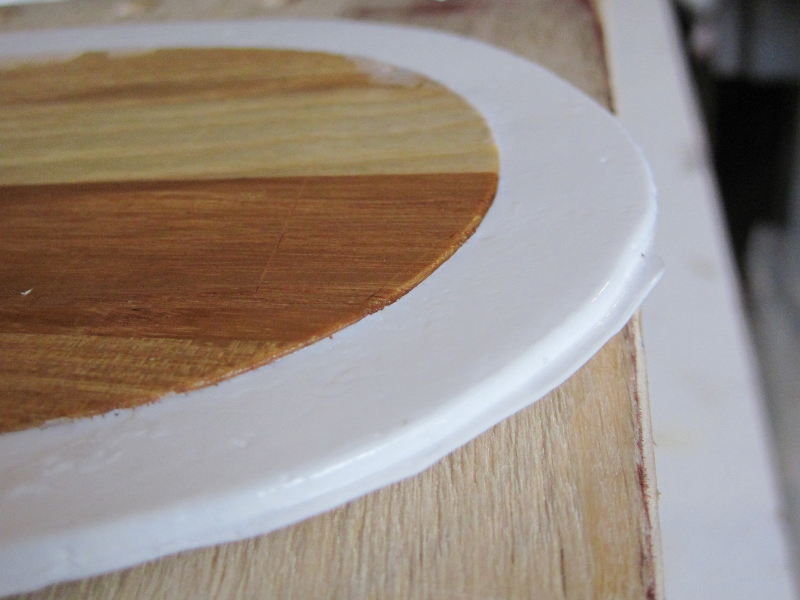
well, the main advantage is using less resin ;) Will also reduce the sidewall width a lot: In this ski it will be about 11mm, the next ski will only have about 5mm. => less resin, lighter ski. Will need about 300g resin per ski in future.
Why I did it was because I didn't want to machine the wood and plastic together, leaving just a lot of waste. Now I'm machining the wood first, so the chips can be put to good use.
In general that you don't have to machine the poured sidewall a lot what I like. Destroying it after successfully pouring it would really piss me off :)
I also like the mold for machining the core with the planer: at least with my planer, the first and last 50mm of whatever I put in the planer are not just planed but planed a bit deeper. As the mold is 250mm longer than the cores, the problem is gone.
For the future I will get a friend to help me with pouring - like this I can leave the resin a bit longer under vacuum.
BTW: What I use for pouring is really working damn well, and its only waste: A tetra pak cut open (http://thumbs.dreamstime.com/x/dreiecki ... 503635.jpg)
The vacuum pot makes the same as the press, about -750mB. With that pump and our altitude (850m) thats the max we get. Looking for a better pump already.
Makes sense 
The tetrapak is a genius idea. We have about ten plastic bowls like these http://shop.laeko.de/Haushalt-Dekoratio ... :6814.html. They can be cleaned easily by just pulling out the cured residues after letting the bowl sit for a few days.
The tetrapak is a genius idea. We have about ten plastic bowls like these http://shop.laeko.de/Haushalt-Dekoratio ... :6814.html. They can be cleaned easily by just pulling out the cured residues after letting the bowl sit for a few days.