
Full wrap or 3/4 for park ski
Moderators: Head Monkey, kelvin, bigKam, skidesmond, chrismp
-
ggardner90
- Posts: 146
- Joined: Mon Jun 13, 2011 9:02 am
- Location: Salt Lake
- Contact:
Full wrap or 3/4 for park ski
for a park ski, what is more likely to delam with all else equal full wrap or 3/4?
-
MontuckyMadman

- Posts: 2395
- Joined: Fri Jun 20, 2008 9:41 pm
i think a full wrap will delam easier but i haven't made a park ski and I dont ride park.
I would mKe one of each and do the standing slap test on concrete and see what happens.
Stand on the tail and flex into the ski with your other foot and slap it down.
I bet the metal tip will delam faster because its not as flexible.
I also think laminate pressure has allot to do wit this. If you press at 100psi vs 50psi, the laminate will hold together better if you do it right and remember rubber always increases bonding.
this should be posted as a poll.
sammer wrote: I'm still a tang on top guy.
-
twizzstyle
- Posts: 2204
- Joined: Tue Mar 07, 2006 8:25 pm
- Location: Kenmore, Wa USA
If you assume you can get the same probability of delam with each method (the exact opposite of your question...), you might consider this: A park ski can be considered more expendable than a non-park ski... I.e. it will inevitably get trashed. Full wrap is a lot more work to get it nice than a 3/4 wrap, and is that extra effort worth it for a ski that will get trashed?
(for what it's worth I do full wrap on all my skis, park or not, just cause I think it looks nice)
(for what it's worth I do full wrap on all my skis, park or not, just cause I think it looks nice)
-
ggardner90
- Posts: 146
- Joined: Mon Jun 13, 2011 9:02 am
- Location: Salt Lake
- Contact:
we the goal is to make the best ski possible, i agree that they are just going to get trashed, but if full wrap lasts longer the extra effort is worth it. what do you do with the end of the edge if you do 3/4 wrap. just end it or do you tuck it in somewhere. i was thinking about safety wiring them together to keep them from blowing out. bad idea?
-
twizzstyle
- Posts: 2204
- Joined: Tue Mar 07, 2006 8:25 pm
- Location: Kenmore, Wa USA
There have been a few people on here that have strung kevlar across the width of the ski/board using the edge tines just as extra insurance. Pretty clever if you ask me, and kevlar would be a much better choice than safety wire. The edge should just end, it doesn't get tucked in anywhere, just cut it.

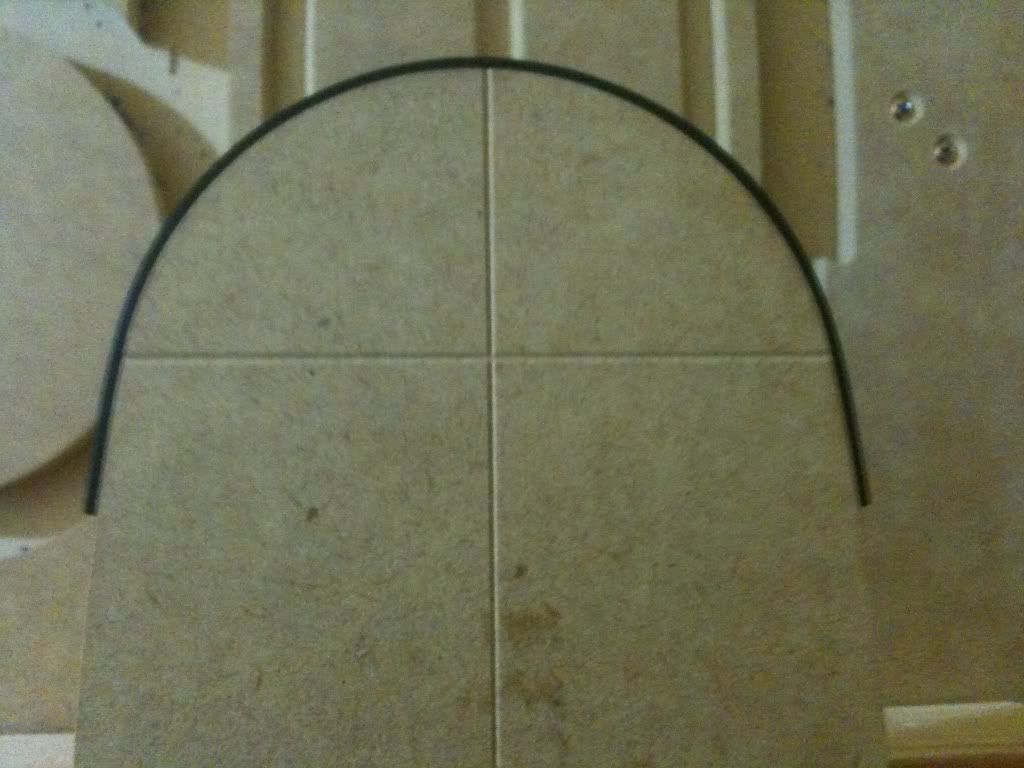
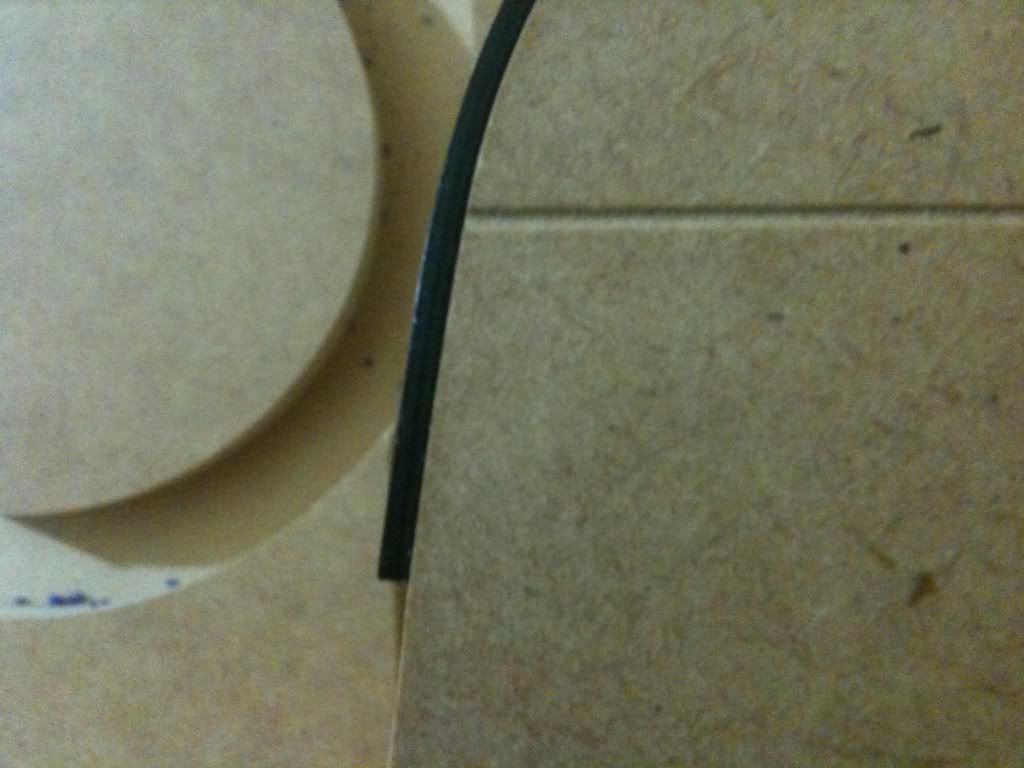
to do 3/4 edge wrap most people tape/glue a piece of tip spacer around the tip and tail on the template they route the base material with. the tip spacer is about 2mm thick so when you route the base you end up with a 2mm wide offset around the tip and tail. It leaves a circular notch that you need to square up with a scalpel/box knife and then you cut the edges to length so they sit in correctly.
Don't wait up, I'm off to kill Summer....
-
ggardner90
- Posts: 146
- Joined: Mon Jun 13, 2011 9:02 am
- Location: Salt Lake
- Contact:
i think i am going to try the 3/4 wrap. i like the way that your edge is flush with the base. just wondering how u get the square cut in the base, is that what u use the exacto knife to cut. i dont use tip spacer, but i am very interested about using the kevlar sounds like a great idea, can u elaborate on how you use it.
thanks
thanks
You want to look at Carlito's work: viewtopic.php?t=2922&highlight=carlito
This is a good video : http://www.swellpanik.com/uk/
This is a good video : http://www.swellpanik.com/uk/
Last edited by Richuk on Mon Dec 19, 2011 5:04 pm, edited 1 time in total.
-
twizzstyle
- Posts: 2204
- Joined: Tue Mar 07, 2006 8:25 pm
- Location: Kenmore, Wa USA
I don't use it, I've just seen others using it. It's one of those things that you shouldn't use to prevent an underlying issue in your ski (delam/edges ripping out). Those are issues you should be able to solve on their own, but there is no harm in having extra insurance built-in to the ski such that if you do bork up the layup, your chances of issues is smaller.ggardner90 wrote:i think i am going to try the 3/4 wrap. i like the way that your edge is flush with the base. just wondering how u get the square cut in the base, is that what u use the exacto knife to cut. i dont use tip spacer, but i am very interested about using the kevlar sounds like a great idea, can u elaborate on how you use it.
thanks
You want to get kevlar tow, just threads of kevlar basically. Tie it to one of the edge tines, and then thread it side-to-side, looping it around the edge tines with a little bit of tension in it. I wish I could remember who was doing that, they had some good pictures of it (it was a snowboard if I recall)
Tip spacer works perfectly to offset your base.falls wrote:to do 3/4 edge wrap most people tape/glue a piece of tip spacer around the tip and tail on the template they route the base material with. the tip spacer is about 2mm thick so when you route the base you end up with a 2mm wide offset around the tip and tail. It leaves a circular notch that you need to square up with a scalpel/box knife and then you cut the edges to length so they sit in correctly.
I've contact cemented it and stapled it to different templates.
The last time I used the brad nailer, quick and easy and pulls right out if you decide to do full wrap next time.
Richuks link above shows how carlito used kevlar tow, gotta scroll down a bit.
sam
You don't even have a legit signature, nothing to reveal who you are and what you do...
Best of luck to you. (uneva)
Best of luck to you. (uneva)
yeah the exacto knife is used to "square" the plastic where the end of the edge fits in.
As a router bit is circular it can't create a 90 degree corner, so when you follow the template and it rides off the MDF and out onto the plastic material (or use any material that is the same width as your edges) it leaves a quarter circle shaped notch. I use the exacto knife to cut in towards the template and then flush along the template to leave this notch at 90 degrees so the edge sits in flush. I attach the edges with a few spring clamps then cut the edge to length with a dremel cutting disc then use the drum sanding piece on the dremel to shorten the edge until it fits snuggly in place.
Way less effort than full edge wrap.
Don't wait up, I'm off to kill Summer....
-
feldybikes
- Posts: 41
- Joined: Sun May 10, 2009 5:23 pm
IIRC, there was a 333skis video that had this. Don't know if the video still exists on the youtubes. Just sayin...twizzstyle wrote:You want to get kevlar tow, just threads of kevlar basically. Tie it to one of the edge tines, and then thread it side-to-side, looping it around the edge tines with a little bit of tension in it. I wish I could remember who was doing that, they had some good pictures of it (it was a snowboard if I recall)
Last time, instead of this, I tried trimming the slot in the base to fit the edge instead. It worked out okay. Sanding/grinding down the edge bit by bit is probably a more precise way to do it.falls wrote:I attach the edges with a few spring clamps then cut the edge to length with a dremel cutting disc then use the drum sanding piece on the dremel to shorten the edge until it fits snuggly in place.