Look MA, No skins!

For discussions related to ski/snowboard construction/design methods and techniques.

Moderators: Head Monkey, kelvin, bigKam, skidesmond, chrismp

Post Reply
rockaukum
Posts: 558
Joined: Fri Nov 03, 2006 9:23 am
Location: Placerville area

Look MA, No skins!

Post by rockaukum »

After having made several skis, I felt that I could "spare" a set of skis to further experimentation. Seeing that now is the time for the wonderful spring corn skiing and the skins get soaked and heavy! With the dreaded snow melt we have to travel farther and farther to get to the good snow. So taking the first steps in getting rid of the skins I took the router to the bases of my first skis.
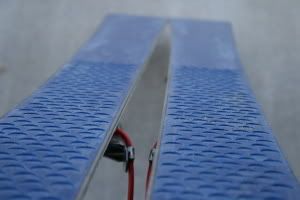
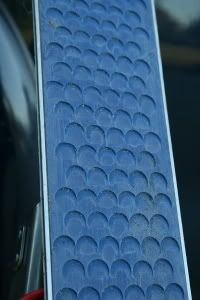
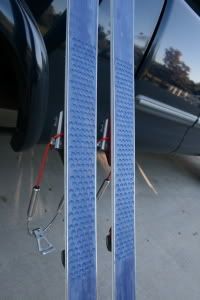
I took a measurement from some "guide" skis and found that the base was patterened 7" in front of pin and 14" behind. I set the skis up on some blocks and clamped them in place. I then set up a jig to try to match the skis pattern left to right. I used the router with a small cutting bit. Set the dept of the plunge on the router. On the router there is a plastic plate for the base. I unscred it and inserted some wood shims to achieve the angle and reinstalled the screws. Next was to line up the router, plunge it, once it reached the depth, I pulled it towards the tail while releasing the plunge to gain the angle.
Here are a few pics of the bases now.
Image
Image
Image
The skis worked great. I was able to climb without too many problems of sliding back. You are quickly able to determing how steep you can climb.
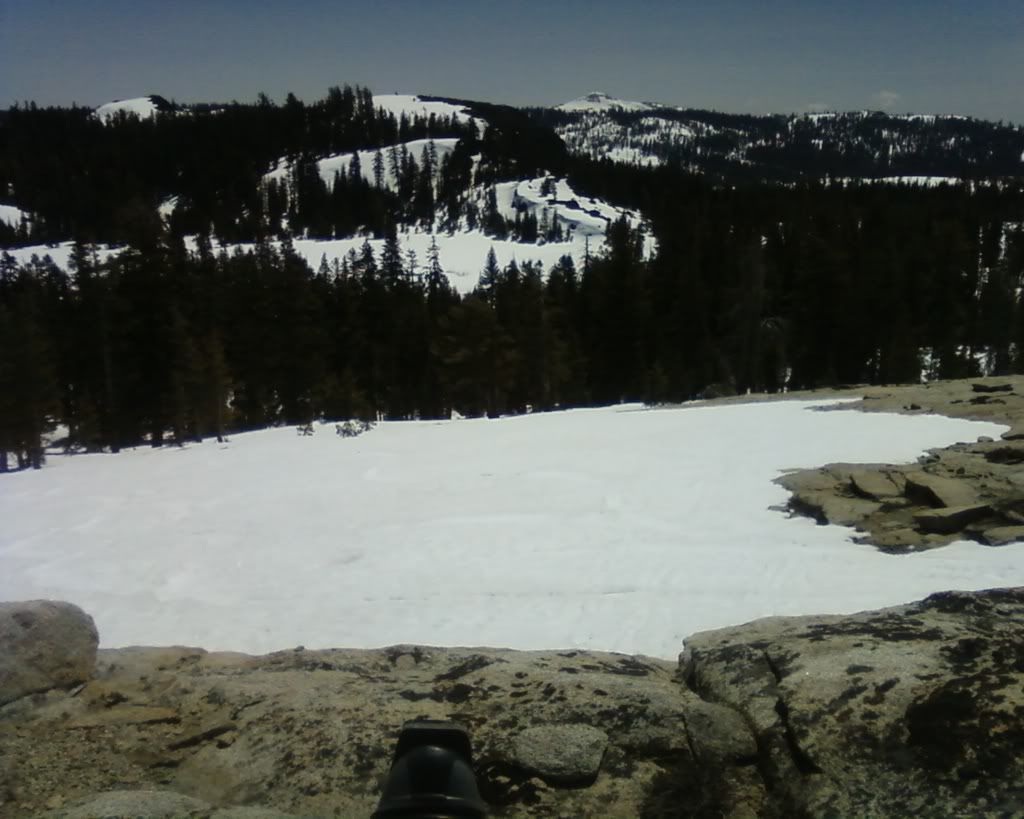
Here are some pics of the area we went out to ski.
This is looking north. In the distance is pyrmid peak .
Image
This is looking south at mokelumne peak.
Image
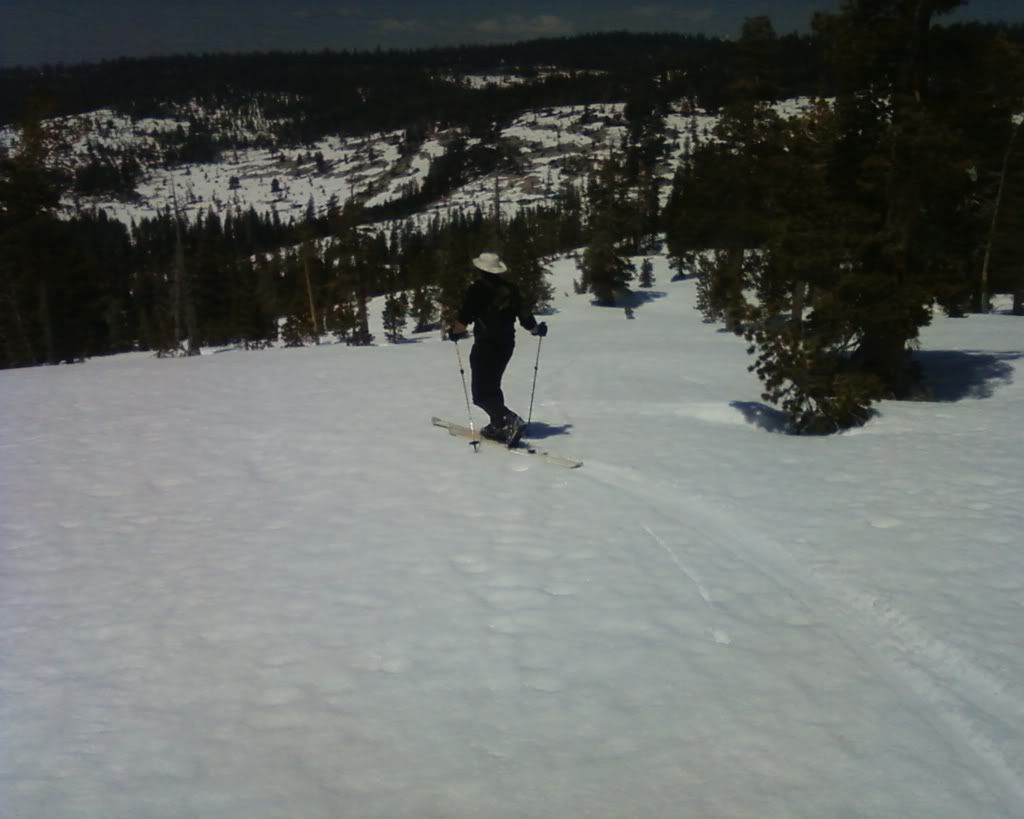
Starting down on one of the runs.
Image
Another benefit of doing this to a set of skis is when the area you want to ski is a bit of a journey away. We traveled for about one hour to get to the area. This included ups and downs. Without skins, the downs are great! unlike skis you slide. The skis are a bit slower than normal but in my opinion it is worth it.
rockaukum
G-man
Posts: 600
Joined: Sat Mar 25, 2006 3:58 pm
Location: northern sierra nevada

Post by G-man »

I like it... I like it. Very cleaver. I've got a few seldom used pairs of skis laying around myself. I think one of them will soon have fish scales. Thanks for sharin'.

G-man
rockaukum
Posts: 558
Joined: Fri Nov 03, 2006 9:23 am
Location: Placerville area

Post by rockaukum »

Thanks G-man,
I have been pondering this for a long time. I have even visited several machine shops in a quest to have the bases CNC'd, but to no avail! So then you have to take matters into you own hands. You WILL enjoy the results!
rockaukum
plywood
Posts: 499
Joined: Fri Oct 13, 2006 2:13 am
Location: wilen, switzerland
Contact:

Post by plywood »

great! finally you did it!

question: on the pictures it looks like those... pockets or whatever you want to call them are quite large and deep. so i`m wondering what if you made smaller pockets but over a larger area of the ski?
i remember having seen some cross country skis for the classical cross country style which also had such pockets as you did under the binding. why just under the binding? of course there you have the highest pressure, but what if you only put those pockets in tip and tail? wouldn`t that work too for climbing? so that the tip and tail hook up, and when riding downhill it wouldn`t affect the ride that much because the main pressure is under the binding? just an idea...
plywood freeride industries - go ply, ride wood!
pau
Posts: 4
Joined: Thu Feb 21, 2008 11:37 am

Post by pau »

@plywood: it would not work because you dont have enough pressure on tip and tail, and it would slow you down more because of the bigger "fish scaled" surface

in special snow conditions ( wet fresh snowfall, around +0 Celsius) even cross countrie racers use this tecnic. they make the area under the binding rough with sandpaper and rotary moves ( do you understand what i mean? )

therefore classical cross countrie skies have more chamber and are adaptet for the skiers weight.
the perfect ski would be: if you stand on both skis there is still chamber ( an area under the binding that does not touch the groung) and if you stand on one ski there is no chamber any more

the area under the ski that does not touch the ground (when you stand on both skis) is measured. only this area will be waxed or rhoughed up
so you can climb and have still a fast ski

i don't know if this helps you because ski don't have so big chamber and another flex

i would not try this with normal touring skis because it slows down verry much
maybe with tele its better because if it gets to slow you can use some cross countrie technik to ski on
Wannabebuilder
Posts: 60
Joined: Sat Oct 20, 2007 8:22 am

Post by Wannabebuilder »

Image
MaRuMo
Posts: 26
Joined: Wed May 23, 2007 9:05 am
Location: Chamonix, France

Post by MaRuMo »

Nice one, I'm curious to try sometime once I've made a few more to spare in the future. I wonder if it can get clogged up sometimes in certain snow conditions. I imagine there is an optimum condition like you mentioned where it performs best. Perhaps one just need to try different patterns and so on and find out! Great work.
User avatar
bigKam
Site Admin
Posts: 538
Joined: Tue Feb 01, 2005 5:15 pm
Location: Park City, Utah
Contact:

Post by bigKam »

Great idea! was looking at a pair of X-skis in my garage yesterday and it looks similar. i may have to try this to shave weight for those long tours..
rockaukum
Posts: 558
Joined: Fri Nov 03, 2006 9:23 am
Location: Placerville area

Post by rockaukum »

They work great. Provided the snow is not too firm. It needs to be soft enough for the ski to settle into the snow so the pattern bites and holds. We traveled over an hour out, skied around, and skied back, no need for the skins! Talk about weight savings especially with wet skins!
rockakum
Post Reply