
Hi,
make sure they know what they are doing. Just putting the snowboard in the robot on the normal program wont help, some pre-grinding on the belt grinder has to be done.
But if they do it correctly this machine is capable of giving a very nice grind to your new winter family member.
HB (Hansen Boards)
Moderators: Head Monkey, kelvin, bigKam, skidesmond, chrismp

The people there seem pretty copmpetent, I went in today, and they had already looked at the board and seen that the base was a little convex, so wanted to call me.
Sounds like they know what they are doing. I told then it was a prototype, and didn't need to be completely flat if it was going to cause problems.
Looks like I will need to work on getting the base a bit flatter.
Sounds like they know what they are doing. I told then it was a prototype, and didn't need to be completely flat if it was going to cause problems.
Looks like I will need to work on getting the base a bit flatter.
I am nobody. Nobody's perfect, so I must be perfect.
I'm not so happy with the results after the base grind. Mainly with how round my base is.
I haven't worked out how to prevent this.
Possibly my problem is that the Aluminium I used is too thin. I used 1.5mm and should have gone with 3
Anyway a bit of a pause from ski building at the moment as I have had a problem with my house in that my cellar roof has decided to fall down. Before I can repair it I had to re-wire and replace the lighting in 2 rooms. Now I can start working on the crappy cement used when building my house. Shit!
I am nobody. Nobody's perfect, so I must be perfect.
I haven't measured the amount, but in the worst places at least 1 mmmammuth wrote:I think youre main problem is the wiggly lower mold. If youre vacuum bagging it it will create the effect you described. The aluminium possibly will not help enough. How round were talking about?
I checked the Aluminium and it is completely flat at the moment.
Maybe I should attach some strips of thicker aluminium horrizontally... Or better is probably just to get some thicker aluminium.
I am nobody. Nobody's perfect, so I must be perfect.
I thought about this, but there isn't any side force, as the aluminium is only 1,5mm thick, there isn't anything to push against, so side force should be so negligable that it couldn't cause this.mammuth wrote:Maybe it gets better when you include the table into the bagging. With youre technique i assume you get similar problems like vacuum bagging just a sheet of something, the side force from the shrinking bag makes everything concave or convex. But ... just a theory
I guess it is caused by the force from above.. but theoretically there should be an equal force from below.
I guess it could be caused by the veneer cap construction, as the vacume bag is bending the wood down around the edges, it would be creating an upward force around the edges which could be causing the rounded base.
I'll try with 3mm Aluminium. I can pick that up for about €40 which isn't going to break the bank.... (I think)
I am nobody. Nobody's perfect, so I must be perfect.
-
MontuckyMadman

- Posts: 2395
- Joined: Fri Jun 20, 2008 9:41 pm
Yes, And if I didn't this would cause the opposite problem.. Edges too low.MontuckyMadman wrote:Did you rabbet the core for the edge tine?
Maybe I Rabbetted too much... though I doubt it.
Anyway I just thought of a simple solution that might help.
After everything is in the vacuum bag, I could clamp some steel strips underneath to keep everything flat... assuming I have enough room in the camber area.
In the middle where I added the camber I could also clamp the aluminium down to hold it flat.
I'll experiment..
I am nobody. Nobody's perfect, so I must be perfect.
If you really like to do it that way and if you like to go fancy heres an idea:
You take an aluminium sheet and weld some aluminium square in lets say 10cm distance to the bottom (like a spreaded cat track). If you use thicker aluminium you can also use countersunk screws. Maybe totally overkill
You take an aluminium sheet and weld some aluminium square in lets say 10cm distance to the bottom (like a spreaded cat track). If you use thicker aluminium you can also use countersunk screws. Maybe totally overkill
Tom
Great idea!!mammuth wrote:If you really like to do it that way and if you like to go fancy heres an idea:
You take an aluminium sheet and weld some aluminium square in lets say 10cm distance to the bottom (like a spreaded cat track). If you use thicker aluminium you can also use countersunk screws. Maybe totally overkill
However my welder, and welding abilities don't extend to Aluminium.
We'll see how the next one turns out with the ideas I have.
Like I said earlier. I would probably solve the problem if I went with 3mm aluminium instead of 1.5mm that I bought.
I am nobody. Nobody's perfect, so I must be perfect.
Hi, is your aluminium sheet flat? I would suspect the aluminium sheet already has that deformation. Simply way to check is to put the board back on it. If the board is completely "flat" on it its the aluminium.
I agree with you that there should be no need to reinforce the aluminium plate the way you do it. Its a nice simple idea.
Another thing: Are you sure the resin at the bottom cured at the same temperature as the one on top?
Cheers Philipp
I agree with you that there should be no need to reinforce the aluminium plate the way you do it. Its a nice simple idea.
Another thing: Are you sure the resin at the bottom cured at the same temperature as the one on top?
Cheers Philipp
In answer to Pmg's question, Yes I put a straight edge on the aluminium, and it looked flat.. Definitely flatter than the bottom of the board.
also it cured for the first 24 hours at room temperaturn, then 6 hours in an oven. But as it is in a vacuum bag with space under the board, it would be the same temp top and bottom..
I'll check on the second board.
OK. I wasn't happy with the curve on my template so I decided to build a sidecut template. And as I like building things that are adjustible I tried to make one using a screw mechanism,
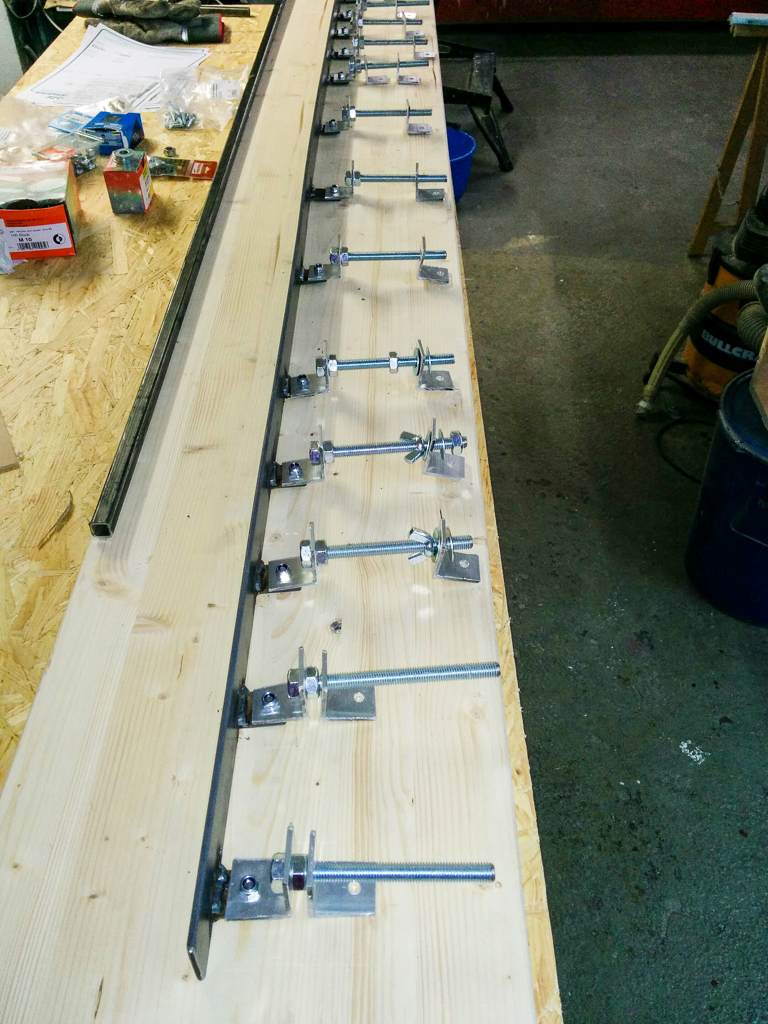
This didn't work too well as there wasnt enough freedom of movement. Promarily due to intollerances in my welding and tabs not being straight.
So last night I re-built it till 02:00am and am happy with the results.
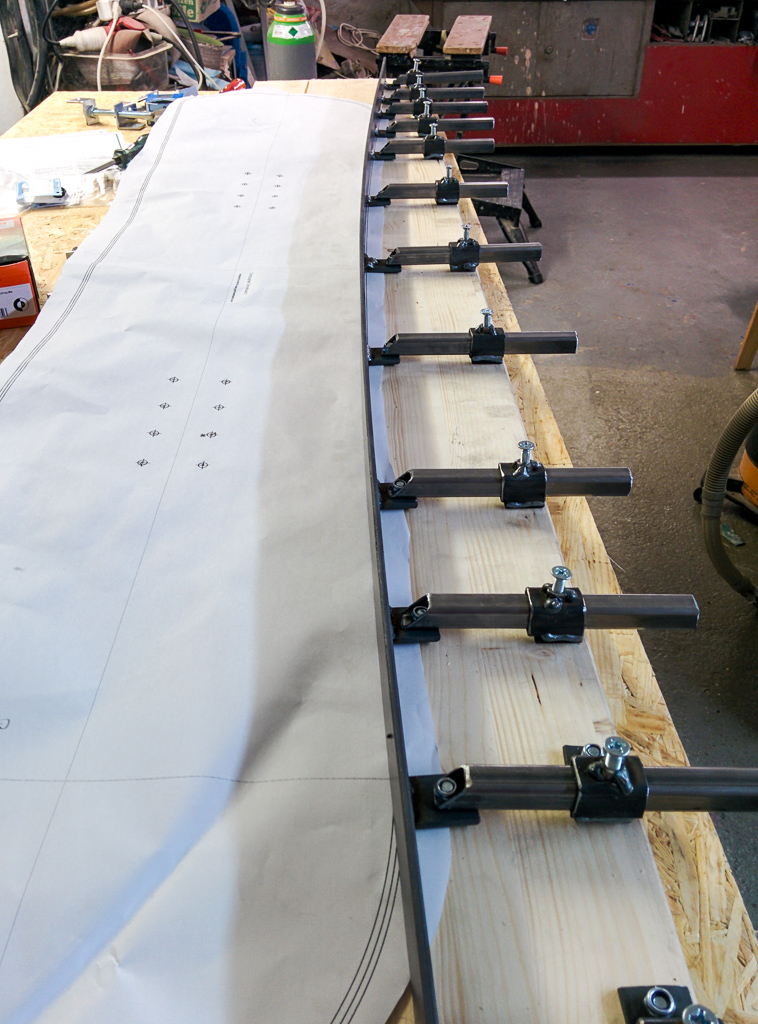
Im off to the cellar to finish it off and then I will make a new template and try it out.
I'll keep you up to date.
also it cured for the first 24 hours at room temperaturn, then 6 hours in an oven. But as it is in a vacuum bag with space under the board, it would be the same temp top and bottom..
I'll check on the second board.
OK. I wasn't happy with the curve on my template so I decided to build a sidecut template. And as I like building things that are adjustible I tried to make one using a screw mechanism,

This didn't work too well as there wasnt enough freedom of movement. Promarily due to intollerances in my welding and tabs not being straight.
So last night I re-built it till 02:00am and am happy with the results.


Im off to the cellar to finish it off and then I will make a new template and try it out.
I'll keep you up to date.
Last edited by Akiwi on Mon Nov 30, 2015 3:15 am, edited 1 time in total.
I am nobody. Nobody's perfect, so I must be perfect.
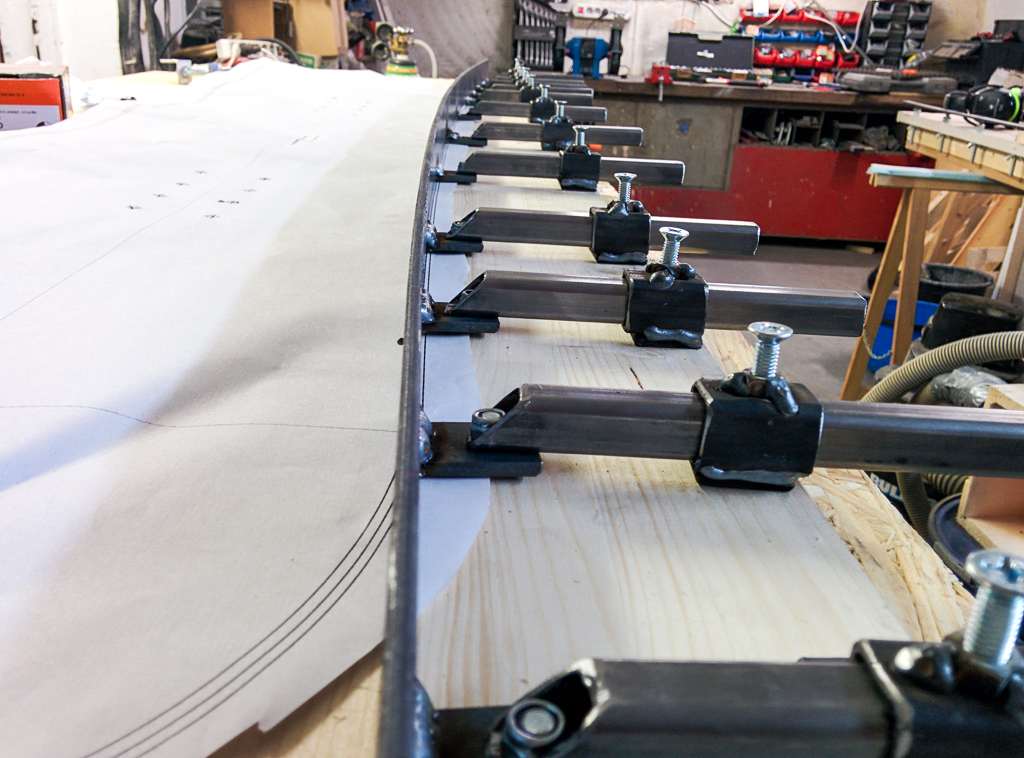
Haha.. Result.
Worked bloody well
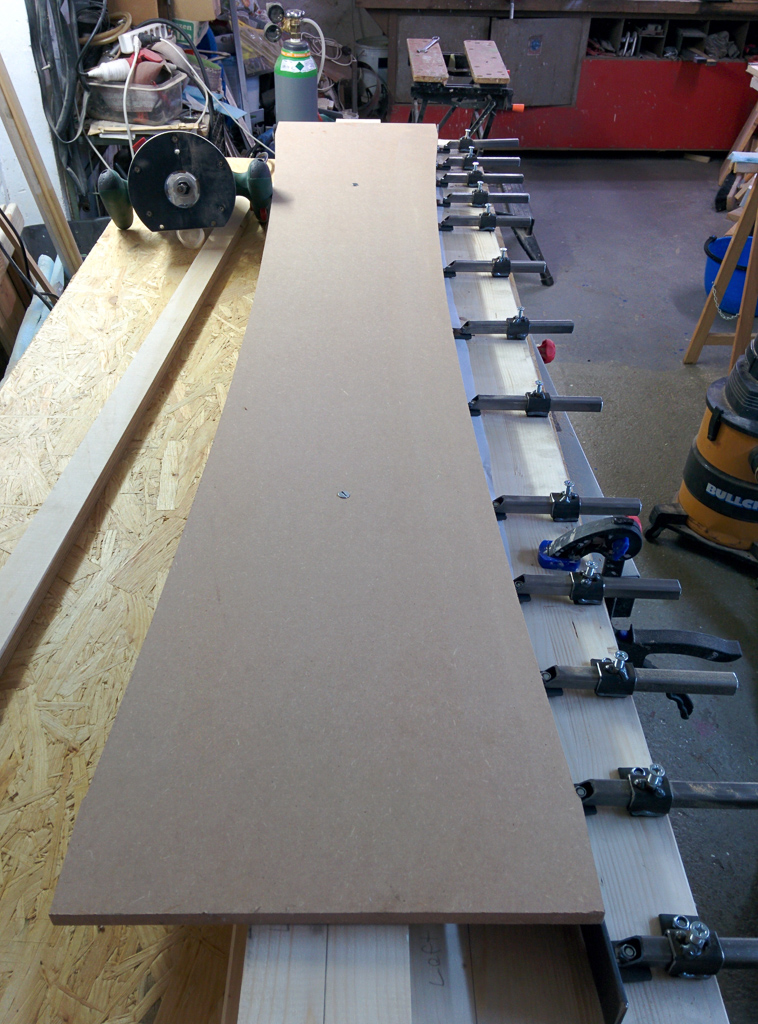
I put in the middle block. This has a skis and snowboard position.
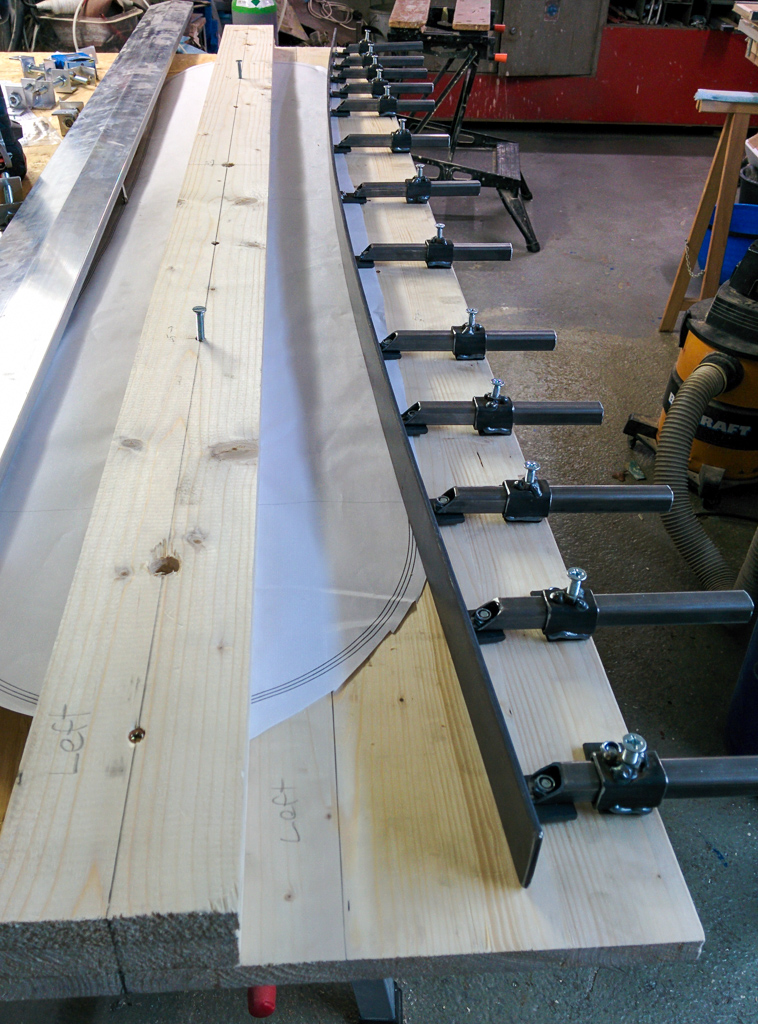
Screwed the template blank onto it.
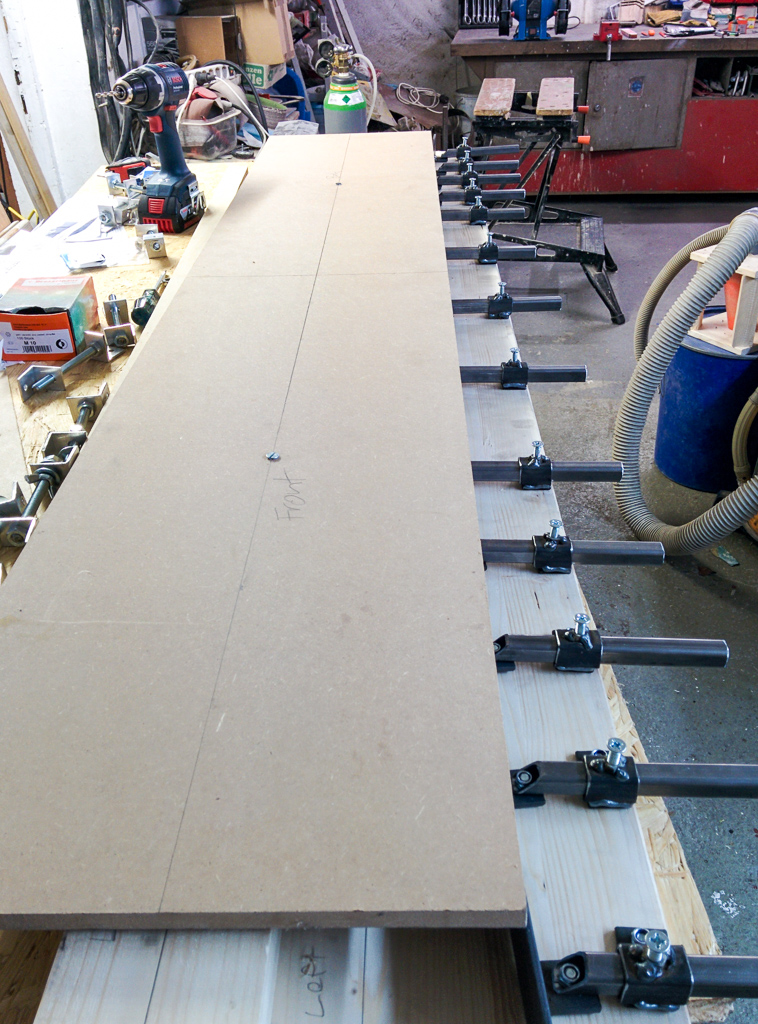
Ran the router along the edge.
Thats me in one of my sexy poses.
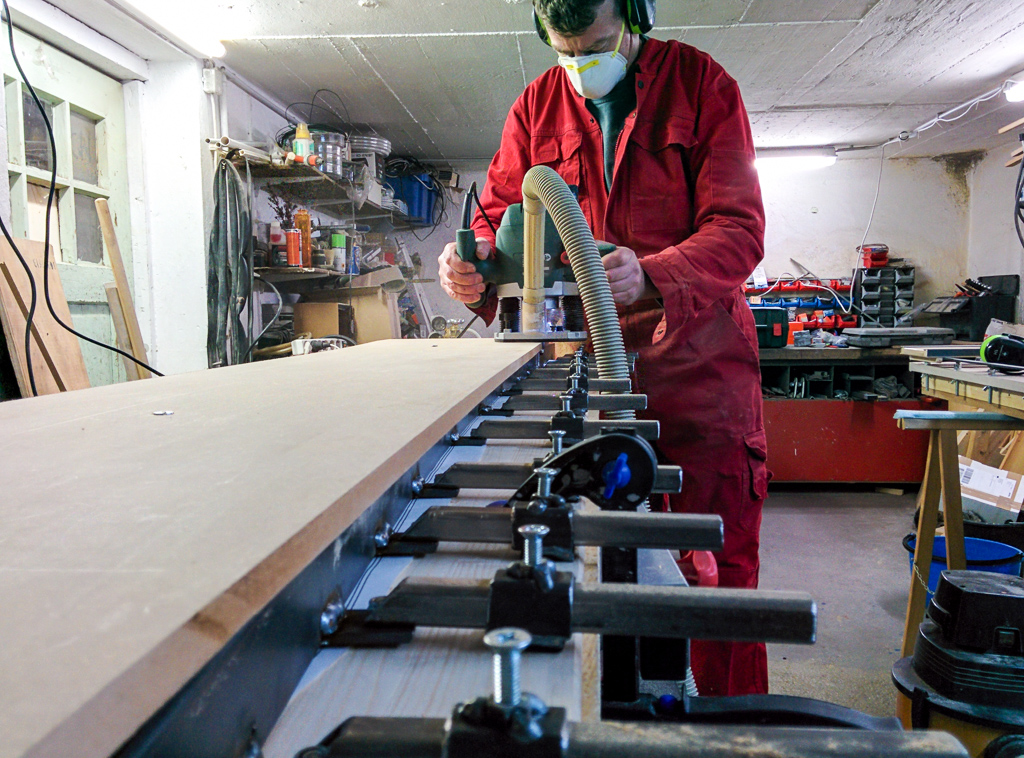
Fliped the blank and did the other side.
It turned out perfectly.
Worked bloody well
I put in the middle block. This has a skis and snowboard position.

Screwed the template blank onto it.

Ran the router along the edge.
Thats me in one of my sexy poses.

Fliped the blank and did the other side.

It turned out perfectly.
I am nobody. Nobody's perfect, so I must be perfect.
-
Danielbroski
- Posts: 46
- Joined: Tue Jan 01, 2013 4:00 pm
- Location: Boulder, CO