Newcomer's first builds

Document your personal work here. Show photos, movies, and share your secrets.

Moderators: Head Monkey, kelvin, bigKam, skidesmond, chrismp

JSquare
Posts: 119
Joined: Fri Sep 14, 2012 1:59 pm
Location: NH

Newcomer's first builds

Post by JSquare »

hello all! I've been on the forum for the past few months, mostly reading...and reading...and reading. This is an awesome community. The building bug bit me this past august, and I've been working with a buddy for a few months. This site has been such a big help for two guys that had no idea how these things all worked.

As I write this first post, we are awaiting our final materials from various places, so its a good way to pass the time.

The board: 157cm long, 8.0m radius, 7mm in the middle, 2.5mm on the tips and tail. Side cuts, profile, and feet set back 3cm from center. Tail is a sort of boxy thing and the nose is a bullet. Board is 300mm at its widest to accommodate riders with big feet.

Methodology: Vertically laminated poplar core, with maple sidewalls. We just free handed the stack in the bandsaw and jointed/planed off the excess. Core was profiled using a version of the skibuilders router bridge in the how to section.

Board will be vacuum pressed at room temp in a basement. Vacuum mold is a copy of one shown on www.boardcrafter.com. It has four ribs, a wooden cat track, a sheet of poly carb clamped against the track. The polycarb acts as a bottom of the mold, where vacuum film is sealed against it during the layup.

Pics to follow...


Image
Poplar stack with Titebond III

Image
Clamping the stack

Image
Cutting the stack on the band saw free hand.

Image
Routing the core

Image
Glue up of maple sidewalls.
Last edited by JSquare on Fri Dec 14, 2012 9:14 pm, edited 1 time in total.
Jekul
Posts: 240
Joined: Thu Nov 05, 2009 12:06 pm
Location: Arvada, CO
Contact:

Post by Jekul »

Nice pics and cores. Quick question. In the past I've always ripped 1/2" x X" and glued my cores one at a time. In the next 1-2 weeks I'll be making 5-10 pairs of cores in a similar manner to yours. Now for the question:

How many clamps did you use when gluing up your big stack, and would you make any changes in the next time you do it?
JSquare
Posts: 119
Joined: Fri Sep 14, 2012 1:59 pm
Location: NH

Post by JSquare »

No real magic to the glue up. Two sets of hands, 2 bottles of titebond III, 7 clamps (pics uploaded now) to glue up 9 planks. We did apply glue to both sides of all the joints and rubbed it in before clamping together. 3 clamps on the bottom and 4 on top, just tighten them in small increments and apply an even load.

Will add more photos soon.
JSquare
Posts: 119
Joined: Fri Sep 14, 2012 1:59 pm
Location: NH

Post by JSquare »

Annnd... we hit a couple bumps this week.

First oops: Somewhere between our CAD drawings, the pdf conversion, and the 1:1 printing, our core template came out just under scale. I ended up adding some fatter sidewalls (maple) to give us some extra slop and then the tip spacers will make up the rest. I guess the tips will be a little soft, but it ought to work okay?

Second one: I'd acquired a used vacuum pump from work. We'd used it a year ago for some handling equipment and it pulled to 25 in hg no problem. Now, it seems to only pull to 5-10 in hg. It's been on the shelf for a while. It is a gast 0523 vane, oil less, pretty basic... Not sure what's up with it. I'm torn between ordering the rebuild kit for it or buying a rebuilt pump from veneer supplies for a similar price as the rebuild kit. I put some calls into tech support from GAST and a couple suppliers... we'll see what comes of it. In the meanwhile, we're going to borrow a pump from a friend... first press should be soon!

Image
Pump

Image
Gauge showing pump not working... sad sight.

Image
Vane ass'y, i took it apart to inspect

Image
Vane... not sure what constitutes worn yet. Need to do some learning.
twizzstyle
Posts: 2204
Joined: Tue Mar 07, 2006 8:25 pm
Location: Kenmore, Wa USA

Post by twizzstyle »

Bummer on the pump!

Was that with the line totally plugged, or did you have it hooked up to something bagged? It looks like a brand new pump, you just want to make sure it's not just a leaky hose or something simple.
JSquare
Posts: 119
Joined: Fri Sep 14, 2012 1:59 pm
Location: NH

Post by JSquare »

twizzstyle wrote:Bummer on the pump!

Was that with the line totally plugged, or did you have it hooked up to something bagged? It looks like a brand new pump, you just want to make sure it's not just a leaky hose or something simple.
Right?! I was thinking that same thing. I ended up just putting the gauge straight to the pump (shown above) and saw the same issues. I also tried another gauge to make sure it wasn't either. The motor slows as it approaches is lowest vac pressure (shown) and seems to struggle a little. Seems like its just fighting something, like the high pressure is leaking across to the lo and the thing is just stalling. I am new to this world, though, so I'm a bit puzzled.

Luckily, this was a dry/check run so no big loss other than sleep and time. I did also check the incoming voltage, 118V VAC.
Cornice
Posts: 73
Joined: Mon Sep 10, 2012 10:08 pm
Location: AK TOWN

Post by Cornice »

Those vanes are brand new. Not even totally seated yet. The blade ends will eventually wear down and have that kerf or wear angle all the way across the ends. Dont think the vanes are you problem at all. There are little check valves or regulators on the end of that thing? Are they clean and seals in good condition? You exhaust filter is clean on the inside and not plugged?
JSquare
Posts: 119
Joined: Fri Sep 14, 2012 1:59 pm
Location: NH

Post by JSquare »

Great to know Cornice! The other thing that i thought was suspect was the gasket. I should have taken a picture. It's white, not sticky or compressible, and looks like its got a lot of carbon on it. Maybe it dried out while it was sitting? It's a cheap part, I will start there!

There are no check valves, and the filters are clean. I did try removing the particulate filters and didn't seen any improvement in the pump down pressure.

Image
GAST 0523 pump exploded diagram
JSquare
Posts: 119
Joined: Fri Sep 14, 2012 1:59 pm
Location: NH

Post by JSquare »

Got it. Sent an email to the manufacturer. Turns out the motor slowing under load is typical of wiring the pump for 240... meanwhile, we'd borrowed a pump to get through our first layup.

First we bent some edges.. added some rabbets to the cores..then the rest was pretty straight forward

Image
yes...its not clamped. Foreshadowing for us rookies..

Image
Quickest and dirtiest way we thought of to do the rabbet. We traced the base on the core and then clamped the base template as a guide for the router base.

Image
Board in the press...
JSquare
Posts: 119
Joined: Fri Sep 14, 2012 1:59 pm
Location: NH

Post by JSquare »

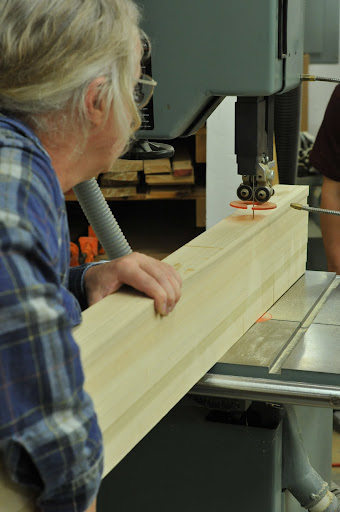
And the board out of the press... not finished. Probably a good time to sum up all the issues we ran into...so many...soo soo many...

1. We mixed our epoxy into a couple solo cups. We were really careful with the mixing ratio using a scale to measure the mass, but then it took us a while to figure out what the heck we were doing and the cups melted down and almost set a few things on fire... we noticed the smoke, and took it outside and threw it in a bucket of ice water. So that was spooky.

2. We'd also tried to position our base on the mold and hold it down with spray adhesive. We moved it around a little to fix alignment (too late and we accidentally peeled it off of the protective layer. So the end result was epoxy getting all up in our base where it came off the masking.

3. We glued two inserts to the base to help us align the core during the layup... but in the end the inserts didn't come up all the way into the core and we have two bumps in the base where the inserts push it down.

4. Earlier on, we'd realized that the templates we made were printed 1:1 scale...actually were not 1:1. We traced the issue to a pdf printer I'd used to share the files from CAD to other machines. But of course, we had a friend make the base template with a shop bot, so the mold ribs and core were scaled about 2% smaller than the base. We ran with it... the tip spacers just occupy a lot more space than we wanted. Also the board has some funny corners on the tips and tails where the oversized tip spacers didn't fit perfectly with the core.

5. Design whoops. I did a lot of research. Like a lot of research. But somehow i got the idea in my head that the board would come out too flexy, so we went with a 22oz triax with CF and a 6.5mm thick core. Man...this thing came out like a piece of a military tank. It has some flex but it is way too stiff. I also expected the glass to compress more but we didn't really get much compression. The glass is about 1mm thick on each layer.

6. Wrinkles. DAMMIT the wrinkles. I missed this somewhere, but apparently this is a common problem? It seems that if you attach the edges to the base and its not perfectly flat, the base gets overconstrained when its pressed and it wrinkles. At least that's what i think i learned from here:
http://www.skibuilders.com/phpBB2/viewtopic.php?t=1277

Either way, we're going to give this nice bevel down the edge, a quick tune up, and hit the slopes this weekend to have some fun with our not so perfect first article.

Image
Unfinished board and press

Image
Unfinished board...that natural top sheet we ordered from action sports is sure shiny. Loved that. Expensive but it comes with its own protective sticky layer.

Image
base side...note the extra sharp bend where the core meets the tip spacer halfway up the nose

Image
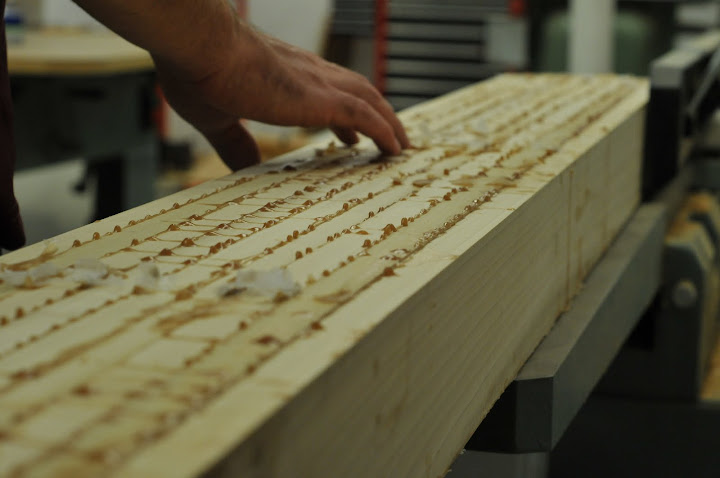
wrinkles and epoxy on our base... i heard beer is the instant fix for this failure mode.
sammer
Posts: 933
Joined: Wed Dec 19, 2007 10:37 pm
Location: Fernie B.C.
Contact:

Post by sammer »

Looks like you learned a few lessons on your first build.

#1 mix your epoxy in small (200-250g) batches spread this out then mix up more.
Fill a few cups with resin (200 or so grams in a solo cup) then you just have to put them on the scale and add the specified amount of hardener.
Mix that well, then transfer into a clean cup, give it another quick stir then get it spread out.
Seems like a lot of cups but any unmixed resin will not harden.

#2 gluing edge to base. Base material is quite heat sensitive and usually under a bit of internal tension.
Cut if off the roll the day before and find a place to lay it flat put your template on top to hold it down and let it acclimate.
I use carpet tape to hold the base to the template when i cut it with the router and leave it taped until the edges are glued on clamping the whole works to the template.
Try to work both sides evenly.
I've never seen a protective layer on base so can't help you there but it seems it would be a waste.
If everything is well planned out and bent to shape you wont get much epoxy on your base.

#3 Vacuum doesn't really compress anything in your layup. It holds it all together and will hold if you use a heavy roller and do your own compressing.

One question, whats the blue tape under the epoxy in your last pic?

Don't despair the first few will try your patience. Just keep at it and remember your mistakes. (nothing sucks more than to go oh shit I forgot that again!)

Go ride that thing, it will be better than you think despite the issues.
And remember your next one will be better.

sam
You don't even have a legit signature, nothing to reveal who you are and what you do...

Best of luck to you. (uneva)
deepskis
Posts: 245
Joined: Wed Sep 21, 2011 12:52 pm
Location: Sweden (Gothenburg)
Contact:

Post by deepskis »

sammer wrote:Don't despair the first few will try your patience. Just keep at it and remember your mistakes. (nothing sucks more than to go oh shit I forgot that again!)

Go ride that thing, it will be better than you think despite the issues.
And remember your next one will be better.

sam
So true! :D
Every turn is a sign of fear

www.deepskis.com
twizzstyle
Posts: 2204
Joined: Tue Mar 07, 2006 8:25 pm
Location: Kenmore, Wa USA

Post by twizzstyle »

Looks great for a first board. You'll learn this much with every single board you do, I'm still learning.

When I do my epoxy I usually make 3 cups. I pour in the hardener and the epoxy, but I don't mix it until I'm ready for it. I'll mix the first cup, then start the layup, once I run out I mix the next cup, etc.
User avatar
vinman
Posts: 1388
Joined: Fri Nov 09, 2007 4:16 pm
Location: The tin foil isle
Contact:

Post by vinman »

Sage words from sammer and twizz. Looks like you did or get good pressure I the tip/tail also.

Go ride the shit out of that board. It might not be as bad as you think.
Fighting gravity on a daily basis
www.Whiteroomcustomskis.com
Jekul
Posts: 240
Joined: Thu Nov 05, 2009 12:06 pm
Location: Arvada, CO
Contact:

Post by Jekul »

My very first pair of planks had the locating pins pushing the base down in two places, on each ski. I also didn't have enough epoxy (ordered a kit that was supposed to be enough and didn't have any more to add), so I had areas in the tip and tail that didn't have enough/any epoxy. I took them straight to the mountain and they skied surprisingly well.

I'm not sure if it was pride of building my own skis or if I was ignorant, but I thought they rode pretty good. Would I ride them again (15+ pairs later? Probably not :) ). But they're still hanging on the wall above my press as a reminder and inspiration.
Post Reply