Ski building so far

Document your personal work here. Show photos, movies, and share your secrets.

Moderators: Head Monkey, kelvin, bigKam, skidesmond, chrismp

n.marshall
Posts: 30
Joined: Mon Aug 30, 2010 7:29 pm

Post by n.marshall »

First three pair out of the press

First pair is for mitchell, 192cm, maple core with carbon fiber topsheet

Second is for Tia, 170 cm, maple+poplar core with birch topsheet

Third is for Ben, 183 cm maple core with maple topsheet

Image

They were pressed out of order, because they were heading off to college and wanted to see the process. I am almost done prepping all of the other skis, and then hopefully I will be able to build a pair everyday, and maybe take a break when I have to change the ski size in the press.

All the cores are cut out, and ready to be glued up one at a time. I wanted to make big core blocks and re-saw on a bandsaw, but my dads bandsaw isnt big enough, and most of the cores are different. I have poplar, maple, bamboo, ash, and aspen going into the skis, some with one solid wood and lots of combinations too.

Cores and sidewalls-

Image

Right now I am at 3/21, and once they are all done I wll post all of the specific info about each pair to a wordpress website so it will be easy for all of the skiers to review their skis, and you guys can read the info also.
n.marshall
Posts: 30
Joined: Mon Aug 30, 2010 7:29 pm

Post by n.marshall »

(double post)
skidesmond
Posts: 2337
Joined: Tue Apr 07, 2009 3:26 pm
Location: Western Mass, USA
Contact:

Post by skidesmond »

Wow, someone's been busy.
User avatar
bigKam
Site Admin
Posts: 538
Joined: Tue Feb 01, 2005 5:15 pm
Location: Park City, Utah
Contact:

Post by bigKam »

How do you like the solid-wood core approach? I've made a bunch of skis this year that way. I can't decide if I like it -- pros and cons. For one, I've found that the cores will warp a bit after profiling if I leave them alone too long before layup. Lamented cores are more consistent, but takes time to make.
sammer
Posts: 933
Joined: Wed Dec 19, 2007 10:37 pm
Location: Fernie B.C.
Contact:

Post by sammer »

bigKam wrote: Lamented cores are more consistent, but takes time to make.
Un-lamented cores cause way less grief :D

sam
You don't even have a legit signature, nothing to reveal who you are and what you do...

Best of luck to you. (uneva)
n.marshall
Posts: 30
Joined: Mon Aug 30, 2010 7:29 pm

Post by n.marshall »

bigKam wrote:How do you like the solid-wood core approach?
What I said was a little bit misleading. My solid wood cores are all one type of wood, with 7 stips of wood about 3/4 inch wide laminated together. The only solid wood cores that I dont laminate are the bamboo cores, like you can see in the bottom of the picture. They came out of a sheet of bamboo plywood that looks pretty consistent.
n.marshall
Posts: 30
Joined: Mon Aug 30, 2010 7:29 pm

Post by n.marshall »

Ski rack is looking a lot better

One more set to go, stoked!

Image
twizzstyle
Posts: 2204
Joined: Tue Mar 07, 2006 8:25 pm
Location: Kenmore, Wa USA

Post by twizzstyle »

Looks like you've been hard at work, nice job!
User avatar
bigKam
Site Admin
Posts: 538
Joined: Tue Feb 01, 2005 5:15 pm
Location: Park City, Utah
Contact:

Post by bigKam »

@ n.marshall -- OK, now your cores design make sense. Thanks for clarifying.

Nice quiver of skis, btw! Looks like you're in business!!!
n.marshall
Posts: 30
Joined: Mon Aug 30, 2010 7:29 pm

Post by n.marshall »

Here's a few notes on how I built the skis. Most of these ideas or processes have already been posted here, I just thought I would let you guys know what worked well for me and what didn't.

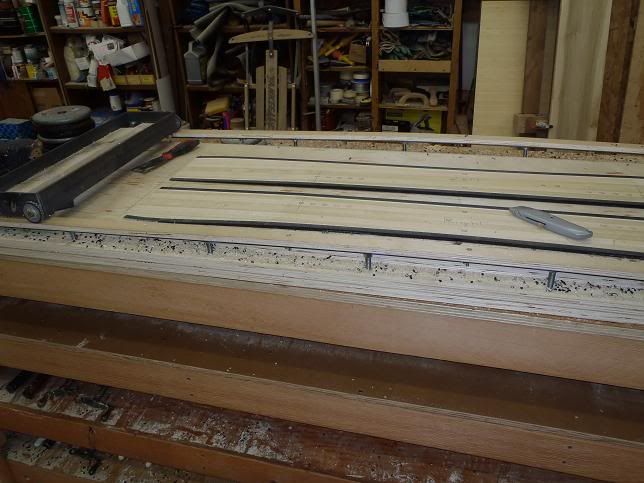
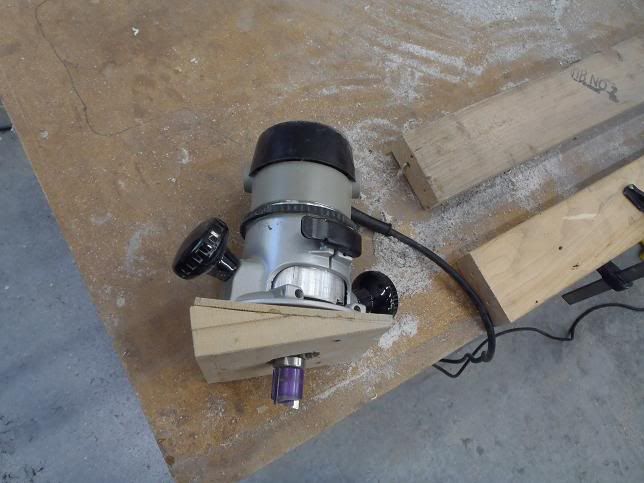
I profiled all of my cores on an adjustable router table. I saw one in a layup video (I think it was from kingswood skis) and tried to copy it.

It works great in the sense that the uhmw sidewalls dont explode off, like I was getting with the planer. I also liked doing two cores at once, as it was a bit faster than one core at a time.

It wasn't so good because if I didn't hold the router completely steady, the cores could be off by as much as 0.3 mm. I think I could fix this by routing one core at a time, and switching out the adjustable rails for solid wood ones.

The rails were thin pieces of steel supported by bolts. The bolts threaded down into lock nuts that were hammered and superglued into place on the lowest piece of plywood. On top of the steel rail was a piece of 1/2 inch plywood, a smooth surface for the wheels to rolll on. I secured the cores to the table by hot-gluing in 4 spots on each sidewall.

I think planers are a lot better for dimensional accuracy, but I would rather have my cores off by a little bit and have plastic sidewalls. With solid rails and a new carriage, I should be able to get them in tolerance.

(Eventually I want to buy or build a cnc, which seems like the best way.)

Check out the k'nex wheels on the carriage haha-

Image

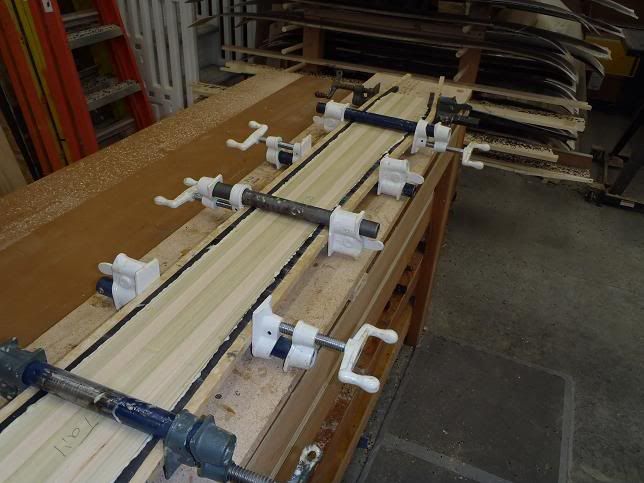
All of my cores were glued up using pipe clamps, which I like since they are easy to use. I used gorilla glue to hold the sidewalls onto the core

Image

I cut out the skis with a bi-metal bandsaw blade, 10-14 variable pitch tooth. The metal blades last longer than the wood ones for cutting out skis. It is hard to get a perfect cut, and when there is epoxy left on the ski edge I usually clean it up with an angle grinder with a sanding disc. I like the edges to be smooth so that when I cut the sidewall bevel the router bearing has a smooth surface to roll on, resulting in a clean, consistent sidewall. Also, I like to deliver my skis to the local shop where they grind the bases and edges epoxy-free. The uhmw sidewalls eat up the grinding discs pretty fast, so I started cutting a bevel into the skis on the bandsaw. I added a little shim to the block of wood that the ski sits on -

Image

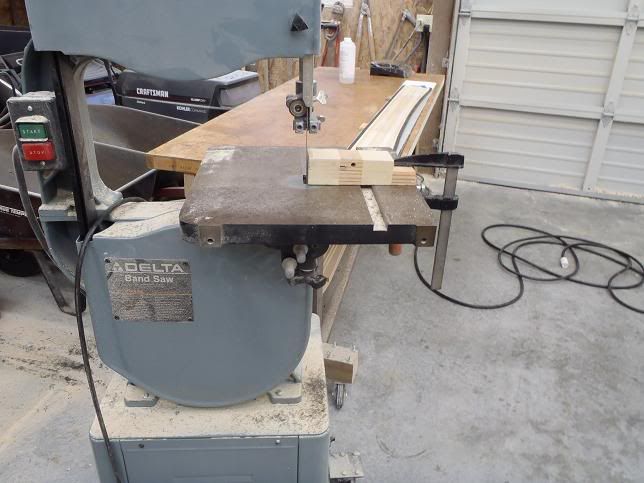
This also makes it a little bit easier on the router.

I have never tried cutting the sidewall bevel on a router table, I am too scared to screw up a ski at that point. Last summer I used a laminate trimmer and got the sidewalls to about 20 degrees in two passes. Since I had to bevel 88 sidewalls this time around, I didnt want to have to cut it in two passes, so I built a new base for the heavier duty router I was using. A little bit more efficient, worked pretty good.

Image

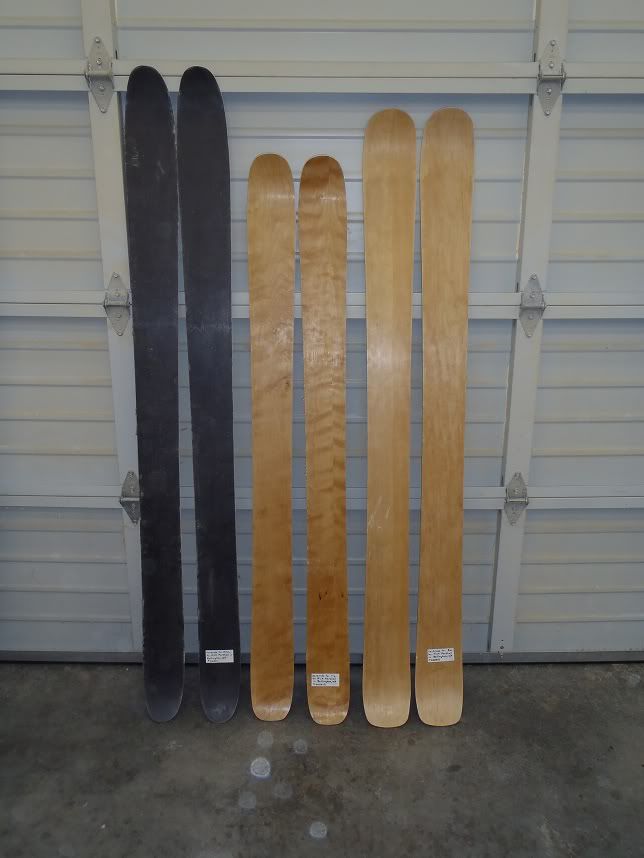
Last summer I put epoxy on top of the wood veneer topsheets, and this year I experimented with prefinishing the topsheets with spar urethane. It worked good for the thicker veneers, or the ones that were darker where you tell that the epoxy bled through. For the thinner veneers, they turned out kind of blotchy

Image

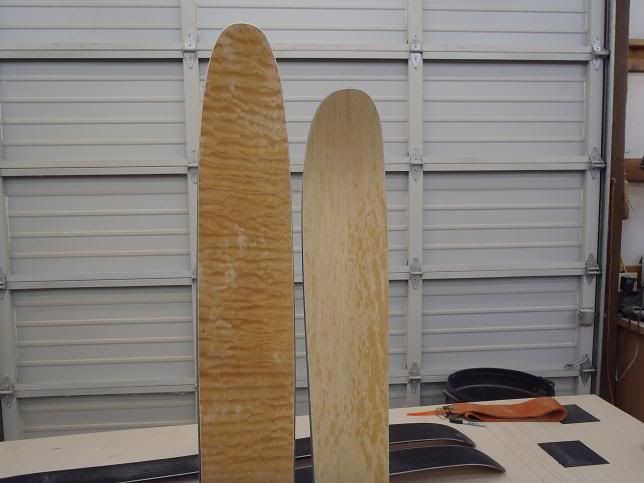
I put a spar urethane finish on tail of one of the skis, and it did not help. I am now trying to spread a thin layer of qcm epoxy and cure it at shop temperature in late october, a huge PITA. For these veneers it would have been easier to put epoxy on the topsheet in the press, and sand it flat later.

I had really good results with these veneers-

http://www.veneersupplies.com/categorie ... d__Veneer/

They are really expensive, but they dont let any epoxy bleed through and seem to hold up better for skiers that like to hit their skis together.

From now on, if the customer wants a hard, durable topsheet, I am going to put epoxy on the topsheet in the press. If they wanted a better looking, smoother topsheet, I will brush spar urethane on the topsheet before it goes into the press and put no epoxy on the top. Either way, the topsheet gets sanded and more coats of finish once it is out of the press.

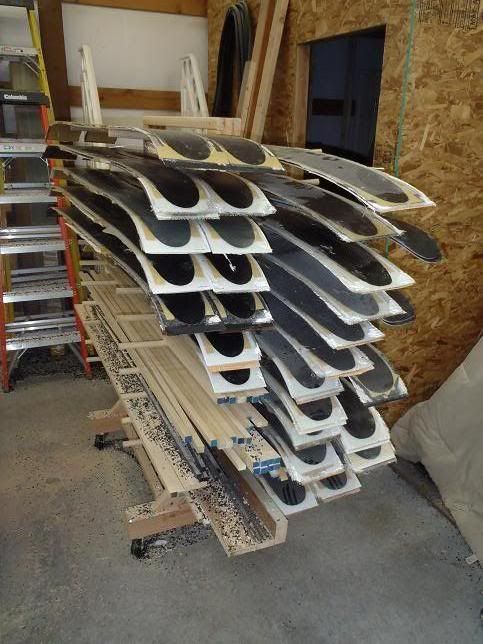
Twenty two pairs in a few months, stoked! All thats left is a few topsheets to finish, waxing the bases, and then they are off to the customers.

Image
skidesmond
Posts: 2337
Joined: Tue Apr 07, 2009 3:26 pm
Location: Western Mass, USA
Contact:

Post by skidesmond »

Wow, you've been crankin' out the skis. Did you have a separate template made for each one of those skis? Or do you have some other way of shaping the skis? You have so many shapes and sizes.
Richuk
Posts: 1146
Joined: Sun Jan 31, 2010 9:53 am
Location: The Duchy of Grand Fenwick

Post by Richuk »

Quality - inspiring. Good luck with the new venture!
User avatar
chrismp
Posts: 1444
Joined: Fri Feb 13, 2009 9:00 am
Location: Vienna, Austria

Post by chrismp »

the last photo kinda reminds me of ON3Ps first batch of skis. and look where they're now! way to go! :D
n.marshall
Posts: 30
Joined: Mon Aug 30, 2010 7:29 pm

Post by n.marshall »

skidesmond wrote:Wow, you've been crankin' out the skis. Did you have a separate template made for each one of those skis? Or do you have some other way of shaping the skis? You have so many shapes and sizes.
I cut out all the templates by hand. I built 12 different shapes of skis this summer, with 8 new shapes to test this winter.

The cnc guy that I was using was charging $80 per shape, and for the people that wanted custom shapes, they wanted to pay less and have me shape them. The cnc is obviously more accurate, but I was able to get them all within +/- 1 mm at most.

I would draw up the shape in snocad, and print off the split pdf template. I would cut the pieces of paper in half and tape them onto a piece of mdf that was about 6 feet long by 3 inches wide. Basically I was cutting out a template that was half of one ski. I would bend a piece of wood (1/2 inch x 1/2 inch maple, clear, no knots), making sure that it followed the sidecut of the ski, and screw it in place on the mdf. Then rough cut along the line with a bandsaw, and a finish pass with a router bit, using the wood as a cutting guide for the router bearing. The wood was too stiff to bend the curvature of the tips and tails, so I would cut that with the bandsaw and clean it up with some 80 grit sandpaper. Now you have a piece of wood that is a ski template, but cut in half down the center. I would then get a piece of mdf that was about 6 feet long by six inches wide, and draw a straight line down the center. Then take the half template, screw it to the new piece of wood with the straight edge of the half template on the straight line of the 72"x6" piece of mdf. Rough cut with the band saw and finish cut with the router. Unscrew the half template, add marks to the other side of what the desired tip, waist, and tail widths are, and attach it to the other side. Same process with the band saw and router.

The whole point of making a half template is to ensure that the skis have the same sidecut on its right and left edge. When making the half template, I would measure off of the straight edge to the sidecut edge to make sure that the tip, waist, and tail dimensions are 1/2 of what they need to be. Here, you want to get the width right on because if you are off by 1 mm here you will be off by 2 mm when you flip the half template over later. It is ok if one of the measurements is off by a mm though, they all just have to be relative. If you are shooting for 75-65-70, and you end up with 73-63-68, you can make up that difference when you flip the half template over on the final template. You also need to make sure that the straight edge on the half template is perfectly straight, otherwise these measurements will be off.

It worked pretty good for all the new ski shapes. It was cheaper than the cnc, but very time consuming and I made a lot of mdf dust. The first template that I made last spring didnt come out to the dimensions that I wanted, but with some practice, you can get them really close. Once I got going I was able to cut out a ski shape in about 3 hours. So, it comes down to what my time + an almost perfect template vs. cnc time + a perfect template. A lot of the new ski shapes were ones that I wanted to have in stock to build for people later, but I think as time goes on I will be less willing to cut new templates.

Like I said above, I just need to buy or build a cnc.
Richuk
Posts: 1146
Joined: Sun Jan 31, 2010 9:53 am
Location: The Duchy of Grand Fenwick

Post by Richuk »

You'll get a better result (almost perfect) if you use a piece of PE or even a strip of wood:

viewtopic.php?t=2405&start=0
Post Reply