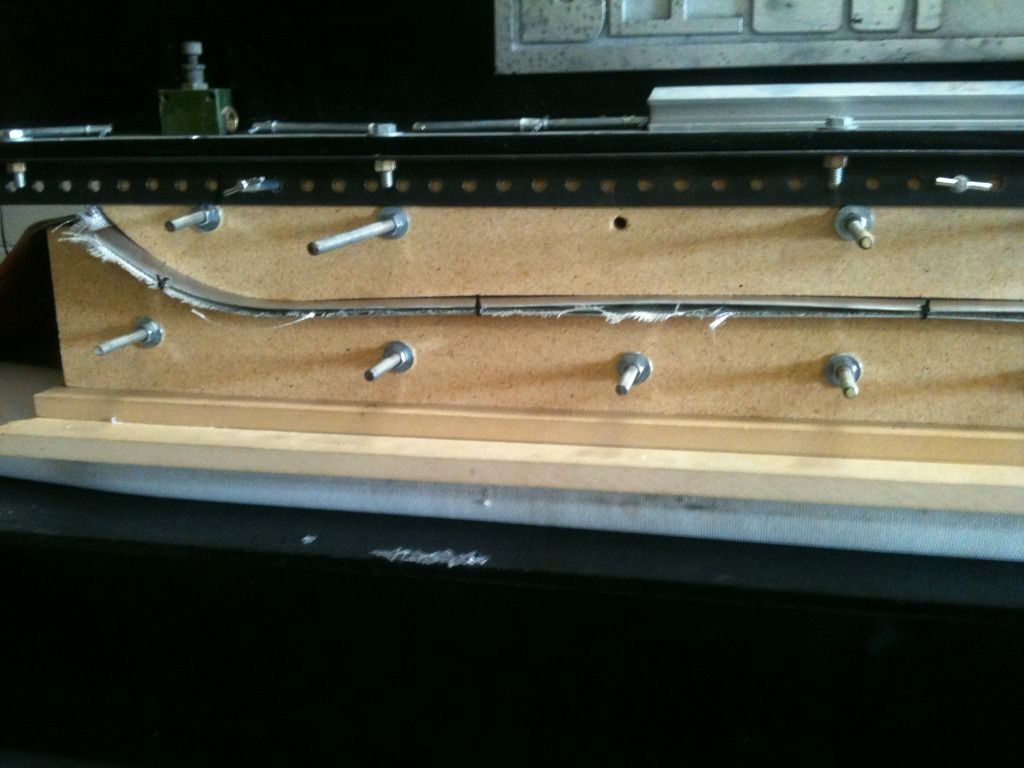
IMO, There is an inherent design flaw with most of our presses. It happens when the bladder doesn’t squeeze every section of the mold at the same pressure. In my case, I have pinch points at the top of the tip molds thus making it virtually impossible to get full pressure at the curve of the tip and tail sections because the bladder isn’t flexible enough to squeeze down at those 2 points. This creates an issue with when I press printed top sheets as the lack of pressure creates voids that fill with gas when pressed and heated. When I pull the board out I have wrinkles in the top sheet or base right at the tip/tails. I was discussing this with another ski builder as he was having the opposite problem where his presses well at the tip/tail but not in the center. His set up has a bigger radius on the top mold to allow the hose to get a full push around the curve but doesn’t allow the center of the mold to get full press. ON3P(Iggyskier) solved this problem by adding pneumatic cylinders at the tips/tail to add pressure. I thought about doing this but it was pretty expensive so I came up with this design.
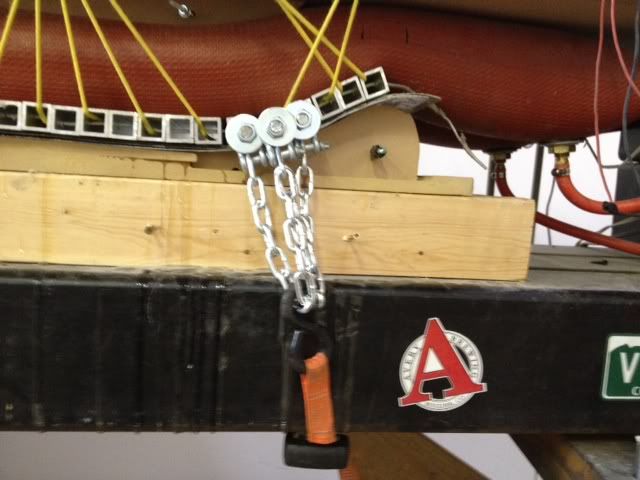
I have all-thread running through the aluminum track, tied to a chain and then racheting straps to pull them down. Its a bit of a pain but a sure beats having blemishes in the board. I just thought this might be helpful to others with the same problem.
It looks like your hose is inflating like 4" thick?? You might have better results if you make your top mold a bit bigger so the hose has less space to fill. When our hose is totally pressurized it is only filling a space maybe 3/4"-1" thick.
Whats happening here is the hose is trying to go straight thus creating the void in your tip/tail section. The method you are using with the straps will create uneven pressure as well.
Try making the radius at the top of your tip/tail molds larger and fill the backside (outside) of the mold with spacers to prevent the hose from trying to fully expand. Ideally, you would shim up to the top height of your tip/tail molds.
I don't think there is anything fundamentally wrong ~ and the pressure is uneven within the press, remember what Alex13 had to say on the matter?
What you've highlighted is good as a quick fix - I'm guessing you're ratcheting this in place before the hose is inflated?
IMHO, you need to trim the cassette so they are the same length as the cat-track - so they don't get pinched. Once you have done this, add a slip layer (above and below end of the cassette) - PTFE coating glass or something like these: www.toastabags.com. Once you have time, add an extension to the tip mold (bottom only) to the list. A continuation of the curve you have will be fine, but making it a little more acute would help.
If you feel the need to close that gap - it is a bit big and probably not doing your cat-track any favours, add a few sheets of mdf placed under the bottom mold. Dismantling your press to remake the top mold would be a PITA. Don't worried whether this makes it difficult to load - just make sure one of the sheets is 12 mm - you can slide it in from below, once the cassette is in the mold.
Anyway, these are just a few tips to consider, as you look as though you've sorted the problem. Loving the Facebook updates btw!
Cat track or not, you want to maximize the contact patch area of the bladder. Not allowing the hose to inflate into a round shape will do this and it also allows it to conform with the tip and tail curves, as Twizz suggests.
This photo shows a typical press form of mine during an inflation test. My forms have matching upper and lower parts designed to minimize bladder inflation. I achieve full contact patch coverage across my ski surface. I place a 1/8" polyethylene sheet on the ski top and a piece of hardboard above that which serves as my cat track.
Yeah, the pulling of those bars in the cat track will leave indentations. Not so noticeable with the veneers you're using CO, but when you start doing dye sub with a thinner material that will be a big problem. The points that Richuk brought up are all excellent, and Twizz and SHIF are dead-on as well. Here's how I've been pressing lately, after talking to the guys over at Monson:
i also struggeld a lot with this tip/tail presure problem. i tried the method with a slip layer but without any progress. pneumatics wasn t a choice because of money. as mentioned before, you should first close the gap betwenn positive and negative mould.
another skibuilder (i dont know his forum name, he s german too) told me that he adds wooden pieces to minimize the area where the hose can expand. the hose is kept really flat in this area. the unorganic "break" of the hose in the tip/tail area doesn t affect anything negative. it works pretty good so far, i also saw this method in a video from the skevik ski guys. i ll shoot a picture of the hose inflated next days. here s one with empty hoses:
Impressive work Brazen - there's a lot to admire about this approach!
Orange - the tip mould is the main point, slip layer is there to pick up the slack until you find your feet.
I'd don't see why CO should have a problem. If the straps are used to approximate 10 psi and ensure the curve is formed before the hose is inflated, the jobs a good'en?
CO
we have had similar problems too.
i believe this is mainly related to the size of the cavity that the hose has to fill (less than 1.5in-2in) before we start loosing pressure. it needs to be tight in there to get even pressure side to side and front to back. too tight is also a problem, but brazen may have solved that.......
your hose might be different (because it is bigger around than the one i am using) so you might have to find what your ideal cavity space should be and try to stick with that. at the same time you have to consider that the snowboard thins in the tip and tail, so you must compensate in order to keep equal pressure as the core profile changes.
this has been hard for us as we change out the press molds, and change sizes multiple times a week/day. but now we have a good understanding of the capabilities of the hose and get far less dimpled/abnormal snowboards.
the other major problem is that the hose (on the outside of the press) is trying to straighten itself, this will also cause low pressure spots.
we have solved that but adding a couple pieces of bolted angle iorn inside the hose clamps. they let the air flow but we can move them around to effectively make the hoses "smaller". i cant think of a better way to describe them but i will get some pics when i am there tomorrow.
Great posts. Thanks for the help. I did press a board with my new set up and had zero blemishes. However, I know it could be just plain good luck. Its weird because I only have issues with printed top sheets. Wood veneers always come out perfect. I think one of the big problems is using 1 press for many different base shapes and sizes. Seems like the big guys have one press per shape and size. I plan on rebuilding my entire press this summer so I will try some of these recommendations.
One other thing to be aware of is that this is also the point where your laminate is the widest. Therefore, this is where you have the least actual PSI at the laminate. So, while your pressure gauge may be reading 40 PSI, you may actually only be seeing 35 at this point, and at the narrowest part of the laminate, right at the tips, be seeing 50, which exacerbates the problem.
I think having longer tip and tail forms so that the hose can't try and go straight is a good idea. Increasing the contact patch, by decreasing the gap between bottom and top mold is another good idea.

 to pull them down. Its a bit of a pain but a sure beats having blemishes in the board. I just thought this might be helpful to others with the same problem.